This lecture covers essential dental assisting skills including patient preparation (reviewing health history, setting up instruments, explaining treatment), pain control techniques (topical anesthetics, various injection types like inferior alveolar nerve block, mental block, infiltration, and PDL injections), and office management (front office responsibilities, HIPAA compliance, patient interviewing, and scheduling). Dental assistants must understand different anesthetic needle types, proper instrument transfer techniques, and maintain patient privacy through HIPAA regulations.
拡張機能をインストールして、あらゆる動画内を即座に検索しましょう
Week 2 Lecture tutorial追加:
Oh hello and welcome to Colorado Dental Assisting school we are going to be reviewing week two our lecture for week two goes over for Hannah dentistry coronal polishing pain control and of course front office and interviewing alright let's talk about how we can get ready for our patients so before you seat your patient you want to make sure that you've reviewed the health history for that patient the treatment we're doing for the day so take a look at your schedule beforehand you want to set up all of your instruments that you'll need for treatment make sure you have everything you need for your doctor as well you want to see the patient go ahead and place their bib immediately and give them their PPE that way they have everything they need the first question should be their recent health history obviously you've talked to them you've identified your patient and discuss the treatment that they're having for the day but you want to review health history right away if we don't have a new health history scanned into the chart we want to go ahead and get that updated and ask them has there been any changes to your health history recently any new medications any hospitalizations that we need to know about even if you saw them the day before right even before you closed you don't know what might have happened that night so please ask them the same question about their health history every time you see them and make sure you put it in your chart notes that you have updated it and again we want to review treatment for that day explain to them what's going on so for example if we're doing a crown we want to explain to them that today we are prepping for the crown so that means they will get a temporary crown before they leave we want to give them post-op instructions for that treatment and let them know when the permanent crown will be back every lab is a little different some of them will take two weeks some of them can take four to five days so make sure the patient understands when the permanent crown will be back and that you will either call them and let them know when to come in or you can go ahead and schedule them that day you want to give yourself a little extra time though if it's coming by mail I usually would schedule one to two extra days as opposed to let's say if it was coming in in two weeks I would do two weeks in two days just to make sure we have it and then your job as a dental assistant is to make sure that those lab cases are in and ready to go before your patient comes in for their treatment or before that day even so on Friday before the following week you want to make sure all of your lab cases are either on their way and will be here in time or have already arrived if it doesn't which sometimes things happen that's understandable please call your patient and let them know before their appointment you don't want them to be sitting in the waiting room and you have to go out there and explain to them that you do not have whatever treatment it is that we have going on whether it be adventure a partial a crown a bridge we don't want to have to tell them same day they might have taken time off of work they might have had to call a babysitter so please be very considerate of your patients time as well as the doctors and yourself because we don't want a big gap in our schedule for the day the next thing you need to do is make sure you have your own PPE as well as your patience and that you guys are set up and ready to go this is an example of what a tub and tray system looks like so it's showing you all of the instruments and materials we could possibly need for the treatment that's being done that day one thing I suggest to all of our new graduates is that you guys carry a small tablet that will fit into your lab coat so you can write down what the doctor likes to use you might have a doctor that uses a certain type of anesthetic or maybe a certain size needle for all of their injections you want to make sure that you're set up and ready to go that way you don't have to jump up and down out of the seat constantly while we're trying to complete treatment it will you know take a little longer if you're distracted and having to leave the room if you're not ready to go talk about pain control and dentistry this is important this is one thing that can cause most of our patients to have anxiety a lot of times the scariest part for them is having to get an injection in their mouth which is the local anesthetics that our doctor give to numb them so it's important that we do our jobs as dental assistants and give them a pre numbing gel which is called a topical anesthetic so what you are looking at here is a jar of hurricane topical anesthetic some of them come in jars like this and it's a gel type of topical anesthetic some of them come in a tube or a little syringe it just depends on how you order it so I don't want you to get too hung up on how this looks because depending on how we order it it could come in a spray it just depends on what the doctor like your job as the dental system though is to make sure we are set up with our operating syringe our anesthetic and of course the topical anesthetic so this is an example of the anesthetic setup whenever I get this ready I do not open the clean needle until the patient is seated you really don't want to start opening things that you can't put back if the patient doesn't arrive let's say it's the last patient of the day we don't want all of our instruments and materials to sit out while our cleaning crew comes in feeder once you do get this set up one thing I would suggest is covering your instruments in your anesthetic set up with the patient napkin or the patient bib that way when they come in if they are high anxiety they don't immediately see that and start to get you know a little short of breath and maybe kind of freak out a little you know we don't want them to feel any more nervous than they already do so I like to cover all those instruments because they don't understand exactly what they're used for and some of them are a little intimidating so what you're looking at here is our cotton tip applicator which is what we're going to use to place a topical anesthetic we have a couple two by twos of guys we like to call them two by twos because whenever we use the term gauze our patients think that they're bleeding so try not to use that term too often when you're talking with the doctor in front of this one shows our topical anesthetic in a tube here so what you'll do is put some onto your cotton tip applicator you're going to use the two by two to dry the oral mucosa I like to place the topical with the cotton tip applicator and put the two by two over it and have the patient bite down it's going to stay in the mouth for anywhere from three to five minutes that way we have completely numbed that area so that way when the doctor goes in to do an injection it's not a really big pinch and it doesn't make them you know tighten up around the needle and possibly cause them to bruise or get a human coma we don't want that to happen once you have placed a topical anesthetic you can go ahead and load your syringe we do have a video on our student portal that you can watch on how to load a syringe and unload a syringe and also how to correctly recap a needle according to our OSHA guidelines for safety what you see at the bottom of this slide here talks about certain types of injections so the short needle is usually used for maxillary and it can also be used for mandibular teeth we have a long needle for a mandibular I a block and we also have a really short needle called our PDL needles what we call it it can also be called an extra short that the PDL is short for periodontal ligament injection and we do have that on another slide here that we talked about as well one thing you want to remember about these anesthetic car pills is that they do have an expiration date on them so when you guys are restocking your rooms make sure that you rotate them out you don't want to continue to put the new ones on top and have them expire the needles have expiration based as well so please pay attention to your materials when you're restocking the room this is our slide that talks about injections so you have three different examples here one thing I want you to remember from this is these don't all come in these colors we can order them all in blue all red all yellow it just depends on how we order them so I don't want you to think oh the PDL needle low is going to be blue we have some that are purple it just depends on how we order them this is just an example so this talks about the eye a nerve block on the mandible Tysons for inferior alveolar nerve block the reason we do that is because it will numb an entire quadrant of T so the whole right side all the way to the midline on the mandible which is your lower jaw I will be numb the tissue the lip the teeth including half of the tongue and will usually either do a right or a left ie nerve block it's not too common that we do both when the patient is awake because they can't feel their tongue and it can kind of scare people we will do it if we're doing oral surgery so that is a pretty common example of a time when we would block on both sides another injection on the mandible that we can do would be a mental block and I apologize guys when I say we I mean the dentist we do not give injection let me correct myself please don't try to give anyone induction you will not be learning how to do that in this course so the dentist will be giving a mental block on the mandible when they do that if you remember in week 1 we had a blown-up picture of the mandibular John it showed the condyles ramus and the mental foramen the mental foramen is on the right and left side of the mandible and it's right behind the canine where the first premolar is when you guys go to place your topical anesthetic you're going to pull the patient's lip out and you will look for a tissue attachment there that's where you're going to dry the oral mucosa and place your topical anesthetic to numb that mental block we'll take care of just the anterior quadrant of the mandible the tongue will not be numb it will only be from the canine to the midline of the body or sorry of the jaw so it's either the right or the left side the nice thing about the mental block is their tongue isn't numb so let's say they're on lunch break and we're coming in to get a filling really quick or have some sort of procedure done it's always nice if we can do that on the anterior instead of giving them an eye a nerve block and then their whole tongue or half of their tongue being numb for a long time another injection for our short needle would be on the maxillary and this is called infiltration on the maxillary our nerves are a little different we don't have a big nerve running and feeding all of them at once like we do on the lower we have branches of nerves feeding into all of the maxillary teeth and if you go back again to week one you can see those blown-up pictures of the anatomy or you can look in your textbook infiltration is going to numb anywhere from one to two teeth depending on where the doctor infiltrates so please remember to ask questions do not assume you know where they want you to place a topical they might even do an infiltration block where they come out a little further onto the cheek and hit three or four teeth so ask your doctor don't be afraid and let them know hey is this a good placement because last thing you want to do is the topical in someone's mouth and it not be in the correct position my stuff doesn't taste very good it's not that much fun so if we're going to do it let's do it correctly the iv injection down here is a palatal maxillary so on the palate we would use a short needle now this is not as commonly done unless we're doing oral surgery or for some reason a patient's having really bad pain or sensitivity on the palate side a lot of times infiltration will be enough for us to go ahead and crown prep a tooth or get it ready for a filling on the maxillary but if we're doing an extraction we want the tooth to be numb all the way around and when we infiltrate it only numb the buccal side or the facial side of the gingiva on the palatal side of the gingiva on the maxillary it will not be numb so keep that in mind when you're suctioning anytime you're suctioning on the maxillary if you're working for a right-handed dentist it will be on the upper right if you're working for a left-handed will be on the upper left of the palate keep it in mind that they are not numb on that area and not that I ever want you to rest your suction anywhere in their mouth other than on a cotton roll but they if you scrape them accidentally they will feel it the last injection down here at the bottom is called your PDL injection and every tooth has a periodontal ligament so let's say we have a tooth that is having a hard time getting numb a lot of times we'll call them a hot tooth the patient comes in they have an infection and giving them an infiltration just didn't do it the rest the tissue everything is nice and numb but when we go in to prep the tooth the patient is still in a lot of pain so what the doctor can do is give a PDL injection they can either go into the sulcus of the tooth which is where the gingiva meets the tooth or they can go straight into the nerve if the occlusal surface is already open and exposed beso constrictors lot of times you will see doctors use anesthetic with a vasoconstrictor in it the reason we use that is to slow down the intake of the anesthetic and it helps increase the duration so what that means is they'll stay numb longer which is what we want we want them to be numb throughout the whole process so that way the doctor does not have to inject again some patients the anesthetic will dissipate a lot faster through their system and a lot of times they'll let you know if they've had that experience so right before you place your topical in the patient's mouth you want to ask them have you had any adverse reactions to anesthetic before or just tell them have you add anything negative happen when you were numb in the past at the dentist office I want them to understand what we're talking about there's a couple agents here that are listed up enough friend 11:02 friend and then Mia Cova friend those are all vasoconstrictors some of them are a little more friendly to not make your heart beat as fast depending on which one we're using and depending on the ratio of the vasoconstrictor which is at the bottom here it tells you how many whether it's twenty thousand or fifty thousand or a hundred thousand depending on the amount you will see that on the side of the anesthetic along with the expiration date if the patient has any sort of heart condition or let's say they're pregnant we want to use something that doesn't have a vasoconstrictor in it the doctor will let you know what they want to use and what they're comfortable with you other options for pain control and dentistry include inhalation sedation which is nitrous oxide otherwise known as laughing gas in week six we will talk about nitrous oxide and you guys will learn all of the symptoms that are related to it which we will be looking for in our patients whenever it is administered the doctor will be the one to administer this drug we can set it up we do not however turn it on it is up to us to stay in the room with the patient and monitor them so remember when you have a patient on nitrous you never leave them alone you always stay in the room with them so if you need to go somewhere and do something you need someone else to come in and watch the patient for you you need to remember that in your chart notes you will be putting in there the duration of the nitrous how much oxygen they had and how long and all of the symptoms that the patient felt again we will be going over this in week six right now we're just talking about it as another option for pain control the great thing about nitrous is we can use it on all ages and the patient can drive themselves and once they are placed on oxygen for several minutes they're completely sober again and they can drive back home and they're okay this tells us that the patient inhale through a nose piece and fills the effect almost immediately so it's pretty quick the other great thing about nitrous is that if we have a change in our treatment plan we can put them on oxygen sober them up when they come back we can talk to them about the treatment plan changes within probably five to six minutes and then if they decide hey you know what I want to go ahead and have this tooth root canal because we've let them know it's going to need one we can get it done that same day where the other two that are listed here the anti-anxiety agents and the intravenous sedation those are not a drug that we can take them off of easily we have to wait for it to dissipate through the system and work its way out so if a patient was on valium or if a patient was IV sedated we wouldn't be able to say hey I'm sorry we can't save your tooth the treatment plan has changed you know is it okay if we extract it we don't expect them to understand what we're saying to be able to make a conscious decision so that's one great thing about nitrous is we can stop it bring them back have them you know have a discussion with them on the treatment plan and then they can make a decision that day if they want to move forward or if they want to reschedule and do it a different day with the anti-anxiety agent like valium we always want to ask our patients to take it before at least an hour or two before and the doctor will give them instructions with that prescription it's always best if they have someone drive them same with the IV sedation this is considered a conscious sedation if you work for an oral surgeon or a prosthodontist that does IV sedation are possibly a general dentist there are some general dentists that offer IV sedation for patients who have high anxiety and want to be IV sedated even to get any sort of treatment or there Profis done and that's okay you can be a licensed by a doctor to help administer and place IVs that is something that would be a different class that is not something that we teach you in this course but it is not something all dental assistants need so it would really be based on the job that you have depending on what you're doing every day isolation is peace and moisture control there's several materials that we can use to help isolate teeth one of them that we use most commonly are cotton rolls we are going to use cotton rolls pretty much for every procedure so with the reason we use the con rule is to keep the area dry and another one is to help retract the tissues the cotton roll will be a lifesaver when it comes to placing your suction in there because it will help retract the lip help retract the tongue and keep the patient safe from being scraped with the hve and also keep the area dry whenever we're placing any sort of materials in the mouth a lot of the dental materials that we use require the area to be dry which can be a little challenging considering we're working in a wet environment when you're removing cotton rolls please make sure to wet them first don't pull it off the oral mucosa if it's stuck you want to wet it and then remove it high-volume evacuation well otherwise known as your hve this is what we use whenever we're doing any sort of restorative treatment we use this to catch any tooth debris water suck up any saliva that's in there so that way our patient isn't swallowing anything that they shouldn't be this these two pictures that you're looking at is working with a right-handed dentist so we're all working with a right-handed dentist you'll keep your suction in the right hand because you'll be passing with your left this example here shows you on the upper right quadrant you never want to cross over into the doctors view you'll always stay on the lingual side what you want to remember is that the bevel tip will be facing the tooth and you want it to be distal of the tooth being worked on everything is going to flow to the back of the mouth because they're laying down and gravity will pull it that way it'll be easier for you if you can stay a little distal where they're at and you want it to be a little closer than that kind of up against a tooth area right next to it as close as you can get it where the patient is still comfortable remember do not cross over into the doctors feel the vision on the upper left side you'll be retracting the cheek and lip area and you'll be on the buccal surface this shows you if we were to be working on the mandible on the lower right quadrant you'll be retracting the tongue it's a lot easier if you place a cotton roll down there first because that will help protect the floor of the mouth and also retract that tongue area on the lower left you'll be retracting the lip and cheek again if you place a cotton roll in there it'll be a lot easier for you to place your suction without accidentally sucking up any soft tissue your air water syringe is going to be in your left hand at all times when we're doing any sort of restorative dentistry and what I mean by restorative dentistry is were prepping the tooth for a filling we're prepping it for a crown or bridge or implant or anything like that we want to have the hve and air water syringe in our hands at both time at our sorry at all times so you'll be rinsing and drying a lot with your air water sometimes you can push both buttons at the same time if you kind of need to blast the tooth out if you know rinsing it just isn't getting the job done and that's okay or if you want to give the patient's mouth a really good rinse you don't want them to close down on the hve because it will regurgitate and spit back I mean it takes a good while for that to happen but we also don't want them to get a human element in their mouth so please don't let them close down on the HP II it's not meant for that if they do want to close down you can always hand them the saliva ejector and they'll let you know when they're ready to put it in their mouth you can just pull out real quick let them close on it if they're more comfortable that way we want our patients to have the best possible experience and we want them to be comfortable so let them hold the saliva ejector if that makes them feel better and use it rubberdam is also a way for us to isolate teeth and to help with moisture control what you see here is your rubber damp setup the only thing missing from this picture looks like our bite block but we do have a picture of it on our student portal as well as a video on how to place it onto a type it on your patient will need to be numb whenever we're placing a rubber band in there and this shows you everything you need so you have your rubber dam punch to punch a hole in the dam you have your rubber dams forceps these are also known as endo forceps because our endodontics placed rubber dams every time they do a root canal so just in case someone asks you for endo forceps you're like what it's the same thing we also have our rubber dam frame our rubber dam and the bye block is not in here but we do have our ligature and our rubber dam clamp these clamps that you see on the left side are all different sizes depending on the area that we're working on in the mouth whether it be a molar a premolar or an anterior tooth this is showing you the sequencing of placing the rubber dam the ligature is a fancy word for floss we want you to tie a piece of floss on that clamp because if it pops off it's easier for us to retrieve it that way you're going to use your rubber dam forceps to squeeze the clamp around the two if it's going to when you squeeze your forceps it's going to spread it open for you and you're going to place it right at the neck of the tooth be very careful not to impinge on the gingiva or you will pinch them and they will not be happy with you later can hurt really bad the next thing you want to do is stretch a rubber dam over the entire clamp make sure you pull this piece forward to completely imaginate it and it's sealed we're not going to get any material underneath the rubber dam you want to floss in between the teeth and when you floss you are going to push it down and pull the floss out please don't pop it up and down otherwise it's going to pull the down right back out of that interproximal space last thing you'll do is place the frame on here what I want you to remember is that you're not puncturing the rubber dam with these little grabbers you just want it to hold onto the dam so it helps if you grab one side and stretch the other side out and then let it grab the material if you puncture it then it will probably rip so you don't want to do that once this place make sure your patient is nice and comfortable they have a bite Block in there to rest their jaw because we don't want them to close down on the clamp itself that could break the opposing tooth this is a picture of an insta dam and the reason it's called an dam is because they come with one hole in there ready to go you don't have to puncture it and it already has a frame on here this would be great if we were doing a root canal let's say a patient with an emergency comes in and they have really bad pain in the tooth and they do need a root canal the doctor will access it on the occlusal surface so this is great for that because we don't need to access the other surfaces of the teeth if we were placing a filling in this tooth we would want it like the previous picture where we have our anchor tooth which is where the clamp is and then we have the other teeth exposed that we need to get to so that way if we're placing let's say a mo D we can go ahead and put our restorative matrix band in there and the clamp isn't in the way for us to get to all surfaces of the tube patient doctor assistant positions during treatment we want to make sure everyone's comfortable right we don't want to work all day and however Baxter or have you know run into the doctor and bump heads and all these crazy things that can happen so it's very important that we know where dental instruments need to be and how coarse we need to be to the patient to make sure that one we're organ ama CLE correct and we're not hurting our backs all day and also that we have a clear view and we can do our job correctly so this is showing you that the assistant is always going to be a little higher than the doctor so we can see down into the mouth remember to put the light up pretty high so no one bangs their head on it you want to be comfortable with that light also this is showing you another view so you can see from this perspective of where the doctor will be and our dental assistant don't forget this little bar is going to go in front of you around your stomach so you can rest your elbows on to it or possibly lean on it if you need to the transfer zone so from 12 to 2 this is where your dental instruments will more than likely be unless you have a cart that moves around then you can pretty much put it anywhere but we wanted an area that is comfortable for the doctor and the dental assistant the doctor needs to be able to move in their chair back and forth around here so we generally don't put anything over the hair on this side unless they request it the assistant zone again for you as well you want this to be clear so you can move around and grab the instruments you need the transfer zone is going to be from 4 to 7 if we're working with a right-handed doctor the reason for that is because under no circumstances is it okay to pass an instrument over a patient's space we don't want our patients to get injured you need to remember also that they should be wearing eyewear it's not okay for them to refuse the eyewear because then they're putting themselves at risk so whether they have their own glasses on or our safety glasses that's the only way we're following OSHA protocol this is giving you an example of instruments you will be transferring to your dentist we are going to learn all of these instruments today when you guys do the lecture in class I want you to learn them before you leave today because you only have a couple more weeks to memorize them so make it your duties to learn these while you're holding them in your hand and instrument transferring in the lab instrument transfer technique while working with a right-handed dentist you will be transferring with your left hand this shows you a picture of exactly how it's going down so if you're looking here it says the assistant extends the pinkie to grasp the doctors instruments holding the new instrument parallel to the old this is so important that you remember this one it's your job and you'll have to do it but too when you go to the exam I want you to remember that these instruments need to be parallel do you see how both doctor and assistant palms are facing up try to keep that in your mind your palm will always be facing up and these instruments will flow naturally parallel there's no flipping of the wrist if you flip your wrist you could run the risk of possibly snagging the patient or you know stabbing them with the instrument or the doctor which is not our goal our goal is to make this as smooth as possible you're going to be doing this a lot so when you go to grab this instrument from your doctor you're going to tuck it in and it's going to go down this way more towards your wrist while you place this one in the hand of the doctor you want to place this firmly so the doctor knows it's in their hand they are not going to be looking at you waiting for the instrument their hand will just be out there waiting for you to place it in there so when you place it in make sure you place it firmly so the doctor feels it so they can grasp it the other thing is you need to make sure you're on the opposite end of the instrument if you hold it in the middle that's called shorting the instrument and the doctor doesn't have enough room to grab the instrument correctly so make sure that you're holding it all the way on the end so they have plenty of room to grab it and make sure that you do not flip your wrist you can practice this at home I would suggest that you practice this every single lab is something that a lot of our students I think take for granted and they go is really easy I don't need to practice that I want to go place another rubberdam or I want to go take another x-ray you need to practice all of these labs every single chance you get this is an example of passing over the face she's not following OSHA protocol she does not have safety glasses on there's a couple no notes happening here this is an example of shorting the instrument the doctor is not able to grab it and if they go to grab it and they're not looking which they more than likely will not be looking he could stab he or she could stab himself on this Explorer we don't want that to happen so make sure that you're holding it all the way on the opposite side they have plenty of room to grasp the instrument you they'll hand pieces and their maintenance it's important that we take care of all of our instruments because when our instruments aren't working it makes our job really hard so let's make sure that we take care of them alright first we're going to talk about breaking down the treatment room so the patient has come in we shut them down and talk to them about their treatment went over health history got them numb the doctor came in to enesta sighs we have already gone through instrument transfer now we need to break down the treatment room this is just reminding you that each office will have a specific policy for cleaning and disinfecting the countertops and treatment areas what you need to remember is that you will do it the same way for every single patient and the reason I want you to remember that is because if you ever get asked you know did you clean this room or this clean this room doesn't look really clean it's only half clean you know like we've taken the instruments out but all of the barriers are still up and they'll if used those should never be questions asked by any of your co-workers they should know when a room looks clean and when a room looks dirty still so by getting in a habit of doing it the same way every time you'll always know the answer so you can say this is what I did this is how I clean the room what I like to do is dispose of any plastic wrapping or anything that's not reusable so what I do is I take the cover for the chair and I use that as my trash bag our trash cans in the rooms but in the rooms that we have aren't very big and I don't like to fill it up because when a patient walks in it doesn't look too you know excusing it it looks dirty and full and like it needs to be taken out so I try to keep it clean in case they need to blow their nose or use it for anything personal try to think of that as more a patient trash can not something that we're going to throw things into if we do let's try to cover it up so that way they don't see any cause with you know a little blood or anything like that on there so take all of your disposables put them in the bag that we use to cover the chair with the other thing that's nice about doing this is if you ever have to go dumpster diving which sometimes you do you'll accidentally throw something away that you shouldn't have you'll know that you can look in those bags as opposed to looking through the entire trash bag especially if the whole office has been using that trash can that's usually in the back so let's remember to do that once you're done getting rid of all of your disposable items the next thing I do is take my youth needle and anaesthetic car fuel and put it in the sharps container the only time the anaesthetic carpools go into the sharps container is if they are not emptied if they still have drugs in them then they have to go in the sharps container if the anaesthetic car peel is completely empty it is okay to throw it in the trash can so get rid of your sharps get rid of any sort of surgical blades or anything like that that you might have used so that way when you take your instruments and you have them locked in their cassette you can go through the hallway and know if I drop this or if someone runs into me no one's going to get stabbed with a sharp or anything like that it's completely safe before you leave it's always nice if you want to spray your room real quick go to sterilization put your instruments in the sink so they can soak or possibly in the sterilizer if you're ready to go you can go ahead and wipe them down bag them or wrap them depending on how your office does that and then start the autoclave immediately we want to stay on top of our instruments and not let them get backed up when you come back to the room you will wipe everything down that you touch so the dental unit all of the instruments that were used and what I mean by that is your suction so your hve your saliva ejector your air water walk wipe down the chairs the handles and once your barriers have been removed from the light you'll wipe down the light as well make sure you look at it and then it hasn't been sprayed with anything because the next patient that lays down first thing they're going to look at is that light right do not spray the light it is electric it is not okay to spray the light the reason we placed barriers on something like that is because it's considered a hard to cream surface we don't place the barrier so that way we don't have to clean it we place the barrier so that way when we wipe it down it's easier for us to clean it's not going in anyone's mouth so we don't have to spray wipe spray it but we do need to at least wipe down the handles that were touched and all around it handpiece maintenance these hands pieces need to be sterilized after each patient use under no circumstances is it okay to reuse any of the hand pieces that we use in restorative so I'm talking about your high speed handpiece and your friction grip slow speed so those ones whenever we let go of the rheostat it has a negative pressure that pulls back in to the chuck and whatever's in the mouth saliva chemo tooth debris is being pulled in some offices will require that you put your hand pieces in a statin for sterilization some offices might not have a stat amande still use the autoclave it's better if we is just adding because it's not as hard on them they don't turn that in there as long so it's a little easier on the bearings but it's important for us to oil them and for us to clean them some offices might have a cleaning machine like in this picture here what it does is we hook it up to the machine close the lid push the button and it's going to push air and oil through the Machine and push out anything that might have gotten stuck in there during the procedure then we're going to bag it and place it into the stata this little guy down here is the Stata this is the autoclave we want to put our hand pieces into the Stata m-- to be sterilized it takes a lot less time as well so if we need these in the next hour before that patient comes in we want to put them in the statin so that way they're ready to go usually only takes 10 to 15 minutes depending on the setting we choose Rhona polishing coronal polishing is something that dental assistants are allowed to do we do not go sub gingival with this it is not considered scaling piece like hygienists do those are different instruments and we will talk in detail about those on week 8 as well for coronal polishing in today's lab you guys will be polishing each other's teeth if you want to start on Dexter first you're more than welcome to get used to the rheostat and the speed of it before you guys start on each other but I do want you to polish each other's teeth to get a feel for what it will be like it's not something we do very commonly because we are on the doctors side which is mainly restorative but it is something that we can do as dental assistants though it's important that you learn this skill what you see here is a hygiene handpiece the hygiene handpiece can be used in between patients after being spray wipe sprays because the end that goes on it which is our prophy angle which is this picture here it's a rubber cut polisher called the Profi angle that is disposable so we take that off and we spray wipe spray the handpiece and it's ready to go for the next patient it's important that you use a fulcrum or a finger rest whenever you're polishing or using any instruments in the mouth we don't want to accidentally slip and possibly hurt their gingiva or slice their oral mucosa it's going to help you keep control of the instrument so in this picture you can see they have a fulcrum with their ring finger on the lower case and in this picture you can see they're using their pinky on this child's chin so however you're comfortable whichever finger works better for you make sure that you have that finger rest so you stabilize your hand whenever we polish a lot of our patients will ask us if this is going to whiten their teeth or remove any staining some extrinsic stains which is down here at the bottom of this slide it can remove but the majority of those will need to be removed by scaling from the hygienist in the endogenous stains which are intrinsic stains these are developmental so when you're developing your teeth a lot of times depending on what you're exposed to whether it be well water or an antibiotic your mother took while you were in her womb or possibly overuse of fluoride which can cause fluoridation her sorry fluorosis and the teeth and little white spots in this picture here these cannot be removed this is something that was developed in the teeth when you were growing so it's important that we know the difference so we can explain to the patient why the staining is not being removed Rosi angles there's many different types air polishing is not as commonly done in the patient's mouth anymore we mainly use this in ortho to polish dentures or anything in the lab rubber cut polishing is very common this is what we use in a regular polishing the bristle brush is great if somebody has really bad staining or possibly or so and their wire is still connected and you can't get in between those brackets what you need to remember while using the bristle brush is it can be very abrasive so do not under any circumstances touch there gingiva with a bristle brush because it will hurt them polishing agents we can order prophy paste like this that comes this is the commercial premix flavors and it has fluoride in it and it's ready to go if you have a patient who is allergic to fluoride you will know because you will have read it on their health history as long as they put it down you can also purchase commercial premix without fluoride or you can use the pumice powder you just get a little in a Defen dish wet it until it becomes a paste and then you can use that to polish their teeth what you need to remember is that this is a course it's a lot more coarse than your toothpaste is so while polishing the patient's teeth you're not going to spend a lot of time on the tooth you're going to move from either musial to distal or distal to mesial whatever is more comfortable for your hands whatever feels more natural to you and you're not going to spend a lot of time on the tooth because remember that prophy angle is going to be rotating spending on how hard you're pushing on the rheostat you want to keep a steady pace and you don't want to push too hard and do it too quickly because you could possibly burn the tooth front office and interviewing skills but office responsibilities our front office patient coordinators and office managers will be up there supporting you guys in the practice they will be greeting their patients giving up new patient paperwork answering the phone checking the patients in and out reviewing treatment plans and finances scheduling and confirming appointments verifying insurance they do review health history with the patients as well if they have time and then they do help explain post-op instructions and this is a small list really of what they do you guys what I want you to remember is that this office is a team do not walk past that for an office and ignore your patient when they walk in expecting someone from the front office to do that job for you that is your patient right how embarrassing would it be to not acknowledge them and then five minutes later you're going out there hi Sarah are you ready for your appointment today and she's like lettuce on you and she's totally ignored me right that's not okay you need to remember that we're trying to give the best possible patient experience so when you see them walk in and your team's busy or even if your team isn't busy greet your patient it will make the biggest difference for their experience because when they immediately walked in they expect to be greeted you do too whenever your patient that's how you feel so make sure you greet them tell them hey I'll be right with you or hey the front office will be right with you and then maybe that'll let the process ladies know or gentlemen though hey there's someone waiting and they weren't sure because they were busy tied up with something else or if you're if you've been trained and you know how to check someone in go up there greet them check them in you know review any notes that it has hey you know what we need to see if you have any new insurance or we have a question about a payment or you know help the team out we need to work together because these are all of our patients customer patient service what you guys need to remember is that it's so easy for them to go on social media or any of our websites and leave reviews so you want to keep that in mind as well because we want them to leave with the best possible experience patients are going to get upset with us it happens none of us are perfect things happen and people get upset but it's up to us to let them know we're doing everything we can to fix the situation try not to take things personally it is not personal when they get upset about you know fees or insurance or something that went wrong just let them know that you're doing your best and that you will get them an answer if you're not quite sure scheduling over the phone you will be answering the phone when it rings up front please don't let it ring and feel like oh that's not my job because I'm a dental assistant it is your job it's important that we support each other one thing you want to remember is to take notes it's so easy to forget what the patient said right when you answer the phone and then you're asking them how to spell their name or what their name is again but they already told you that that's usually not a good sign and it doesn't make them feel like you're really paying attention so take notes asking for a phone number in case you get disconnected and then review what it is that they need and if you follow up and explain to them exactly what they needed before they get off the phone you know that phone call went well and that you guys solved whatever issue they were calling for whether it be you know I have pain and I need to come in and get seen or I just have a question about my bill you know that you know before you let them up the phone is there anything else I can do for you for you are you satisfied with what we did or ask them to get feedback Vaman appointments in dentistry you will need to know what these common appointments are this might not be exactly what the office that you look for what their schedule looks like but it's important that you know so when when you get your job again make sure that you write these things down because it'll be a lot in the first week it's a lot to remember to write it down okay an adult prophy I usually want an hour or they only want 50 minutes or you know however it goes the doctor for a chrome prep usually wants 90 minutes or maybe you have a doctor who's a rock star and you can do it in 40 minutes or you know whatever the case may be it's important because when you go to schedule this patient you don't want to use 120 minutes when the doctor only wanted 30 and now we have a gap in the schedule and the patient's left and they're going what we've scheduled this person and you know if someone else is calling to get in and we couldn't get them in because we scheduled incorrectly so these are some things just little details that we need to know as dental assistants when we're answering the phone and when we're working with our patient and scheduling them before they leave health history review so we did talk a little bit about this in the beginning of the lecture this is giving you an example of some questions to ask you want to ask about pre medication allergies any medications that they're currently taking ongoing treatment that they might be in and any health concerns that they have verifying insurance it's really important you understand what insurance your company accepts because that's one of the most common phone calls we get they want to call they want to make an appointment but their first question is what insurance do you accept right how embarrassing would it be if we had someone in the chair and we didn't accept their insurance but we've already given them an exam taking their x-rays and now we're telling them I'm so sorry but we don't accept your insurance that's a huge waste of everyone's time very embarrassing not okay so make sure you know that when you're answering the phone so you can give them correct answers and point them in the right direction predetermination form it's important that you know what this form is because you will be using it a lot as a dental assistant the majority of our patients are going to be asking what the fee for the services and a lot of times our insurance companies only give us a an example of what it would be and it's not a hundred percent okay this is only going to cost you $200 so instead of giving them what we think it might cost we can turn in a predetermination form to the insurance company and they will tell us exactly what they're willing to cover and how much the fee will be sometimes it can take up to a month if I were you what I would do is put a little note in your calendar to follow up with the patient and with the insurance company to make sure that they received a predetermination form and that's being processed because it can take so much time you might forget and if we forget then we won't reach back out to the patient and get them scheduled for that implant or possibly a night guard or whatever it was that they were hoping to get treatment done if you guys will learn and take a test on Health Insurance Portability and Accountability Act well no we are not doing it in class but you will do it once you get hired at your dental office so what I want you to take away from this slide today is that HIPPA is there to protect our patients that we don't accidentally share any personal any sort of patient information or health history or treatment plans or anything like that they are not only talking about electronic documents paper documents but also our conversations and discussions you need to remember when you guys go to lunch or go anywhere for that matter it is not okay to talk about patients outside of this office if you need to ask your doctor a question about one of the patients that's okay but it's not okay for us to go out to lunch at you know um McDonald's or whatever is next door and talk about our patients one they see you wearing scrubs so it's pretty easy for them to assume you work at you know one of these offices that's close by them so if they see you doing that do you think they're going to want to come to your office and be a patient when they can hear you chatting about others no that would not be okay so keep that in mind because HIPAA is there to make sure that you know if something were to get reported because they heard you talking about a patient and they know who that is you could be sign and you know lose your job so we don't want that to happen we want to keep their health information private and secure and we don't want to do that to our patients it would not be good interviewing for success who is ready to go interviewing I know you guys love interviewing it's probably one of the harder things that we have to look forward to but rest assured we are here to support you guys and we're here to make sure that you're ready for your interview so what I want you to remember is once you graduate we are more than happy to have you come in and sit down with us and do some mock up interviews or we can do them now while you're in class however you want to do it let us know to join our bootcamp you will be required to turn in your resume and do an interview with your instructor whether it be over the phone or in person so we are going to do kind of get you in the groove of things before you have to go out there and do it one thing that we've done for our students has been very successful is they'll let us know what day they have an interview and they'll come in an hour two hours before sit down with us go over their instruments you know shadow the team do whatever it is that makes them feel most comfortable since they've graduated and haven't been a lab in a while we want them to brush up on their skills before they go in so they feel comfortable and it really helps them before they have to go in and do their interview to do that because remember in Dental Assisting we will be doing working interviews so the doctor wants to see you work with their patients work with their team they want to see your skill set as well as your attitude they are looking for people that have a good attitude and are willing to learn and be open and ask questions so this is a little example of dental assistant tips what to ask all that good stuff and if you guys have any questions about this please email your instructor or give me a call and more than happy to talk to you about interviewing and give you some tips and help you guys rebuild your resume don't forget to ask questions about the employer are sorry the company that you are applying for one of the most frustrating things is when we sit down with an interviewee and you know we kind of come to the end of it and we ask them if they have any questions for us and they say no and that's very frustrating to us because we're sitting there thinking well why do you want to join our team if you don't know anything about us or I don't think you know anything about us then maybe you do because you don't have any questions right so it's hard for us to get to know someone and try to get to know them if they're going to be a good person for this team when they're not asking us any questions they're really not showing interest in the company itself another good thing to do in interviewing is take your resume with you one for them and one for yourself so that way when they ask you questions you have it in front of you and you don't freeze up I know it's easy to get nervous and you know you'll forget your name you forget everything so it's nice if you keep your resume in front of you so you're ready to go and you can talk about your strengths then what kind of interview or sorry experience you bring to the table don't forget to thank them either send a thank-you email send them a card that's handwritten something small like that can really go a long way and help them remember who you are and why they want to hire you
関連おすすめ

3 Reasons Eating Meat Will Kill You?
Professor-Bart-Kay-Nutrition
1K views•2026-05-28

Group launches palliative care training campaign – May 29, 2026
cpac
593 views•2026-05-29

#shorts | First Guess of Brain Stroke? | Dr Manoj Vasireddy | Neurology | Sri Sri Holistic Hospitals
SriSriHolisticHospitals
103 views•2026-05-28

Whether you have chronic infections or mystery symptoms, Evvy’s Vaginal Health test can help you
evvybio
584 views•2026-06-01

🍉 Benefits of Watermelon During Pregnancy | Healthy Fruit for Mom & Baby #medicoabhijit #healthymum
medicoabhijit_br
1K views•2026-05-30

7 Sneaky Attacks on Women's Womb Health You Never See Coming
DrBobbyPrice
1K views•2026-05-29
#pregnancyafterloss leaves you feeling very scared and all i can go on is the information i have
Changedbygrief-TFMRMama
498 views•2026-05-31
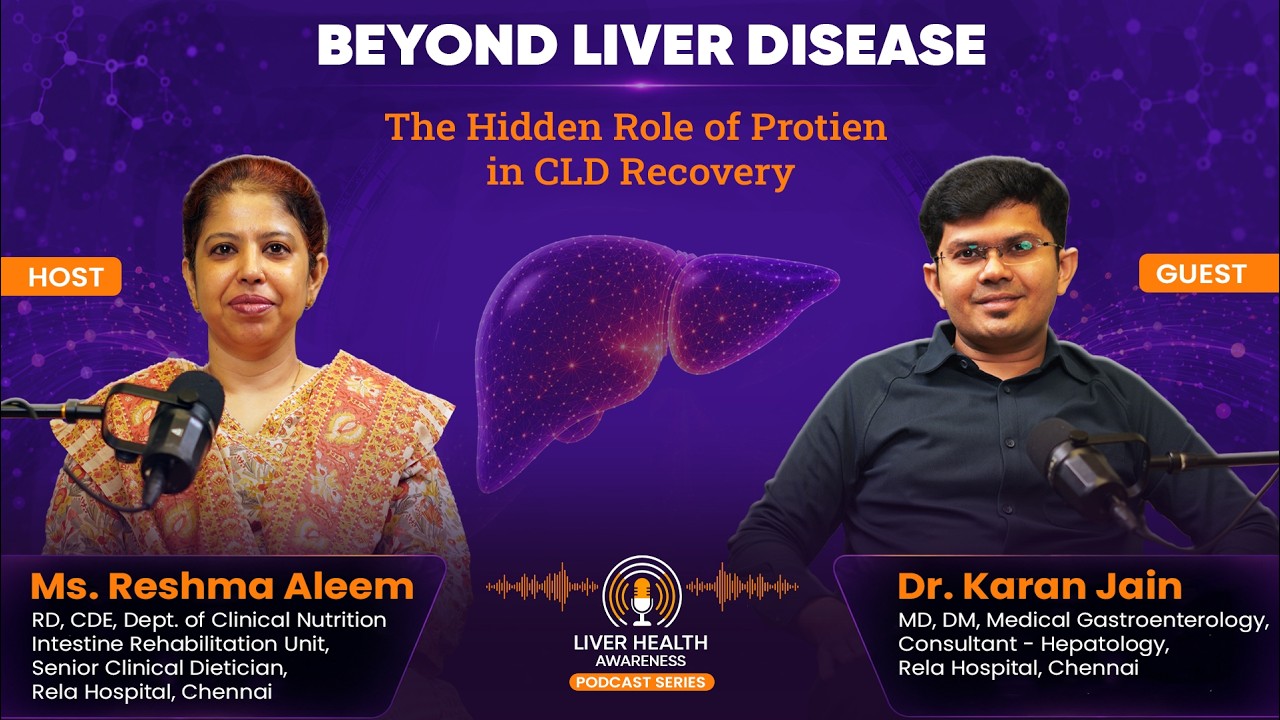
Beyond Liver Disease: The Hidden Role of Protein in CLD Recovery | Dr. Karan Jain & Ms. Reshma Aleem
VoiceofHealthcare
420 views•2026-05-29


