Miniature building sets like Mini Brands Spaces require careful attention to detail during assembly, including proper sticker application, component orientation, and snap-fit connections; the Here's Cheers Bar set demonstrates how modular building systems with electrical components (LED lighting) and modular furniture pieces (tables, chairs, counters) can create realistic miniature scenes when assembled following step-by-step instructions.
Install our extension to search inside any video instantly.
NEW Mini Brands Spaces! Building the Here's Cheers Bar
Added:Hi guys, welcome back to my channel.
Today we're building a mini brand spaces. I think this is funny that Miniverse also has spaces. Like they couldn't think of a different name.
Weird. But I selected the here's Cheers Bar cuz that is interesting. Miniverse has not done a bar. Um on the back though, it shows you other options. Very similar to Miniverse. They have the ice cream shop. Then there's like a little like fast food joint, the bar, and then a bakery. Um yeah. So, we're going to see how these compare to the miniverse ones. Let's go ahead and open it. So far, literally looks the same. So, we'll see. Just glancing at everything outside the package. Very different than Miniiverse and maybe a little bit more in depth slash complicated, but let's go over some of the things. So, they do give you tweezers. There is a lighting element, an electrical element, so that's different. Mini Verse doesn't have that. Um, but looks like pretty good step-by-step instructions. We do have to put some stickers on things, so I'll see how well those stickers hold up. Um, I don't think there's glue involved. I think a lot of things like snap together. U, but again, we'll we'll get into that and um see here soon. So, we're putting some drinks together, tables, chairs. Uh, the floor is all one piece, so that's very different than Miniiverse. not um taping down individual tiles, so perhaps less customization options for that.
Uh but yeah, interesting. And just like Miniverse, if you collect more than one, looks like they snap together to make like a store. I think that's pretty cool. I like that. Um but let's just glance over. We have this thing.
And then there was some itty bitty pieces.
This one has the here's cheers light.
So, the bags are all labeled and numbered.
We have some stickers in here.
Looks like something could be charged.
Maybe the light.
And I thought there was other electrical wires. Oh, well, yeah, a little bit for the light. So, that's kind of cool that maybe it could be charged instead of using batteries. That's different. But the flooring looks like it's all one piece, but otherwise kind of similar to Miniverse and the tweezers they gave us. Similar to what I've gotten in other brands, little little buildings I've made. So, let's do step one. This is the first page. First step, we're going to be locating all these pieces, which is in the bag labeled number three. We're going to be putting stickers on the bottles. And then it looks like there's some glue dots to glue them down or stick them down to the board. And then we're also doing this one too. These are in bag two. Bag two.
So you kind of have to look at a little bit. And then K1 on that sheet.
So it's not labeled as good as like the Pure Mind sets I've done before, but if you take a moment to glance over it, you could figure out where the pieces are supposed to be. So, let me gather all those and we will build. It tells you how many of each to take out of the bag.
Pay attention to that because there are extras um that we'll probably use later.
Um these are not labeled except for this one. There is an absolute vodka one.
Well, absolute Vogue it says, but it looks like an absolute vodka one. Um and then this one actually has a stopper that goes in there. So, that's pretty cool. So, this is what they told us to pull aside. Then we have some stickers on here. So it says to take K1, which is this one.
Some kind of whiskey. And that's what's going to go on here. It says to put the stopper in first, which goes in nice and snug.
And yeah, I don't think there's a certain side it needs to go on, but let me grab that K1.
I'm very curious to see if the stickers are going to stay on there. Hopefully, it's not going to be I'm still scarred from that real life one I did where the stickers kept coming off. Um, it shows it on like the lower half.
I don't know if that's too low. I think it looks good though, but I think it needs to be scooted over just a tad.
The way the bottle is, it's hard to see where the edge is cuz there's all these lines in it.
But that's cute.
Then we have this one next that gets K2.
Just realized I was zoomed out a little too far.
And these are like oversized cuz they wrapped around. So it's hard to tell where it's centered.
There's not like a guide on the bottle or anything.
So, guess that looks right slash how it's supposed to look. I'll do the rest of these. And then we're going to use these glue dots, which look like this, to stick them on the board.
There is absolutely nothing that guides you on the board, which I hate cuz I wish they would be evenly spaced out.
You're just going to have to wing it.
So, yay.
I have the bottles lined up in the order they're supposed to go. I'm putting the stickers on here.
Just realized I put it on the wrong side cuz they're supposed to be this lip in the background. Cool. Hope they gave us extras. Unless this lifts. It probably doesn't. Maybe it does. I was going to show you what my idea was for putting them on there straight.
Boop.
I was going to put one on each end, one in the middle, and then do those. That way, it's like in a as straight of a line as it's supposed to be. You know what I mean?
But, uh, we may or may not have already messed up. It's fixable, though. It's fine. I'm sure they did give you extra glue dots because most brands do. Most kits do. Okay. I'm just going to scrap that one. I have other glue dots. Not exactly the same as this, but it would work. They do see seem like decently sticky. You have to make sure when you pull this off that the bottom piece is also lifting cuz sometimes they don't.
So, I'm going to place all five on and I'll go back and peel off the pink part.
But I'm trying to do it as even and straight as possible. I think I'm kind of successfully doing that.
Okay.
Close as it's going to get. We got to peel the pink part off. I do like that it's um a different color that stands out. So, it's easy to tell if you've peeled it or if you haven't peeled it. That's helpful, I think. And they lift off fairly easily.
So, they have it. This bottle goes here.
This one is next.
followed by this bottle.
Those stickers went on really nicely, by the way, but they aren't very giving if you need to reposition, so keep that in mind.
Okay, that's cute. And the stickers, the glue dots seem a lot stronger than other ones I've used. So, they're stuck on there. That looks nice. I think I did a decent job keeping them kind of evenly spaced out because I place the stickers like that. Now, for this one, let's make sure we have it going the right way off the rip. We do. We want that lip in the back. For this, we are placing these strips instead. So, it looks like we're using the longer one and a shorter one.
Oh, maybe they're the same length.
Actually, the same length. Just looks shorter on that on that picture for whatever reason. So, let's grab this and place it there.
And then one here. These things are clinging to me.
I don't know. That kind of the spacing is not uh accurate on here like at all.
H.
Oh. Well, I guess I could cut one and add it down here.
I'm not too worried about it.
So, we do the one that has three. So, those are like the wine glasses.
Those are going to go have one like hanging off over here.
That one in the middle.
And then these two, they even show it like scooched over really oddly, but as long as there's like a decent even spacing, I think it looks okay.
So, that is page one. Page two is building this counter and putting the hardware on. So, we have six drawers that will have knobs, um, pull out ones that have handles. So, that's the first thing we need to do. Let's take this.
Take that and snap them in there. So, I was trying to do it in the air, which is hard. If you lay it down and then just make sure they're in the right spot, gently press down. Um, it should go in with little to no effort.
And then you could adjust it there. Just snaps right in.
So, that's how that will look. So, we're going to repeat that. And then with this one, we have these itty bitty knobs.
Same thing. We're just going to push them into there. I'll lay it like that and then snap it in. That was pretty easy. They gave exactly three of those.
They gave seven knobs. And at first I was like, "Oh, I wonder why." Well, when you go to push them in, because they have like a longer, thinner um piece, I did bend one. So, I guess the other one's a backup unless it goes to something we haven't got to yet. Um, but I was able to still use the bend one and just kind of push it the other way. So, these you have to be a little bit more careful putting in, but these were fine.
So, now it shows you have to make sure and make sure all the dots are correct. So, this part is the top and it shows taking one of these, making sure the handle goes this way, and there's holes here and here.
So, we should be able to line it up and put it in there.
Try to do the top one first. There isn't much of a um point or a stem, what whatever you want to call it. So, you have to be a little careful here. And of course, I have a camera in between my face, so that adds a more difficult element, too. But let me try to do this off camera. That actually took longer than I thought it would. It's not as easy to snap in as things like this I put together in the past. Part of the reason because everything's black, so it's a little bit hard to see. But I got it snapped in there. But look, it it actually opens all the way through kind of like that.
So yeah. So now I'm going to do that exact process with this one. Putting the doors there. And then we're going to snap the rest of it together. That was fairly easy. Now these two pieces should snap together. I like that they kind of look like Lego bricks.
Let's line them up and snap them together.
Then this part goes at the bottom and that snaps in.
Make sure everything's lined up before you go adding too much pressure.
Snap. Snap.
Looks good. And then this piece snaps on top.
And then once you have all that in, let me wiggle it around here and get it to snap.
There we go. There we go.
Pushed in that door. Do these push in?
No, they don't. But that one does. Why is that? Oh, that's cuz there's This one has shells behind it. That's why it can't. Well, that's slightly annoying. I'll have to get something to pull that out since you can't do it from back here because it's all enclosed. But now you can take these, put them in there, and that's all you do for page three.
Very easy. Look how cute that is. I keep pushing in that drawer or that door rather. That looks nice and sturdy.
Love it. Let's look at the next page.
That's so cute.
Page four, we're digging out a bunch of accessories. Um, looks like we're snapping some pieces in, putting some stickers on, adding some handles, adding like the handle to the bucket.
Okay. Does that continue for a couple pages?
Yeah. So, you're gonna snap the handle on, add the ice, put a sticker on that thing, snap together the drinks.
Okay. So, let me gather all those pieces. That's quite a lot. Wanted to point out an error. The reason I can't bring that in. So, when you put this top on, right here, there's a little lip and that should keep this drawer from swinging completely in. So, you can kind of see it there in the corner now. So, I guess I had it pushed back when I put the thing on. So, now it's not going to push in. So, just wanted to correct myself um on me saying that it swung both ways. It doesn't.
I've identified all the pieces. And then this is the first step is assembling this little um beer little draft beer thing. So, this later I'm assuming putting the holes forward.
Yes, it's showing you that there's a little part at the back. Yeah. So, it has to go a certain way.
So, you got to make sure this is facing forward.
Easy enough.
Second step is putting this in the middle.
Snaps right in. Then we're going to find K8, which is right here, and add that sticker. Stickers are holding up on those bottles, by the way. I try to just touch them with my nail so that we're not using or trying to remove all that stick in an effort to not handle them that much.
I'm going to switch to the tweezers.
Actually, I should get my tinier ones cuz it's going to be hard to place this straight.
Yeah, I need my tiny ones. All right, try this again.
Yep, just goes right in. Kind of hold my nail to hold it down. Use the back of this to help press it in. And it says here's cheers on it. That's very cute.
That's what it looks like. And then we are going to take these two.
I don't know what the proper name is.
I'm going to call him a spot. And then we put this on the top.
We're going to do that twice.
Let me make sure that I'm doing that right. Oh, I'm not. It goes here.
It's kind of a confusing piece.
So, make sure that matches up. Yep. And then how Let's do this.
Goes like that. This goes on top. And again, if you go to like I just did, go to put it on there and it's too tight, don't force it. It's probably in the wrong spot. So, that was actually page, what is it? Fourth step. Then we flip it over.
Oh, I totally skipped putting those in.
Okay, let's go back.
So, this part then snaps into here and everything fits very nicely so far. Okay, that goes into here. Snap. Snap. That piece is complete. Now, we're going to assemble the beer. That's kind of fun. So, you take these mugs with the handles.
We have two of those.
And it says you put this in and then this on top.
Is that it? You don't glue it or anything?
H. Oh, it even has like the little uh like uneven. Okay. Well, maybe you should glue that. It just depends if you're going to display this or play with it. You might want to fix it together. But otherwise, these things are forever going to stick to me cuz they're staticky. Ain't that cute?
I think that's cute.
Yeah, I think that's cute.
Press that in there.
>> You know the record players in the background.
>> Yeah.
>> Imagine Oh my god, that's adorable.
>> Even made those work for the record players.
>> Yeah, >> that would have been epic. But sadly, I don't think that's true.
>> Look, we're going to assemble the handle for the ice bucket. And the ice is actually something you have to like break open and separate, which is kind of funny.
Let's get that handle on. Okay, we got that. And then this is the ice. There's six pieces stuck together. It does show cutting them or it shows a scissor, but you don't really need to do that. You could just twist them.
And then you're going to put all six of the ice in there. And then you have these gold tongs.
that you can then place in the bucket, too. Easy peasy. Next up, we have this piece.
Um, the gold part facing up. We've taken the K9 sticker and looks like you just kind of butt it up to that gold piece.
Slightly crooked, but not a deal breaker.
Grab it with my nail.
Oh no, I just pushed it down. Okay, then that's how it's going to stay. We're going to take this clippy part, snap it in there. Got to make sure that I have it lined up so we don't break it.
One side at a time.
These tiny pieces love jumping out of my hands.
>> Of course they do.
>> I know.
Then next we're going to do the martini shaker, which looks cute. Oh, no, I lied. We're not doing the martini shaker. That's in like two steps, I think.
>> I'm going to make my carrot bloody marys.
>> Bloody marys.
>> Bloody Marys.
>> Is that hanging off the edge? No.
Almost, though.
Okay. Next, we have this cup we're putting this green piece into. And then we're putting this lemon slice that's already sliced on there. Again, that'll fall out, it looks like, but the lemon is actually going to keep it in place.
Pretty cute idea. I like the way that looks. So, we have that. Then, next we are doing martini glass. It gets this blue diamond-like piece.
Nothing really to like press into it. I guess they could have done that. That would have made it a little bit easier.
And then this cherry.
Oh, there is a slice in the side of it.
So, you can put it on there.
If I can get it to stick. Let's see.
Yeah, like Well, maybe not. Maybe it's got to face the other direction.
No, it just doesn't like me.
Unless I'm doing it wrong.
>> Or I can try. I might be doing it wrong.
>> Got baby hands. Let them try.
>> Yeah. Well, it's just that it's loose.
Like, it's in there. It's just not It's not tight enough to grip it.
>> Super glue it.
>> Yep. Exactly. That's the solution to everything. When When in doubt, >> super glue it. So, now our martini shaker that snaps in pretty snugly.
Then we have this that we put the red piece in.
And what is that for?
>> I just realized.
>> Oh, that just sits on the counter. Now, with the things we just built, it shows placing them on here. It doesn't show sticking them down or just placing them on there. So, I'm not going to do that yet cuz I'm going to have to move it into the building anyways and they're just going to fall. But, we are building chairs and tables. So, let me get all those items out. So, part one, we're going to be putting the tables together.
I think these are all the same. We're going to snap this piece into the base.
Turn it upside down and put it in there.
Boom.
Very easy.
Going to repeat that another time since we have two tables.
Then I think we're doing chairs next.
Let me turn the page. That was already the first page of that step.
Okay. So the chairs, we have two different pieces here. So it shows this going through there cuz that one's split and then it's going to meet like so.
Then this little piece. It looks like no.
What is it? Yes. Okay. So, this little piece is going to go at the bottom here. So, it shows putting it in there.
And there is a tiny hole there that you got to line up. Okay. So, that keeps that sturdy. I like that. Then we have this piece hole or not the hole, the bigger taller part goes up. We're going to line here. We'll do it like that.
Line that up.
Snap it in.
It's hard to grip it. I don't really want to. I've learned from other kits.
You got to kind of press and move around.
You don't want to do it too forcefully or too much on one side because then you could snap a piece.
So, it's real snug in that area. I needed over here a little bit more.
Took a minute, but I got that. And then this just snaps into there.
And then you have to repeat that three more times. Very easy though. And I like how sturdy it is. So that's cool. Then they show putting the drinks on the table, which again pointless cuz we're not gluing those down. They're just going to fall. In here it does show putting a string of tape And then these three bottles, we can use the labels. I guess there was more labels on here. Yep, we have three leftovers. We're going to put those on the bottle. Put a sticker in here and stick those down. And then this is going to be stuck to that. So, it's kind of like a higher elevated one. Guess you don't technically need to do that, but um you could, you know, display them separately if you wanted. But we're going to follow their instructions. So, let me finish building these, put labels on there, and I'll show you this part.
This next step is a little tricky. And they did give you two of each, probably for a reason. You're supposed to flip that over and then stick this to it and then crease it in half. Like, they should have just gave you like a cardboard like material. You could have just Oh my god. Did I line that up perfectly?
Nope. Close enough though. Honestly, not as bad as I thought. And then we have that little crease there.
So, you have a sticker menu.
Again, if that would have been just like a little thicker piece of paper, that probably would have been best. But that's to lay on one of the tables. Oh, it's sticking a little because it's offcentered.
Oh, well, we got one. And I think this is just an extra in case you mess it up, but we may need that later on. I'm not sure. But let's take one of these and put a strip at the bottom.
Let's put this on here.
So, something like that.
Then we're going to peel that pink part off to reveal the sticker part and we're going to stick those bottles down.
Oh my goodness.
So, at least from my recollection of the mini verse, there's a lot more steps to this one and it's more involved building all the little pieces, but I kind of like that. So, I feel like these sets are definitely for older folks. I don't feel like kids are going to have the patient or younger people will have the patience to do this. Railen just said that's offensive.
I did not mean it to be offensive.
Okay, let's put that one there.
And I made it crooked.
This one next to it.
And then this one at the end.
So, it's in the crate like that. And then it shows sticker here, sticker there.
Again, we'll pull those backs off.
And then the crates will be stuck together. I don't like the sizing on these. They're off.
A lot of the times that that you need the stickers, they're not quite long enough.
I was expecting them to be like the exact length so it can go corner to corner because the corner is where it's the widest and has the most uh real estate for it to stick together.
But I do appreciate how sticky they are. So that's that. That's pretty cute. I like that. Now that we have all the little pieces built, we could finally start assembling the walls. So, let me set out all those pieces. I'll have to see what they mean by this. So, we have this base plate. It's going to go this side down.
And then there's four of these that snap into the side.
Not really understanding the purpose of that. Oh, is that what's going to hold the walls eventually?
H.
They don't stick in there very well, though. They're kind of loose. But maybe I have them upside down.
Yep. Yes, I do. I have them upside down.
Well, even more so. Like, that serves Does that even serve a purpose? I feel like it doesn't. Why are we doing that?
I do not like the way they're showing this. I don't think it's very clear.
Shows it going in. It's hard to tell which way it's going. There's a little itty bitty indent, which means it goes in like this, which has a gap here, which kind of makes sense in case the walls are going to snap in there. But it doesn't. It fits loose. It comes out. It bends in the middle. It's not a snug fit. However, if you flip it upside down, there is a little hole here that something could still snap. It's very snug. You have to work to get it out. It fits flush.
So, to me, it should be like that. But the instructions are showing like this.
And if you look here, it shows this big gap, which would indicate this way. The way that I feel like doesn't make sense. And also, the measurements look way off. I don't think they did a very good job describing that. And then this is just supposed to set in afterwards. I don't know.
Also, that's a nice like wall pattern. I guess maybe you could do either or. I do like that. And it's like sturdy all one piece plastic. So, that's nice.
So, h yeah. I mean, I guess it's supposed to go like that. Let me look at these pieces.
H I don't know. To me, that just doesn't make sense. At least not at this step.
I put them all in here, but some of them are wobbly. They fall out.
Not sure about that.
But if it isn't supposed to be like that, I guess we'll find out soon. So, these appear to be the same. You're going to start with the three pieces. If it's three, that's the top of it. Don't make sure it's not the bottom one. It shows sliding it in here, even though it doesn't uh stay snugly like that. And then here's my base plate is turned.
It's going to snap in to where those are.
So, let's line those up. They do not line up. I get it now. I had it flipped over from when I was repositioning these. It should be this side facing up. So, try this again.
We're gonna slide that in here. Even though it doesn't connect nicely, it just comes apart.
Make sure those are lined up. And put them all in. Press down.
Okay, that works.
And then this is just supposed to go in there. Oh, okay. It's cut out like that, but there's nothing securing it.
So, next it shows this tab being removed. Not quite sure why it's there in the first place. I guess for their printing purposes. Um, there are three holes here.
It looks like we're supposed to punch them out. Shows them being opened.
takes little to no effort.
And then this is our cheers light.
It's going to go in that middle hole.
So, we're going to feed this through.
And then there are lots of holes here, but it shows, let's see, these top three over here on the very end. So, we're going to feed that through so that it matches up.
And then this also snaps into there. I think Oh, okay. That's what the other two holes are for. It fits right there nice and snug. That's cute. It had me turn it around. We're taking this wire. We're going to feed it through this bottom hole behind the thing I just snapped in. So, I guess I need to remove that and then loop it through here. There's a lot of like looping around of the cord. So, the wire should come from this corner through the very bottom one around the other side out through here up and through where it lines up to above the A and then out above the S.
That's a lot of zigzagging. Not quite sure why, but that part's done. Now, we're taking this piece and fitting it into here. There is a cutout for that wire.
like that. Oh, does it slide behind?
Maybe it does. Is that Well, that's where it's going. I don't think I did that with the other one. It's like a track that kind of you can put it in.
Complicates it with the wire, though.
That may not be necessary since stuff punctures in here and kind of holds it in place. Anyways, we flipped it over and this part is going to go through this middle part. So, we're going to feed that through.
And then we're going to bend this so it fits in that track.
And it fits in there hopefully nicely. It's going to go from the middle to the middle. It only goes one way and it shows you which way, but you could also just kind of look at it and tell. It's kind of like a puzzle piece. It's kind of like a puzzle piece.
So, just make sure you connect that.
Should slide in pretty easily like that just did. Then when you have that, it snaps into here and should look like that.
Then you have that last wall that you just need to bend this in so it goes in the track piece at the bottom that sticks in.
And then that part will be done.
Then because there is like a little bit of flexibility, they gave you this L-shaped bracket that's going to snap over the top. And that's what the Miniverse ones did, too. So, we're just going to attach that. Now, to help with the flexibility in this wall, like the bulge or the bow of the wall, we could snap these in. So, the glass one goes on the bottom. Oh, no. Oh, I just pushed my finger into the glass and moved it.
Got to be careful.
Make sure you punch those holes out cuz I was wondering why it wasn't going in is cuz the piece of the paper was in the background. So, once you do that, which you can do before you put on the wall, um, it snaps in really nice and easy.
Look how cute that is.
So adorable. Now, I think that's it.
Now, that's all we have left is to stage it. So, yep, the bar goes there.
Then we have tables and chairs like that.
And then they have this one turned like this.
Yep. And then the other chair over there. And then this that we made for the Oh, I forgot it wasn't glued down and it just went flying and the beer came out of the bottle.
>> No. So yeah, you should probably glue it down for safety measures.
>> Okay, >> I would like to point out, speaking of that, >> they have all these left over. So if you totally want to stick down stuff so it doesn't move, they give you the option to do that. A couple other things I wanted to show you. So there's that. And it connects into two of them. So if you buy more, um, you can do that. Also extras, we have that one menu which I told you >> menu >> about. And then this piece is if you buy more and you want to stack them, it provides stability right here in the corner. And the last thing I wanted to say, we had one extra knob and one extra glass. Not quite sure why they gave us an extra glass, but cool, we have one.
>> Yeah, you're doing a good job.
>> And for the most part, that's where everything goes. Um, and then you just put what else goes on here? the check and some empty glasses, I think.
Um, yeah, I'll let you finish setting that up and then I'm going to show them.
>> I see what it's supposed to looks like.
>> Yep.
>> So, see, >> so the piece that I was fretting about whether or not it was on the right area.
The only purpose that serves is if you get more than one of these, you remove that and then it snaps in there. So, guess doesn't really matter which way you put it, right or wrong, flip it over if you don't like how it fits in there.
Um, but yeah, that's what that's for.
And then again, if you get more than one, you take this piece, it fits into here, and then that provides an extra beam of support.
And then, you know, there's a roof for that one.
There's like a porch thing. I don't know if that's like a separate piece, I guess, but they show several of them.
And overall, I thought this was pretty fun. Little bit more involved. Did you just spill it? It's okay. a little bit more involved than the miniverse ones, but still nicely done. At first, I was a little worried. I'm going be honest.
But, um, everything fits together really well. Pretty good quality. Sticker stick. Pieces are thick. Um, and I would wouldn't think would be easy to break or flimsy in any way. So, I kind of love these. Which one should I get next? We have the fast food, the ice cream, the bakery, >> um, and like a little floral like rooftop. Okay. I forgot to show you the light. Hold on a minute. So, this essentially it has to plug into a block.
So, it's not like to charge it. It's to plug it into a block. As you can see, it's not very long. So, I literally have my cell phone charger cuz it's a C to C um plugged in. And that's what I'm using to show you. Uh you can't really Let me see if I can if I cup it, you could see the lettering, but because it's bright, it's affecting um the colors on the camera. So, I'm going to unplug it.
Boom. So, you can see it better. Um, and then I'm going to take the phone or the camera off the tripod to give you like a better view. Maybe it's going to get a little wobbly. So, here we have the back wall. There's some like license plates and signs on it.
Over here we have a menu, some records on the wall. That's really cute.
And then all the little pieces that you can set wherever you want.
Peep the drink I spilled. Very realistic.
And again, you could glue those in there, which is probably best if you're going to play or move it. Anyway, this is the outside wall. Looks like you could see a bunch of wine and there's a door that's really cute.
And then this wall has the business hours. And again, you see a bunch of bottles and stuff. So, very cute build.
So, that is final product. Overall, better than what I expected. Um, I kind of like this a little bit better than Miniverse, I think. Um, it feels a little bit more sturdy, more durable.
Um, this you could glue it down, I guess, if you wanted, but I like that you can just easily flip it over as well. Um, the tape they get is real sturdy.
Cute. I really like it. So, leave me any and all questions you have. Hopefully I covered everything and yeah, thanks so much for watching. Bye guys.
Related Videos

I’M COVERED, NOT CONDEMNED | R&B Gospel Soul Music
JesusHeals247
388 views•2026-06-14

One Year Later: The Small Habits That Helped Me Lose 40+ Pounds
Rkted1234
273 views•2026-06-18

The smoothest Tsk Tsk Tsk I have ever heard
VELVETFLY
1K views•2026-06-16

Bugfixes For Chaos Reign! - Mechwarrior 5 Mercenaries
TTBprime
2K views•2026-06-16

Engineer to Government Bank Officer|FREE SBI & IBPS Webinar| Bank Exam Strategy 2026 | Learn On-Line
learnonlineBengaluru
2K views•2026-06-14
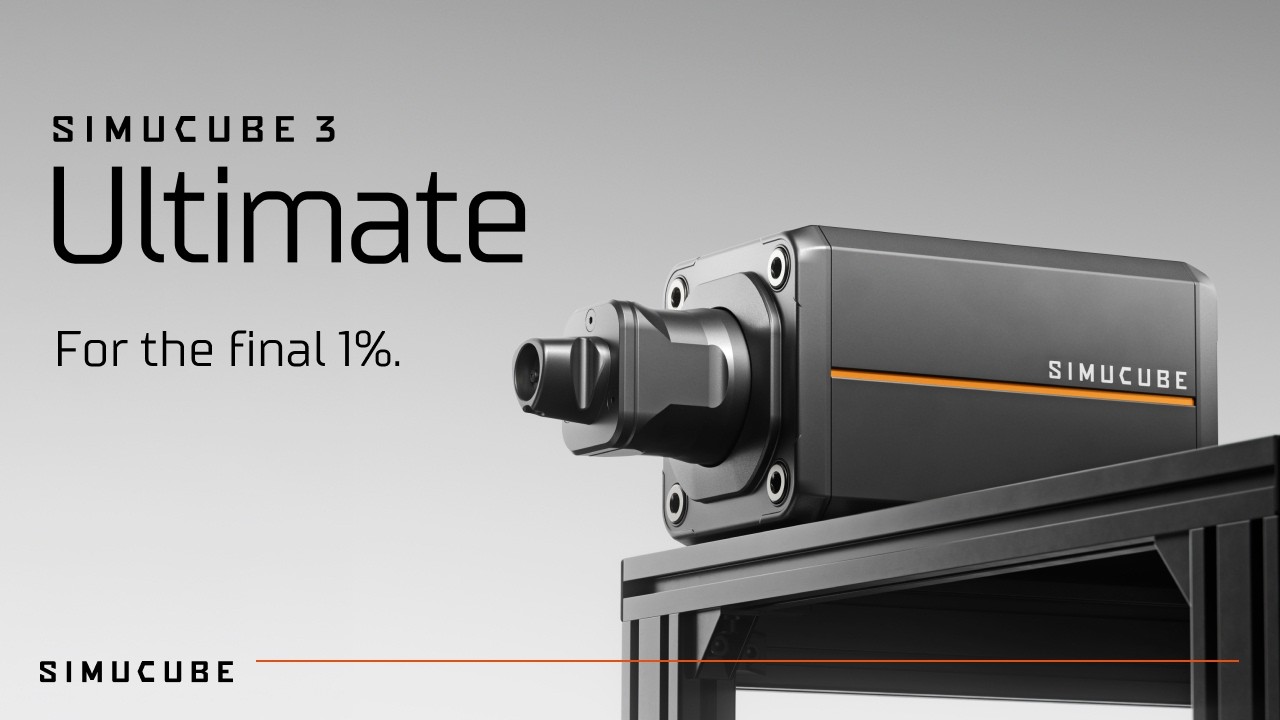
Simucube 3 Ultimate | The Pinnacle of Direct Drive Force Feedback
simucube
314 views•2026-06-16
That Vegan Teacher is live!
ThatVeganTeacherYouTube
66K views•2026-06-16

HINT: Panthers unlikely to trade their 2026 first round pick before the draft
LockedOnPanthersNHL
417 views•2026-06-15


