This tutorial provides a clear and practical application of vector math to solve a common user experience challenge in 3D games. It effectively shows how a simple dot product can make basic interactions feel much more natural for the player.
Install our extension to search inside any video instantly.
Kicking Doors Open | Godot 4 Dungeon Crawler [Ep 11/18]
Added:Well, hey there traveler. Come on in and welcome back to the game dev tavern.
This is a cozy little corner of the internet where we sit down, relax, and build fun games together. My name is Nicholas and this is episode 11 in the tutorial series where we create a 3D dungeon crawler from scratch in Godot.
And welcome back. So, in this episode we are going to be implementing our kicking mechanic. Now, we're going to be using a lot of familiar themes that we have been visiting in the prior episodes from building a new state to binding a new character animation. And kicking is going to be one of the core mechanics of our game play. So, hopefully you're excited and you'll be able to follow along pretty easily.
The first thing we're going to do is add our animation into blender and then we'll come back and add our state into our code. So, let's hop over into blender right now.
All right. So, here I am into blender and I opened up my character top down file and here I have my character. I'm going to start by selecting my armature and then I'm going to go into the animation tab. So, make sure that here you are in pause mode and then pick select the default animation which we're going to duplicate by clicking this icon here. I'm going to rename this kick.
And I'm going to press this shield icon to make sure I don't lose it. And we're going to make this pretty short. So, I'm going to press A to select all my bones and then shift D to duplicate my frame and I'm going to bring this to frame six. And then what we're going to do is just go to frame two here and I'm going to take the foot and then just bring it up. Now, you will notice here that given the location of our pole right now our knee cannot really go further than this and this is fine for running but whenever we want to kick our camera is actually located here. So, we won't be able to see our foot unless we actually drastically change the way that things are configured. So, the way I'm going to do this is exaggerating things by a ton.
I'm going to scale up the foot so that it actually blows out of proportion but at least it makes it into the camera.
And from the user standpoint, from the player standpoint, you'll see that um you know, it actually looks much better because they'll be able to see their foot as they press the the kick key. Um so, let's go ahead and grab this bone here by pressing G, and I'm going to move it uh by pressing shift X alongside every axis except the X axis. And I'll bring it I don't know, somewhere around here maybe. Like, we need the foot to really go up. And then, let's go ahead and take this bone here. G to grab, and then start to bring it up. I'm going to go this way, and G to grab and bring it towards the X. And then, let's go ahead start scaling things up. So, I'm going to stop uh press this bone, press S to scale, scale it up, and then take this one, S to scale, and scale it up. And as you can see, I now need to just take this bone again, and then just grab it, and go towards Yeah, go towards the top here. Uh G. Uh how does that look?
Okay, we we can try this. We'll see. It may be too small, maybe too big. Um but again, there's only one way to know, which is to just go back into Godot and test this out. So, first of all, I'm going to select all my bones, and then I'm going to select this frame here. Um and I'm going to press uh shift D, and I'm going to duplicate it, and I'm going to bring it to frame four. That way, there's going to be a little bit of a pause by which that foot is going to be standing still. And I think this will be helpful for the animation. So, if I press play now, yeah, it's a it's a pretty pretty simple animation uh really. But, it should do the trick. Um and if we feel that it's too too long or too short, then we can always come back here and make some modifications. You can see here, by the way, that the bones are, you know, pretty pretty um changing the the mesh in a very unnatural way. But again, our camera is going to be located here. So, I think we should be okay. And uh again, I actually wonder if maybe the foot should be located a little bit higher. But, let's try this. So, let's go into the layout mode, and then um you can select your mesh, shift select your um character, and then file uh export, export as GLTF, and then just pick the character once again.
Okay, let's go back into Godot and see how that looks.
All right, so back into Godot, it should have automatically reimported your um your asset, but in case it did not, just go ahead and find your character.glb, double-click on it, and you can press on reimport here. And then just double-check that the kick animation should be uh visible. So, we can actually just double-check what it looks like if we go over to the player and go into the animation player, find your kick animation, and then we can zoom in here a little bit, and then let's go ahead and find where it's as big as it can be, and then look at the camera, and let's see what this looks like. Yeah, so we see our foot here, and you'll see in the game it won't it won't look as bad um as as what it seems here. I think it should be fine. So, let's go ahead and move forward with this. Again, this is exactly kind of what you want. You want to have at least a portion of your foot visible here uh so that it makes sense from from the player's perspective looking at the camera.
So, let me go back into the uh level here, and we're going to be able to start working on our code.
All right, so hopefully this step is pretty familiar to you. We are just going to add a new state and a new enum once again. And for now, the only thing we're going to do is just play the kick animation and then go back and transition into the moving state. So, let's hop over into uh our script here, and only our player will be able to uh kick, by the way. Uh let's start by going over into our player script, and then we want to go over to the top.
Let's add a new state here called kicking. Let's go ahead and create the class, file, new script.
Let's locate this inside our uh scenes, characters, player, state, and I'm going to call this player_state_kicking.
Okay, let's give this a class name.
Let's extend player state.
And once again, this is going to be very similar familiar to you uh if you have done this in for other states.
Basically, when we enter the tree, so when we enter the state, we'll just want to play our animation.
Okay, let's also hook ourselves up to the signal where the animation completes, which is animation finished.
Let's create this method.
And [snorts] we just want to transition into our player.state.moving.
The one thing I may want to add here is when we kick, it doesn't really make sense for the player to continue to move. Um doesn't actually make sense that they completely stop altogether.
So, maybe we just bring the velocity towards zero at a certain certain speed.
Uh so, func physics process and player.velocity equals player.velocity.move_towards vector3.zero.
And uh let's see how fast or maybe let's just um let's have let's have a constant at the top called ground friction.
And maybe we set that to 10. Let's check it out. Okay, we need to now enter into this state. Um so, for that, we'll first need to go back to the player script, and when we have our switch state, we want to make sure we register this. So, um maybe right here.
Okay, and how do we go into the kicking state? Well, we want to be in the moving state.
And here we want to check if the player is pressing the kick key.
And if you remember, we in the previous episode we used that key for um showing the vignette the vignette. So we're going to get rid of that code really quickly. So kicking and we can get rid of this. Let's go back into the player script and I believe it was towards the top.
Right here. Let's just get rid of this for now. I'm just going to comment it out just to not forget that it exists and that way whenever we implement getting hurt, we'll be implementing the vignette once again. So let's go ahead and try this out. And uh so if you press the F key, you should now see your foot go up. And uh yeah, it doesn't look fantastic, but honestly because I don't have any weapon or shield in hand, it kind of looks odd. But if I do take a weapon here, now it kind of feels better.
Otherwise, it almost looks like it's my uh my my hand actually uh trying to hit.
So anyways, I think this looks good enough. Again, you'll probably have something slightly different on your end. So feel free to make some adjustments so that it actually looks good on your end. You just want to make sure that everything looks, you know, fairly decent on your end. Um all right. So right now we have the ability to kick. We do just don't have anything to kick. So there is a couple of things we want to do. We want to start implementing doors and being able to open doors. And then we also want to be able to stun enemies. So I think maybe we start with doors today and see if we have time to stun the enemies.
All right. So when creating our door today, I guess the only thing that we really need to make sure is that we can actually go through uh once the door is open. So for that, if you look at the uh player's collision uh shape, where is it? Right here.
You'll notice that the radius is 0.5 m.
So we just want to make sure that the door is larger than 1 m wide. And if you remember in um the way that we have set up our pixel textures is that 16 pixels is a full meter. So if I open up a sprite right now and I go over into my texture file, uh my door will need to be larger than 16 pixels if I want to keep the same ratio of pixel by dimension. So um let's see. Let's think about this. Maybe we make it 25% larger. So rather than being 16 pixels, it becomes 20 pixels. Um we increase it by a fourth. So, our door would be 2 m high and 1.25 m wide. And uh those dimensions will be helpful when we go to Blender. So, that way we'll be just be able to create the door, just work around it as well. So, maybe we start by creating our door uh sprite here and uh and then we go over into Blender. So, I'm going to use my color picker here. I'm going to press uh Alt and select this dark brown. And then I'm going to start by drawing uh maybe just uh yeah, let's just draw the boundaries here. So, we said 1 2 3 4. So, that should be our meter 25. Let me go back into line view and is this too dark?
Hmm, I wonder.
Let's try this. Let me grab another brown, maybe this brown here. I'm going to start drawing the lines for the various um wooden wooden pallets. Uh let's see, something like this.
And yeah, I'm going to skip I'm going to skip it three every time.
All right, and then let me paint the container uh with this brown here.
And maybe some lighter brown even in the middle.
Is this too light? Maybe too light. Let me try this one here.
Oh, it's terrible. How about this one?
Yeah, I think this looks okay. All right, and this is where your artistic uh feelings should come into play and uh and override what I'm doing. Maybe let me add some uh highlights towards the top.
So, I'm going to just uh use this color here.
And then do the opposite on the other side. Does that look weird? Kind of looks weird, huh?
Yeah, let me remove that. I'm going to keep it pretty simple. All right, and then let's have like some metal bars uh maybe two metal bars that go across the length of the uh door. So, I'm going to pick this uh dark black here, and let's go maybe right here. I'm going to create one line here, and then maybe just another line here. Let's uh have some metal color in the middle. So, I'm going to take this um blue/gray, and maybe the white here to do something in the middle. Yeah, so I'll just I'll just paint what would be the maybe the nails, I guess.
I'm going to press M to select this and bring it and copy and paste it, and I'm going to create another one maybe right right here. Yeah, I think it should be fine. All right. That's that That's going to be good enough, you know, again, every time we can come back here and make some tweaks, but um for now, let's go over into Blender and and build our door.
All right. So, over into Blender, I'm going to start by by opening my uh dungeon tiles. Again, our door is going to be easily tileable with the rest of the uh dungeon wall. So, I'm just going to use this file for everything that can nicely fit into this uh 1 m by 1 m tiling uh setup that we have. So, I'm going to start by creating a brand new collection, uh going here, clicking right click, and then uh let's rename this collection doors.
And uh if we think about what we need to build, well, basically, we need to have a door that kind of fits inside this type of enclosure, right? We'll have this on both sides and then the door here in the middle, and we already know the size of our door based on the texture that we have uh here.
So, maybe what I can do is take this shape here, and I'm going to Shift D to duplicate it, right click, and I'm going to drag that new shape into my doors folder, and I will just rename it to door-enclosure call for collision.
Uh and then let's go ahead and hide the entire collection of walls.
And that way I can just work on my door, uh, nicely here. So, I'm going to start by bringing back to the center, so GX - 2 to bring it back to the center here.
And then, uh, let me press tab to go into edit mode, A to select all of my faces, GX - 0.5 to bring it towards the center here. Shift D to duplicate, right click, RZ to rotate on side the Z axis 180 to bring on the other side, and we now have something that looks like our door enclosure. So, we'll be putting our door in the middle here. Let's, um, let's think about this for a second. So, first of all, I don't think we're going to need the ground, so three to go into face mode, and then select these two and X to delete these faces.
And maybe we, um, maybe we make this like a third.
So, control R to go into loop mode, uh, use your mouse wheel to increase by one, left click, and then right click.
So, this will be a of our junction here.
We'll do the same thing on the other side. Control R, mouse wheel up, left click, right click. Three to select the faces, alt to select this edge to select all of these, shift alt to select all of these. Go on the other side, shift alt to select these, and shift alt to select all of these. X to delete faces. So, we now have kind of the, um, uh, the beginning of our wall, right?
We'll have like a wall that will go here, and we'll have our door in the middle. So, perhaps an easy way to work around this, and there's probably faster way to do this, but I'm going to start by building the door because I know the dimensions of the door, and then I'll use the vertices of the door to kind of connect everything together and create the outside wall. And that way I'll make sure that everything kind of fits in well together. So, I'm going to press tab to go outside of this object into object mode. Shift A to create a brand new object, mesh, cube. And we know that this is a 2 by 2 by 2 cube, so let's, uh, make it the right dimensions. Sh- uh tap to go into edit mode, S to scale, 0.5 to become a 1.1 * 1 m cube. Let's uh scale it on the X axis. So, SX 1.25. So, now this is 1 m 25, which is what we need. SZ2, so you have it 2 m high. And on the Y axis, we mentioned that this is going to be a third. So, SY 1 / Interestingly, in Blender, whenever you start typing the divided, it automatically adds a one after. So, you have to do 1 / and then backspace three, if you want to have 1/3.
Uh and then let's bring everything up by 1 m. So, GZ1.
And we now have our door. So, this is going to be the exact um scale that we want the door. That should fit exactly our 20 pixels wide * um 32 pixels height. So, we can start by texturing this. Let's go into the material tab. Here, let's assign the dif- default material which we have for the scene. And I'm going to go into this view here. Three to select this face, U project from view.
A to select all of my vertices, G to grab, bring it here, S to scale down. I just want that to map nicely around my doors. So, I'm going to just align all the vertices and make sure that everything fits in properly.
Okay, and this looks This looks decent.
It looks fine enough. Let's just do it on the other side as well. So, select this face, U to unwrap, project from view, A to select, S to scale, G to grab, and then let's just map it up here.
All right. So, I think that was the easy part. Let's just do the uh edges of the door.
Um I actually think we're just going to do like a hard color. So, three to go into select mode, select each of these, U to unwrap. It doesn't really matter.
Let's do project from view, A to select all of them, S to scale, zero to bring it down to a single pixel, G to grab, let's go over to this dark brown here.
That's That I think should be good enough.
Um let's take this face, X to delete, we're not going to use it.
And there we go, we pretty much have our door here. The only thing that we'll need is to have a handle. So maybe the handle we make it like three pixels wide and one pixel high.
Um so an easy way we we know that like one pixel is uh so 16 pixels is 1 m. So if I was to press shift A right now and create a new cube. By the way, I'm still in edit mode, right? So this cube is part of the door mesh. And if I press S 1 / 16, I actually have a 1 pixel per 1 pixel per 1 pixel cube here. So now I can play around with this. So I mentioned that um oh actually it's 2 by 2 by 2. So this is 2 pixel by 2 pixel by 2 pixel. Let's divide it once again by half. So S point five. Okay, and that now we have a single pixel right here.
Um So I'm going to uh make this three pixels wide. So S uh X three.
And let's bring this and make a handle here. So I'm going to go into this view, G Y, and bring it about here. And then let's look at this here and G and then let's go up.
Maybe we put it uh somewhere like this.
How does that look?
Yeah, I think that looks good enough. So press L to select all of the um all of this shape, U to unwrap, uh project from view. We're also just going to assign a single color. A to pick all of the vertices, S to scale, zero.
G to grab, and let's bring this to maybe this dark blue here.
And then I'm going to take this shape, shift D to duplicate the shape, right click, G Y, let's bring it on the other side so it appears here. Okay, and this should be exactly 3 pixels by 1 pixel.
Um so that should fit the norm. So if you wanted to do like cubicle shapes and you need a specific precise pixel um size, I would just bring it everything down to a 1 pixel by 1 pixel by 1 pixel and then just resize it according to your specs.
All right, we have our door. Our door looks fine enough and now we're going to be using this to create our enclosure.
Let's go ahead and rename this to door.
And All right, there's probably multiple ways to do this. I think one way I'm just going to duplicate this object and join it with our enclosure. So that way I'll have something to work with inside my my enclosure. So shift D to duplicate, right click, and then select this object here, shift select this object here, control J to merge those objects together. I'm going to hide the door. We're not going to use it and then oh, I guess we rename this one. So F2 rename door-enclosure-collision.
And then tap to go into edit mode and now we have a little bit more things to work with. We want to connect a verse of those vertices to this shape that way we can create kind of the the wall structure around it.
So for that, maybe we uh we need to split this in half. So control R to create a loop cut, left click, right click to bring it back to the middle.
Let's do the same here at the top. Left click, right click and then I think we can start by merging some of those vertices. So I'm going to go into vertex mode, select this one, this one, this one, this one and press F to create a face and I'm going to do the same thing with these four and just go around basically my uh my door. I just want to create all of my wall all my wall sections here.
Okay, let's do the same thing on the other side.
Typically, the fact that I'm working on on both sides and it feels like I'm duplicating the work. I should probably have used a mirror modifier. I think it would have probably been uh a faster again. This is where your skill as a blender expert would come in handy.
All right, so I have my pillars to the side here. Let's create maybe the top portion. I'm just going to go and shift select these three, press F to create a face, and I'm just going to go around and this is going to create this fan um yeah, this this fan faces here. It will probably make it a little bit tricky to um Oops, what did I do here? 1 2 3.
It'll probably make it a little bit tricky to not distort the pixels when we draw and UV unwrap those, but yeah, again.
Okay, [snorts] let's do the same thing on this side. So, shift select three at a time and then press F to create a face.
And one thing we'll probably do is making sure we don't have any duplicates.
So, once you're done here, select press A to select all of your pixels, M to merge by distance, and here we're going to set the distance to 0.01.
And yeah, well, so we removed two vertices. There were two duplicates probably here at the center.
All right, so let's go ahead and clean this up a little bit. I'm going to go into face mode. We don't need each of these faces. We don't need them on the other side either. So, select all of them, X to delete faces. We don't need these handles, so L L, X to delete the faces, and then we need to swap Oh, actually, we probably don't need these either now that I think of it cuz this is going to be looking outwards.
So, just select all of these and then X to delete faces. We should be left with something like this. And let's make sure that the normals are looking the right way.
So, three to go into face mode and select all of these that are currently looking red whenever they should be visible. Alt N to go into the normals menu and then click flip.
Let's do the same for all of the remaining faces that should be visible to the player.
These these Alt N flip.
I think we should be good here.
So now comes the kind of the tedious exercise of UV unwrapping everything and um for that I'm going to let's see there's probably multiple ways to go about this.
I'm going to go and select each of these faces here you uh let's do project from view A to select all of them G to grab let's bring it up here for now and I'm going to do this on all of them. So you project from view let's bring it here and that way I can work on all of them in parallel.
So where is it here G and just bring it up here.
All right and then let's do this four as well. So back into the Y view you project from view A to select let's bring it up.
Similar to this one.
Similar for this one.
And similar for this one and I'm not going in details right now because I I'm going to want to do all of them all at once by just merging all of this together. So now if I select each of these eight faces uh I could also select these as well.
Let's unwrap these as well. So let me go and look towards the X U project from view uh grab this let's bring it here.
Let's do the same thing for this one.
U project from view let's grab it here.
Let's do the same thing here.
And finally this one.
U project from view.
All right and so we're going to be working on all of those faces at the same time. So I'm going to select all of these.
And All right, I should have 1 2 3 4 I should have 12 faces selected here. And I'm going to go ahead and merge all of the vertices. So, I'm going to um going to vertex mode here, select all of these, M merge at uh center. Let's do the same thing here, the same thing here, and the same thing here. And now I can select all of these S to scale it down, and let's just bring it to uh I guess it should be about 6 pixels wide.
So, let me see. Let me bring it to about here.
And how does that look?
Yeah, this looks uh this looks fine.
Decent enough for me.
So, let's do the top now. And again, this is where we're going to see a little bit of distortion.
The one way that I found to not have any distortion, by the way, uh oh, this almost looks a little bit weird, these ones here, because the door is going to be here. I kind of like this, the fact that the bricks kind of end here. So, if you want to go in a little bit more details, you could, you know, potentially just go in and play around with with these wherever you want to fine-tune the details, and uh and just make it a little bit look a little bit better. But anyways, those are those are really details. All right, so, the one way that I found to actually unwrap these the best way possible is to actually do a a projection from view.
But, as you can see here, it takes a lot it takes a lot of space here. And so, I would actually create a brand new texture which has these elements, these bricks kind of tiled in, and that that way I can just map this over. And and that actually is the best path that I found to not have any distortion. But, um yeah, on our end we're probably going to have to just work around with just a single tile of 16 by 16 by 16. So, for now, I'm going to select these three.
And I'm going to grab them, G to grab, and then let's bring them here. And then let's see something that we can uh let's scale it down.
And see if we can find something that works decently well.
So, something like this, maybe I bring these up.
And maybe I bring this up as well.
Yeah, something like this. So, you can see a little bit of distortion here.
Not not ideal, but you project from view, grab them, G, and let's scale it down. See if we can have something that sort of maps to the other here.
Uh so, this is a little bit too high. Bring this down. This is okay, I guess. Bring this here.
Yeah, something like this. Um again, you know, as you'll be playing, like the player won't be spending too much time looking at the details, but and it's okay if they're not, you know, perfectly square, but again, it does does, you know, it's not perfect. If you want to spend a little bit of time polishing, you would probably want to do this. So, let me do this on the other side, and then I think we should be uh almost ready to go to start importing this into Godot. So, you uh unwrap project from view, A, G to grab, let's scale it down.
And then what do we have? We had something like this.
Uh I think we had these here, this one here, this one here.
Okay, let's do the same thing on this side. You project from view, A to select them all, S to scale down, and then let's see if we can find something that works here.
So, something like this.
There we go. All right, and this is all that I'm going to do here. I'm not going to go any further. I think uh again, like you could you could spend a lot of time just polishing this. That's probably what I would do if I were to ship the game, but All right, so now that we have the enclosure, the one thing I do want to do is I want to make sure that, you know, if if we bring this into Godot right now, you'll see that every time we have faces that are exactly on the same um uh vertex locate position as the others, you're going to see some issues with uh faces overlapping. So, I'm going to select all of my faces here, press S to scale 1.01 to just bring everything up by 1%. And uh if you look at the door now, you're going to see that there's a little bit of a gap, uh which I actually don't want. Uh so, I'm going to do the same thing. I'm going to press tab to go into object mode, select my door, tab to go into uh edit mode, A to select all of them, S to scale 1.011.
So, it it brings it up by 1.1% and you can see here that it doesn't overlap and it won't overlap with the world either because we've increased everything by 1%. All right. Now that we have all of this done, the last remaining thing is we need to make sure the rotation is correct. So, if I select the door here, if I uh go into edit object mode, rotate along the Z axis, you'll see that the rotation is kind of weird.
Uh this works well for like a secret passage, but not for a door. So, for that, we just need to set the origin properly. I'm going to go into uh tab to go into edit mode, two to select my edge. I'm going to select this edge here, then shift S and bring my cursor to my selection. So, that way it's it's located here. Tab to go outside of um into object mode, right click, and then set origin to my 3D cursor. And now, if I rotate along the Z axis, you can see that it now uh behaves properly. All right. So, we are ready to export this over to Godot. I'm going to select my door and my door enclosure and go into file, export GLT GLB. Um you can uncheck this and then make sure to limit the selected objects, and I think the rest should be fine. Again, like these have a tendency to uh to reset, so I usually like to just uh make sure we have all of those options properly set up. We want to export this to our meshes folder. Let's create a new folder here called doors.
And inside my doors folder, I'm going to rename this to door.GLB.
And we should now be good to go into Godot and see how this works inside our level.
All right. So, back into Godot, we are going to create a new scene to hold our door. So, let's go ahead and click on plus. I'm going to click other node here, and I'm going to pick a static body 3D.
Let's go ahead [clears throat] and rename this to door, and it's going to complain right now because we don't have a collision shape, which we're going to add in just a second. First of all, let's go ahead and save this into our scenes folder. And um let's create a new folder here called door.
And inside door, we can just save this uh scene here.
All right, let's find our mesh, which we have just exported from uh Blender, and we can just drag this into our scene here. Normally, this should um this should look fine, but if you have any issues, um make sure that, you know, you've selected the objects to export.
You should have both of those exported.
And um a couple of things. So, first of all, uh you can right-click and click on editable children here.
First of all, we typically have done animations so far in Blender and then exported them uh back into Godot. For this specific one, I think we can just use something pretty straightforward because we're just going to be rotating the door. So, we'll be using animation players. We can add that as part of our door here. Uh control A, add animation player.
And uh we can create maybe just two animations, one for open left.
Uh so, open left means that we will take this mesh here. And starting at frame zero, we're going to go into our transform. Let's go ahead and add a keyframe for rotation, and click on create here. And then let's go to 0.1.
Uh and this is only going to last 0.1 seconds, so we can just zoom in here a little bit.
And at 0.1, we'll just go ahead and rotate our door by uh 90°. So, you can either uh type 90 here or type um or just rotate it using the gizmos, and then go ahead and insert a new uh keyframe here.
Okay, so that should be pretty straightforward. Let's go ahead and uh create a similar um, similar animation for the other side.
So, animation new open-dash-right.
And similarly, at uh, let's pick our frame here, go into the rotation, select a keyframe at uh, zero, and where we at here? And then let's go over to 0.1.
And rotate this by minus 90°, and then add another keyframe here. Okay, so you should have now both animations to rotate left and rotate right.
It does feel like the door is a little bit thick, huh? But, uh, I guess that should be fine. All right. Um, go ahead and save this and uh, a couple of things. So, if we First of all, let's see how this fits into our world, and we haven't added any collision collision shape yet, but the enclosure here should have its own collision shape. So, we shouldn't be able to go through the sides here or through the top. So, let's go ahead and add this to our level, just make sure that it fits okay. So, here in the base level, um, maybe we need a container for doors.
Let's go into uh, let's go into the original scene base level here. Control A to add a new node 3D, and I'm going to rename this to doors. Save, and then go back to our level one welcome, and then here I'm going to press control shift A to instantiate a door scene. And now that I have it here, if I uh, press control and drag this, it should go alongside the grid. We actually don't want it exactly on the grid, we want it to be uh, kind of in between two cells. Uh, so I'm going to go into the transform here, and I'm going to switch this minus four to a minus 3.5.
And now I can uh, drag it by um, accordingly, but I think this will actually look better. So, let's go ahead and try this out, and make sure that And you can see here how it kind of uh, goes beyond. Actually, I think this will make it easier to see also where we have placed our doors. Uh, F5 to try this out, and then let's make sure that it looks okay. So, we can we should be able to go through, but now we shouldn't be able to go through the sides, which is what happened.
Oh, by the way, my my camera seems to be very close to the walls here.
Um so, maybe you might also need to make some tweaks on your end. Um if I press Alt F4 here, going back to our player, it's going to be a little bit of a balance between like making sure the camera doesn't go on top of the animations. Um potentially, you could also increase the radius of this uh of the body of the character.
But, for now, I'm just going to bring our camera back just a tiny bit. I know that uh we don't have a lot of wiggle room with the animations. So, let me see how that that feel.
It feels a little bit better. I'm making sure that everything still works properly.
Okay. All right. So, let's go ahead and add a uh Oh, it looks like uh my shape here Yeah, it looks like um Let me see. Let me look at my door.
Yeah, it looks like I have not applied either I have not applied the texture properly or something is wrong with my uh texture here. So, I'm going to have to go back into Blender and double-check what's happening with my texture. It looks like it's it doesn't feel right here on on the upper part of the door.
Um but, let's go ahead and add a collision uh shape to our door. So, going back here, what you can do here is select the door mesh and then clicking on mesh, you can create a collision shape directly from the mesh. Uh we can keep this by default. There are some options here to make it more optimal. Uh for now, this should be fine. And if you click on this collision mesh here, you should see it how it kind of embraces the door. It even uh has like the handle here as the bonus. So, we're going to take this shape and drag it over to our static body.
Also, we want to make sure that we create another collision layer. So, um here we don't have a collision layer for doors. Let's go ahead and create one.
Just under project tiles, I'm going to create these doors. And I want to make sure that we are uh on the doors layer and uh we don't need to um we don't need to connect with anything else. However, if we go over to the player uh scene uh and to the enemies go and click on the character body 3D here and in the collision, make sure that we also collide with should probably collide with the enemies as well and collide with the doors.
And then let's go over to the enemies, make sure that they also collide with the doors as well.
All right, so with that done, I think we should now now be able to go through the door and uh so this seems to be working fine and now we just need to be able to whenever we hit the door here with the using the uh kick key, we should be able to uh open the door. I'm going to go take a quick look at what's going on with my texture uh wrapping here. I may have done something incorrect in Blender and then I'm going to come um right back and then we're going to allow us to um play a specific animation whenever we kick the door.
All right, so on my it looks like just uh re-exporting from Blender and re-importing here into Godot actually uh fixed the fixed the uh texture uh for me. So I'm not exactly sure what went wrong or even if you are uh seeing this issue, but if you are in experiencing this, uh just let me know in the comments. We can try to figure out what's what's going on here. Um the one thing I did notice though is that uh when I play the game, I am definitely way too close to the wall. It kind of feels weird. I think the camera is just too uh far forward. Uh but if you bring it too close to the player, then it's going to mess up the animation. So what I'm going to be doing instead is hop going over to my player and again, this is probably um specific to my mesh. Uh you may not have to do this, but on my end, I'm just going to crease the radius of my collision shape and I'm going to bring this to 0.55. Just to increase it a little bit more and now I think it just it looks a little bit better. Uh it's not as close to the wall as it was before. It's still pretty close, but you know, we should be good enough here and we should still be able to go uh through the door. Well, we have that collision shape, but we should be able to go through the door and once we are able to open it.
All right, so now we want to be able to um have the door open whenever we uh kick it with our foot.
All right, so let's go ahead and then create a script for our door. I'm going to select the root node, click on the plus node here, and I'm going to accept this default name. Let's give this a class name.
And for now, we're just going to have an open function. The argument here is going to be the position of the player.
Maybe we call it source um position, which is going to be vector three. And this will be an interesting challenge um that I will ask you to try to do, which is to figure out which animation should we be playing depending on the position of the player compared to the position of the door.
Um so, that's an interesting challenge.
If you haven't watched the uh tutorial series on the soccer uh field, it's it's uh we we talk about that aspect a little bit to know whether we should pass or shoot the ball. Um anyway, so here um let's do just two things. We'll want to disable the collision shape, and then we'll want to play one of the two animations. Uh in any case, we're going to need the reference to both of those nodes. So, uh shift and select both of these, right click, access as a nickname, drag them into our code here.
Uh make sure you have both, and let's start by disabling the collision shape.
And then, for the animation player, let's just play one animation just to make sure that everything works properly, and then we can figure out which is the right animation to play.
All right, so we now need to call this uh open function on our door. And uh so, this is going to come from the player's standpoint whenever they kick the door.
So, let's go over to our player and figure out how do we detect that we're close enough to a door that we can actually open it. So, if we go over to our player, look at our 3D scene, um there's currently two ray casts that we're using to interact with the world.
This uh select ray cast here, which is meant to figure out whether we're looking at something that's pickable.
And then, this um weapon or is it weapon reach ray cast. Um so, this one de facto we're not going to use because if you don't have a weapon in hand, then this is going to be disabled. Um it should be disabled.
Um So, we can't really count on it. This one actually think maybe too far into the distance, right? Like we shouldn't be able to open a door when it's so far away from the player and we're just kicking up in the air. So, uh this is a matter of preference, but maybe uh quick and easy way to do this is just to have a third ray cast all together, uh which I think will probably be cleaner. So, I'm going to go into main camera, right click, add child node. Let's go ahead and pick ray cast 3D. Let's rename this to door ray cast.
And a couple of properties here. The target position right now it's looking downwards. Let's set the Y position to zero and the Z position to minus one.
And I think this should be good enough.
We're going 1 m in front of us.
Um that may be too much. We'll see. I'll let you figure out and play around with that property. Collision mask, we want to make sure that we're looking for doors. And then in terms of colliding, we want to make sure we collide with bodies, right? We're going to be colliding with the static body of the door that we created earlier.
So, we're going to need a reference to this door ray cast in our code. Right click, access as unique name, and then at top over into the player script.
Um let's drag this node into our uh on ready variables. I'm just going to reorder it.
And uh yeah, if you want to try this, this is a fairly trivial challenge. We need to be able to uh check whether we're colliding whenever we're kicking and and then calling out the right functions. So, if you want to try this, uh take a couple minutes and see if we can uh if you can get it to work, and then you can compare with my solutions.
All right. So, um now that we have a reference to the door ray cast, we just need to check if we are colliding with that ray cast. So, let's go over into the player state kicking.
And here when we enter the tree, let's check if player.door_ray_cast is colliding.
If we are colliding, then let's go ahead and have access to the door.
And then let's go ahead and open it.
And let's give it the player's dot global position.
All right. Um so, now that we have Oh, I think we need to pass it the global transform actually, not the global position. Let me go here. Source transform going to be a transform 3D.
And let's go back into the player and player's take kicking and let's pass the global transform.
All right, let's try this out.
If I go and I'm far away from the door, if I'm close enough, and I open the door. Great. It actually ended up opening it the right way, so I guess we got lucky. But, this is kind of the second challenge here that I would have for you because if we're to open it on the other side, probably wouldn't make a ton of sense, right? If I open up the door and if I use the open left and if I kick this forward, it shouldn't open towards me. So, try to figure out how do we figure out what is the right animation to play? And this has to do with the position of the player and the transform the way we're looking at it with the transform of the door. I still think the door is pretty thick, but maybe it's because it's a single solid color, so maybe we can tweak this uh accordingly. Anyways, try to do that challenge. I do think it's a very interesting part of um uh core game mechanics to understand whether two objects are facing in the same direction.
All right, so this is a very important concept that you will be using constantly in every single one of your games. So, you want to figure out whether two objects, two characters, on our end it's a door and our player, but potentially it could be a door and an enemy or a player and then the enemy, whether these are looking towards the same direction. And I'm going to go to go ahead and create a brand new scene here just to illustrate. Let's create a 3D scene and then I'm going to instantiate you don't need to do this on your end. This is just to articulate things and then let me instantiate the player as well. Okay, so these are right now two different scenes and I'm going to move this guy back. All right, so right now these two characters are looking towards the same direction and by the way when we're saying looking towards the same direction, we want to look at the forward vector of both of these characters. I'm going to be looking at the local space here. I'm going to rotate this guy around you can see that the forward direction of the player is actually the negative basis.z, right? This is the basis the local basis. This is the z-axis. So the forward direction is the negative basis.z. Same thing for this guy negative basis.z, right? It's looking this way. So when we want to check whether they're roughly looking towards the same direction, we basically want to check whether these characters look is somewhere between here and here. Or if the forward vector is between if you look at the difference between this vector and the forward vector of the character is between minus 90° and plus 90°.
So let's look at the for those different values. Let's look at a little bit of of trigonometry.
So I'm going to open up what's called the unit circle. The unit circle is basically a circle where the radius is one and on this unit circle you can see that when you have a triangle with the hypotenuse of size one, we can directly get the value of the cosine is here and the value of the sine is here.
And so as I move this point around the circle and as my angle increases, you can see the value live of the cosine is and the sine is. So we're actually only going to be interested in the cosine is here. So let's picture that in in orange here is the forward vector of the character maybe the zombie and then in red is the forward uh forward vector of the character. So, the fact that they're looking towards the same direction means that the angle here is anywhere between 0 and 90° or 0 and -90°, right? Like both as long as we're staying on the right-hand side of this circle, on the right half, then we can say that those two vectors are roughly looking towards the same direction.
So, what's interesting here is if you look at the value of the cosine is as long as I stay on the right-hand side of the circle, my value of my cosine is stays positive. It starts at one here, it goes all the way to zero, and on the other side on that other quadrant, I go from one as well all the way down to zero. And then as soon as I start going on the other side, which means I'm starting to look away, we have like we're looking at different directions, then all of a sudden my cosine is is negative. It's a little bit hard to see here, but this is negative minus 0.91.
>> [clears throat] >> So, interestingly, if the two vectors are looking towards the same direction, that means that the cosine is of the angle between the two vectors is positive. And if the cosine is is negative, that means they're looking in opposite direction. So, how is that useful?
Well, in Godot, there is a very simple math operation that we can do between two vectors called the dot product. And uh looking at the definition of dot product in Wikipedia, you'll see that the uh definition when you multiply when you do a dot product between two vectors, the result is the length of vector of the first vector times the length of the second vector times the cosine is of the angle between the two.
We already know that these two lengths are positive. Those are length. So, they're always going to be positive. So, the dot product has the same sign as the cosine is. So, in Godot, we can actually use this math operation. We can do a dot product between the two forward vectors and look at the sign of the resulting uh the result. And if the sign is positive, that means that the cosine is is positive and so those two vectors are looking in the same direction. If the sign of the dot product is negative, that means that we are looking at opposite direction because the cosine is is going to be negative. So, let's go into the code. We'll do a dot product between the forward vector of the door and the forward vector of the player.
And if those are positive, that means they're looking towards the same direction.
And if you let me go over to our level here. So, if I look at the door >> [clears throat] >> right here. So, the the forward vector is looking at this way here and our player is here looking this way. So, that means that if both of those are looking towards the same direction, we'll want to open the door towards the right, right? Like this will open like this.
So, let's go into the code and try this out. We'll just do a dot product of the forward vector of the door and the forward vector of the player. If the sign is positive, then we will do open right. If the sign is negative, we'll do open left because that means the player is on the other side here of the door looking towards the door.
All right, so let's go into the code and uh and make those changes. So, I'm going to hop over to uh door inside our scripts and here rather than do a random uh open left, we're going to first calculate the forward vector for the door. So, this is the minus global transform.
Global basis dot Z works as well. And then the player forward equals minus source transform dot basis dot Z. Okay, and we're going to do the dot product between the two. And again, this is a very simple mathematical operation that's offered by by Godot called dot and we'll just uh multiply it by the player forward. So, now we know that if the dot product is positive, then we'll be playing open right.
If not, we'll be playing open left.
All right, let's go ahead and try this out. So, uh right now I'm going to uh open and it's opening in the right direction. Let me go ahead and try the other uh aspect.
Oh, I don't want to I don't want to save this scene.
>> [snorts] >> Uh but, let me go over into our level, and I'm going to move the player spawn, and we're going to spawn on the other side of the door, and we'll try to open it on the other side.
Okay, so right here, I'm going towards the door, kicking it up, and now it's it's generating the right animation. So, this is going to be so critical in every single one of your game. This is just such a a core important part of gameplay to understand whether two objects are looking or facing towards the same direction. So, hopefully that made sense, but you know, again, if you have any questions, feel free to ask um you know, in the comment section below. So, we probably want to start adding some doors around our level. Uh we don't need to add them everywhere, by the way. Um I do think that at the end of the day, those doors will be good to segment out the entire level, and then we'll start introducing some key system to make the level a little bit more interesting, and force the player to go and discover uh pretty much all the rooms before they go on to the next level.
All right, so let's go ahead and maybe add a second door to our level. I'm just going to take this one, press Ctrl D to duplicate it, and then I'm going to move it uh over there, and that will allow us to just test the entire flow end to end. Um but yeah, overall, with these doors now working, and the kicking mechanic in place, uh this is going to be it for this episode. So, we have yet to uh be able to stun the enemies by kicking them, which we'll probably be adding further down the line. Um but, overall, I hope that this episode was use was useful, because we basically went over a lot of the same things which we uh did from the start, whether it be creating a brand new mesh, texturing it, uh importing it into the dough, uh creating this new animation here, tying it to a new a new state, and then just getting everything to work together to create a new gameplay mechanic. And this is going to be kind of the basics for every remaining game mechanics that we're going to be doing out there. So, as usual, if you have any questions, don't hesitate to pop them in the comment section below.
So, in the next episode, we're going to introduce our shields and the ability to actually block hits for both the players and for the enemies. So, this will really help the combat feel a little bit more interesting and challenging than what it is today. Um but it's also going to be a good way for us to review just, you know, additional topics that we haven't yet covered in this episode. So, anyways, this is the time that I want to where I want to thank you again for watching this series. It really means the world to me that you would find this interesting and useful, hopefully, to build your own games. I've been in love with game development since I've been a young child and I'm just thrilled to share this passion with all of you. And if you learn anything new and you want to support this channel, just consider using those infamous like and subscribe buttons. Let the YouTube algorithms work in my favor to help the channel grow.
Um I think we're way past the halfway point of this tutorial series, actually.
So, our game is starting to shape up quite nicely and I'm actually pretty excited about the next couple of episodes where we're going to start looking at shaders and then just completing all of our various game play mechanics. So, in the meantime, it's time to take a quick break and I will see you in the next episode. Cheers.
Related Videos

6:13
Computer Science
TOP 15 Data compression Interview Questions and Answers 2019 Part-2 | Data compression | Wisdom jobs
wisdomjobs
281 views•2019-06-28

27:51
Computer Science
CTS 158: 802.11w Management Frame Protection
ClearToSend
4K views•2019-02-04
23:21
Computer Science
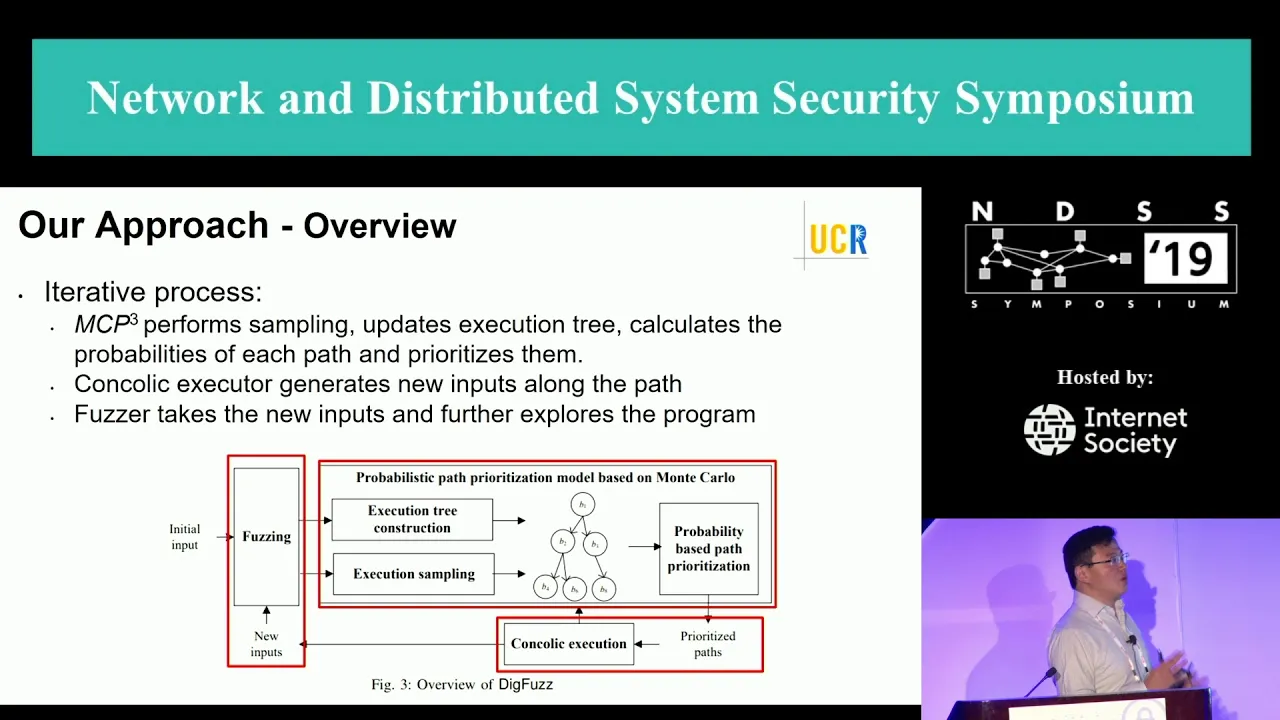
NDSS 2019 Send Hardest Problems My Way: Probabilistic Path Prioritization for Hybrid Fuzzing
NDSSSymposium
496 views•2019-04-02
12:48
Computer Science
How realistic is Cities: Skylines?
CityBeautiful
159K views•2019-02-14

46:39
Computer Science
GUIs & TUIs: Choosing a User Interface for Your Python Project | Real Python Podcast
realpython
2K views•2025-04-04

25:15
Computer Science
The OSI Model - Explained by Example
hnasr
225K views•2019-05-12
1:10:47
Computer Science
Cloud Computing - Introduction
elithecomputerguy
98K views•2019-10-07
2:24
Computer Science
From Traveler's Dilemma to Dynamic Routing | Demystifying Networking
IITBombayJuly
5K views•2019-08-04
Trending

13:38
Law
WOW! Judge TURNS THE TABLES on Trump in His OWN $10B LAWSUIT!!!
MeidasTouch
197K views•2026-07-23

13:25
Business
Playstation NO DISC/NO BUY Fight Is Over...
DavidJaffeGames
4K views•2026-07-23

22:40
Business
Steam and Xbox Just Dropped The Hammer On PlayStation
OhNoItsAlexx
9K views•2026-07-23

16:52
Anthropology
Americans Confused in Australia for 17 Minutes Straight
IWrocker
17K views•2026-07-23