Water's power comes from its ability to create thrust through pressurized flow (Newton's third law), as demonstrated by water-powered vehicles where pressurized water exiting a tank creates forward motion; this same principle applies to hydroelectric power generation, where falling water spins turbines to create electricity, and tidal power, where the natural rise and fall of ocean tides can drive generators to produce renewable energy.
Installieren Sie unsere Erweiterung an, um sofort in jedem Video zu suchen
The Power of Water | Science Experiments | Science Max | NEW COMPILATIONHinzugefügt:
This is Science Max experiments at large.
>> SCIENCE MAX.
>> SO, I've joined Anthony and we're going to max out our water powered car. Our small design works by creating gas, which creates pressure, which forces the water out of the bottle, creating thrust. Our new plan is to get a water tank, put it on wheels, and put water in it. Then, we use an air compressor to pressurize the air inside. When we open the valve, the water is forced out this way, which causes our water car to go that way. OKAY.
SO, water car maxed out version.
>> Uh-huh. Huge water tank >> and filled with lots of water and lots of uh >> lots of air.
>> Yeah. Pretty good, right?
>> It's a lot of it. So, >> did it mess up did it mess up my hair?
>> Uh, no. You look fine. You look great.
>> Okay, good. Now, the only thing left is we just got to open uh this valve here, right?
>> Yeah. You want to do the honors?
>> Uh yeah. Yeah, let's do it. Okay.
>> Okay. HERE WE GO. THREE, TWO, ONE, GO.
>> WE OPEN THE VALVE and our pressurized tank moves forward. The air pressure in the tank forces the water out with enough force to move the tank.
>> Awesome.
>> That was awesome.
>> That was a great run. Yeah.
>> Amazing.
>> So, pressurized water tank on wheels.
>> Totally works.
>> Totally works. Total success. Yeah.
>> Um, so because this is Science Max, the only thing we can do now is make it bigger.
>> Bigger. Exactly. Yeah. Uh, problem is I don't think we're going to find a tank bigger than this one. Um, so >> cuz then it would be too heavy, right?
>> Maybe maybe what we can do is just get a lot more water and then and then we find a way to pressurize the water.
>> Oh, so don't pressurize the whole tank.
Just just the stream of water that's going out >> that comes out. Exactly. Something kind of like a like a fire hose. a fire hose, right? So, so we take a big container of water, >> right?
>> And we I guess we would need a pump.
>> Yeah, like a pump would be perfect.
>> So, then we we suck the water out of the container, put it through the pump to pressurize it, shoot it out of a fire hose.
>> Uh-huh. And then our car goes flying.
>> Goes flying.
>> Okay.
>> YEAH, LET'S DO IT.
>> YEAH. AMAZING.
>> Our maxed out water car worked pretty well. Now, it's time for something even more maxed out. We start with a giant tank on wheels. We add a pump to pressurize the water and a fire hose to shoot it out the back. What's more, this version is big enough for me and Anthony to ride.
>> WATER CAR.
>> SO, this amazing >> is the more super improved water car.
This tank holds 1,000 L and right now it has 720 L of water.
>> We have a pump.
>> A pump. That's right. Our water pump.
So, the idea is we take the water from this container out through your hose.
Really pressurized, going really fast that way. Our car goes really fast this way. All we got to do is just turn on the pump and we're ready to go.
So, we fire up the pump and the water stream comes out really strong. So strong I can barely hold on to it.
>> HERE WE GO.
>> But even so, there's a problem.
>> What's going on BACK THERE?
>> I GOT IT.
just fill it off.
>> Yeah.
>> Nothing happened.
>> No, nothing really. Well, something happened. We got wet, but it didn't really >> It's too heavy.
>> Too heavy.
>> So, you're on it and I'm on it.
>> That's a lot of weight. We don't ride it. That's something.
>> Yeah. And >> also, this is kind of going crazy.
>> Yeah. Cuz if nobody's holding it, it's just going to flap around.
>> So, we'll have a brace here.
>> Shoots it that way. That's good. And then we'll need I feel like we'll need something to kind of propel it. Maybe a better propulsion kind of like one of those steamboats.
>> So we put a big paddle wheel here.
>> Exactly.
>> And we aim it.
>> I guess we aim it down at the Yeah.
Exactly.
>> Like that.
>> And then >> at the paddle wheel and then the paddle wheel spins and that propels the car.
>> Exactly. Right.
>> Right. Okay.
>> Okay. Well, we can do that. Let's do it.
>> Sounds good. Together. You know what? I have a paddle wheel because I had a failed hydroelectric This is called flyboarding.
POWERFUL JETS OF WATER ARE BEING SHOT OUT from this board at my feet. Whoa.
The engine on the watercraft behind me creates the water pressure which travels up the hose and through the jets. The force of the water is strong enough that I can use it to fly around.
So, what's the difference between this and a water car? Well, >> we don't have to take THAT MUCH WATER WITH US BECAUSE IT STARTS IN the lake and ends up in the lake. So, the only water I have to carry is in the hose that goes up to the platform.
Flyboarding is lots of fun, but it takes some practice to get it right. Bouncing on jets of water isn't easy, but I got the hang of it.
>> It's all due to Newton's third law. For every action, there's an equal and opposite reaction.
>> Physics. Woohoo.
>> One of the ways you can experience the power of water is watching it wash away dirt. You can experiment with this yourself by making your own erosion table. To make your own, fill a plastic tub with sand and tilt it up. Cut a hole in the tub at the low end and put a hose with a trickle of water at the high end.
Then to complete your model, fill it with a little happy town. This small model shows how rivers cut their course to the ocean by following the lowest point. Try to design your town and the layout of the ground so the river goes around the buildings. I'll see you later. I'm going to take a swim in the river. Now, there are lots of ways to experiment. Change the amount of water or the steepness of the angle.
>> Look at the soil. It's all getting eroded over here. Or the way the town is laid out. Every time you do it, the river goes in a different direction. And have fun.
>> Oh, I'm I'm tired. I'm just going to lie down.
>> And that is the power of water. When water is going fast, it has a lot of force. This is a power washer. It's made for cleaning concrete and wooden decks, but it doesn't use soap and it doesn't use heat. It only uses the power of water. Let's try it out.
The power washer creates a stream of water that is moving really fast. It has the force to clean concrete, strip the paint, or even the Science Max logo off wood. But how do I max out the power washer? What's the most ultimate use I can think of? Power washer. Pumpkin carving.
Heat. Heat.
The power of the pressure washer creates a stream of water strong enough to make short work of my pumpkin. Power washers may only shoot water, but they can be dangerous. So, don't try this at home.
Yeah, science.
>> Greetings, Science Maximites. My name is Phil and this is Science Max experiments at Large. And this is a syringe. You might know syringes from when you get a needle at the doctor, but syringes are used all the time in science because they let you measure very precise amounts of fluid. Now, check it out. You push the plunger down and it comes out the top. Or you could pull the plunger in and it would suck more fluid in this way. But check this out. I've got a syringe attached to a hose here. And this hose is filled with water. And I wondered if the hose was really, really long, how hard would it be to push this plunger down? Of course, I don't know where the end of the hose is because it was really long and I had to string it all the way around. So, here it is. Okay, so let's find out.
Push the syringe down and water will come out the other end of the hose.
Pretty cool. You see, this is called hydraulics. Hydraulics is a branch of science that deals with fluids. Fluids like water. But hydraulics are also a mechanism used in a lot of machines.
Check this out. This is a syringe with a short hose on it. Much shorter this time. and I press down on the plunger of the syringe and water comes out. And I pull in on the syringe and water goes back in. Because the plunger is airtight, it allows me to push or pull the water. But what if I close the system and take another syringe and attach it to the end of the hose like this? Well, then if I push this plunger in, this syringe fills up with water. And then I pull this plunger out.
The syringe empties. So check it out.
This plunger raises and lowers based on what I'm doing with this plunger. And you know what that means? We've made a remote control. Huh? Check it out. So if you take two syringes and you take a hose and you attach them to something you want to remote control, voila, you can build something like this. We have made our very own robotic arm that you can power remotely with hydraulics.
Pretty cool, right? If you want to build one of these yourself, here are the materials you need. First, you need two supports and the arm. I used pieces of wood, but you can use wooden spoons, rulers, or pencils. You'll need some craft sticks, elastics, and a paper plate. And of course, two syringes and a hose, which you can get in an art supply store or a hardware store. Here's how you build your own hydraulically powered arm. First, make the base by tracing holes for your supports the width of a craft stick apart. Cut out the holes and use a craft stick and elastic to secure the supports underneath the plate and on top. Then add some elastics and a piece of craft stick in the middle so the supports won't scrunch together because we are holding this whole thing together with elastics.
>> Then get your syringe in there and keep it propped up with more elastics. Then get your arm and slot it in between the supports. The arm should be horizontal when the syringe is half full. elastics to attach the arm and the syringe. Then push down on this end of the plunger and haha, you have a remote control robotic arm.
You can also max it out even more by adding more degrees of movement. You can make the arm rotate side to side. You can even add a little claw attachment at the end and power it all using syringes.
Haha, science and hydraulics. M a delicious plate of cheese and crackers.
My favorite snack. But these crackers are pretty salty, so I should probably pour myself a glass of water first. Huh?
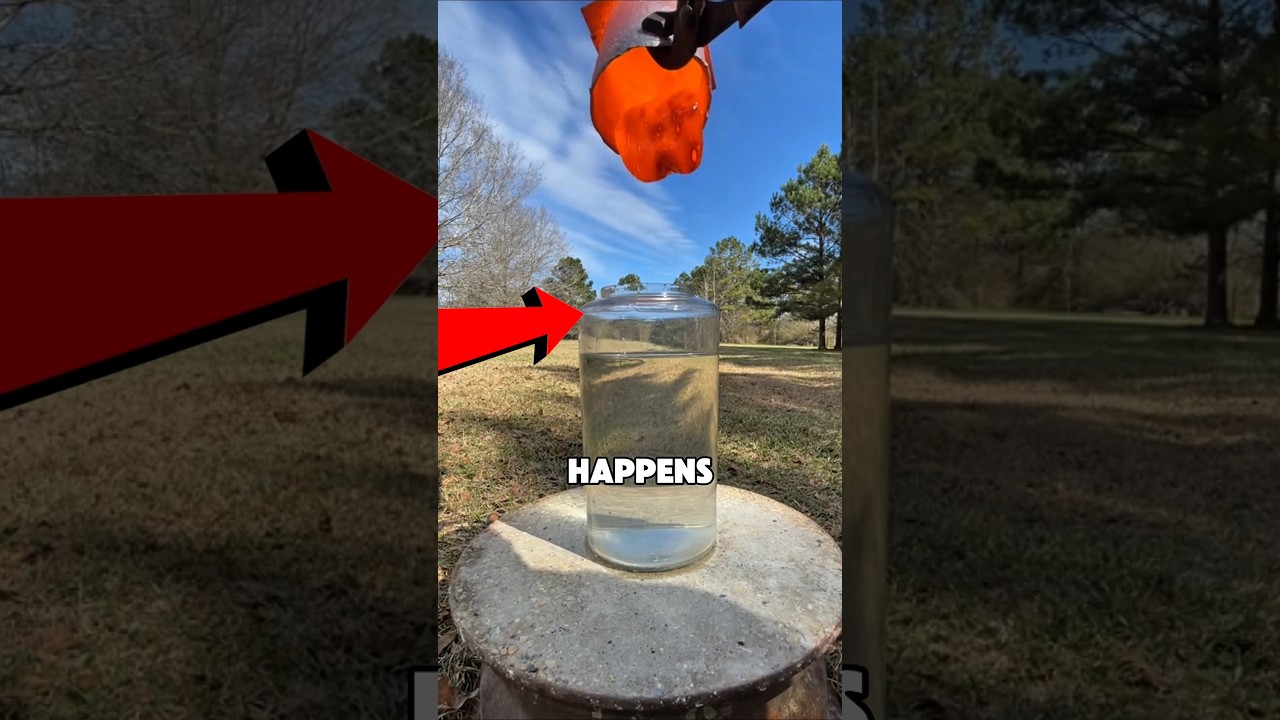
No. MY CHEESE ARE CRACKERS. WHY? WHY DOES THIS HAPPEN? WHY DOES THE WATER STICK TO THE GLASS? WELL, because it's science. And the reason why it happens gets a little complicated, but it boils down to this one simple thing. Water likes to stick to things. Huh? Did you see? Did you see how it stuck? No. Of course you didn't. You know why? because it only sticks on a small scale. See those drops of water? That's water sticking to the surface. But it only works when the surface tension of the water is less than the force of gravity.
Which is why water drops fall when they get bigger. So it sticks to things. That still doesn't explain why you can pour water out of some containers without any drips and other containers make it nearly impossible.
It's all about the angle. Water will flow very easily when there isn't a large change in direction, like around the curved top of this glass. But when there's a big change in direction, like at the mouth of this teapot, the water can't make that turn as easily. This is also why pouring from a full glass is much messier than one that's less full.
Pouring out of a full glass, the water only needs to change direction this much to flow down the side. But from a half full glass, the water would need to change direction this much. So all this happens because water likes to stick to things. So let's do an experiment and coat this glass with hydrophobic spray.
Now hydrophobic coatings repel water. So if it's repelling the water from the outside of the glass, will we still have the same problem? Well, let's find out.
Hydrophobiccoated glass, nonhydrophobic coated glass, or just regular glass.
Water likes to stick to surfaces, but it can't stick to one coated in hydrophobic coating. That's impressive. Should we try something else? Well, that's one way to solve the dribbling glass problem.
Except you can't coat your glasses at home with hydrophobic coating because it's not good to eat. The secret is using a container that has a very sharp angle between where you're pouring the water and the underside of the glass, like this jug. And there you go. Now I can enjoy a nice glass of water with my cheese and crackers. Uh oh. Right. I um Wait, hold on. I can re I will remake the crackers into See, look. See, it's just It's fine. It's fine. I'm not really going to eat that. I'm just kidding. Max Historica.
This is Arimedes.
>> WHAT? WHO SAID THAT?
>> It's me, the narrator. We're doing a segment.
>> Oh, well, I was working. Don't sneak up on a guy like that.
>> This is Archimedes, an ancient inventor and one of the greatest scientific minds ever.
>> One of his famous inventions was the Archimedes screw.
>> Um um >> which was used to make holes in wood.
>> No, that's not what it's for. It's for water, >> right? Used to make holes IN WATER.
>> WHAT? WHAT? NO. LOOK, DID YOU EVEN DO your homework?
>> I um hold on. It's uh it's here. It's here somewhere. Um look, I'll just show you. You see, in ancient times, we had many uses for something that could lift water up from a well or to take lake water from uh the lake and put it into a farmer's field and that sort of thing.
>> Ah, okay. I've got it from here. So Archimedes invented a screw and he drilled a hole in the side of that container.
>> No, no, no. Look, just just sit down.
Oh, I'll I'll explain it. Okay, >> I am sitting. I'm in a voiceover booth.
>> Good for you. Now, be quiet. Now, look, what you do is you put the screw in the water like this. And then you want to raise the water higher. You see? And so, turn it around like so. And the water fills each gav in the screw and it starts to come up. It gets to the top.
And look at this. Look, we've got water coming out the top there. The water is being pumped up. It is the first water pump.
>> I see. Still seems like a lot of work to fill a glass, but it's very cute.
>> NO, WE MADE THEM BIGGER. WE OBVIOUSLY WERE NOT GOING TO MAKE THEM THIS BIG.
THIS IS NOT VERY USEFUL, is it? My dear Arimedes, one of the greatest scientific minds ever.
>> Being a chef is my absolute passion, and cooking up science recipes is my specialtity. I'm Buster Bea, and this is Cooking with Science.
OH, HELLO. WHEN YOU'RE A PROFESSIONAL chef like me, you spend lots of time perfecting the perfect recipes. I know my way around a kitchen. And today I'd like to show you one.
>> That's not the fridge. Oh. Today I'd like to show you one OF MY FAVORITES.
QUAIL TRUFFLE gpacho cakes on a plate of ice.
>> Oh, >> beautiful. And here's how to make it.
Take some quail, some truffle, and some gaspacho, and put it into a cake.
Delicious. And here's the interesting part. How to make the plate of ice. Ooh.
How did I do it? Well, I tried many different methods and none were very successful.
But now I let science do the work for me.
So, here's what I do. You see, I've got my large block of ice and I've got a fishing line over the top and on the bottom I've got two heavy weights. Now, we wait.
The heavy weights put pressure on the fishing line. This pressure melts the ice where it's pressing down. As the ice melts, the fishing line moves through the block of ice and eventually cuts its way through. THERE WE ARE. MY HOURS OF WAITING HAVE almost paid off. You see, I've got a perfect line through the ice and I stopped it just before it finished. It's the pressure of the line on the ice that makes it work. The same thing happens when you use ice skates.
You see, it's a very thin line and your body weight presses down on the ice, melts it a bit, and that allows you to glide across the ice. It also allows me to just pop this off. There you are. You see? Perfect plate of ice to put my delicacy on. Let's just try that now.
There we um >> tidal power in 60 seconds.
>> By now you know that in order to create electricity, you need to spin a generator. Scientists and engineers are always coming up with lots of new ways to use natural forces of the earth to spin a generator and create electricity.
One of those natural forces, one of those natural forces is the power of the tides. You see, the water in the oceans doesn't stay still. Every few hours, the water or the tide goes out and then a few hours later, it comes back in. So, if you attach a paddle wheel in the water and attach that to a generator, when the tide goes out, it creates electricity. When the tide comes back in, it creates electricity. That is how you create electricity using the power of the tides. It's water power. In fact, hydro electricity is also using water power. Do we have do we have time to talk about hydro? We don't have time. We we don't. Okay. Come back. Come back.
Hydroelectric power in 20 seconds. 20 seconds. Uh okay. Hydroele electricity comes from water. Hydro means water. So, all you have to do is find a place where water pours down from a height and you can put a generator in there and ta, you're creating electricity with the power of hydro.
I did it. Yeah. Thanks, Ramona. And get me one of them fizzy drinks. Not too fizzy, just sort of medium fizzy. Thanks a lot. Hello. Do you have trouble knowing what is a solid, liquid, or gas?
Are you confused by jello? I mean, which is it? Is it a solid or is it a liquid?
Water is a liquid, but what about when it's ice? Well, you got to know your states of matter. There are three main states of matter: solid, liquid, and gas. And there are three rules that you need to figure out which one of them is which. Does it flow? Does it fit the shape of its container? And can you squeeze it? Rule number one, does it flow? Solid, liquid, gas. Here's a gas.
Does it flow? Do the particles pour over each other and cascade down? Yeah. Yeah, they do. Does a liquid flow?
Yeah. Yeah, it does. Does a solid?
Nope. Rule number two. What happens when you put it in a container? Does it take the shape of the container? Gases take the shape of the container. Liquids takes the shape of the container. Solids do not take the shape of their container.
I know what you're thinking. You're thinking, I get the whole pouring and taking the shape of the container, but come on. Liquids and gases, they do both of those things. Well, it all comes down to rule number three. Can you squeeze it? Now, solids, you you can't you can't really squeeze them. Liquids, you can't really squeeze them. Gases, bam, you can squeeze them. You see, gases compress. Liquids and solids, they don't really compress very well. The other difference between gases and liquids is gases will take the shape and the volume of the container they're put in. Liquids don't do that. So, there you go. Solid, liquid, gas, and the rules.
Does it flow? Does it take the shape of the container? And can you squeeze it?
Now you know your states of matter.
That'll be 650.
Ähnliche Videos

Is dark matter real? - Why can't we find it? - physicist explains | Don Lincoln and Lex Fridman
LexClips
1K views•2026-05-30

Saptarshi Basu - Spectacular Voyage of Droplets: A Multiscale Journey to Extreme Flow Conditions
DAlembert-SU-CNRS
152 views•2026-06-02

A 6.0 Just Hit Hawaii — And It Came From The Wrong Place
TerraWatchHQ
115 views•2026-06-03

The Split-Second Mistake That Made Bouncing Bettys So Deadly
NoMansLandChannel
253 views•2026-06-02
Nobody Expected This Lava Reaction 🤯 #faits #facts
TendzDora
28K views•2026-05-30
The Difference In Charged And Neutral Particles
heavybrainspace
959 views•2026-05-29

The Silent Memory of Glass
UnchartedScienceworld
146 views•2026-05-30
A380 vs Every Vehicles Crash Test Challenge | Which One Win?
BeamLap
163 views•2026-05-29


