This tutorial offers a pragmatic blueprint for replacing cumbersome logic with UE5’s elegant, data-driven Chooser system. It effectively bridges the gap between fundamental vector math and scalable animation architecture for polished combat feedback.
Install our extension to search inside any video instantly.
EASY Directional Hit Reactions in Unreal Engine 5 (Using Choosers)
Added:Let's make directional hit reactions in Unreal Engine 5. In this tutorial, I'll show you how [music] to detect which side of the enemy you're attacking from, factor in melee swing direction, and use Unreal Engine's chooser system to automatically play the right animation.
>> [music] >> What's up, guys? Welcome to Tech Drill Games, where we break down the secrets of game development. Before we jump in, this video is a collaboration with More Studios, and for today's setup, I'll be using animations from their Hit React Pro Pack, which includes over 100 hit reaction animations, knockbacks, additive hit layers, and a complete plug-and-play framework for handling hit detection and reaction selection. It's easily the most complete hit reaction solution available for Unreal, and I highly recommend checking out their fab page and YouTube channel linked in the description below. But, if you'd rather follow along with free assets, I've also linked some Mixamo animations that will work, too. In this tutorial, I'll be working in Unreal 5.7, and to save a little setup time, I'll be using the project from my previous hit detection tutorial. Okay, so if I open my project and I click play, if we go to our pistol and fire, we still have it set up where hitting a specific limb will ragdoll the enemy and kind of apply an impulse to shoot them back. And that's still working, but we're not going to use that in this setup, cuz now we want our hit to actually apply a hit reaction. So, if we go back to our shooter weapon base, and we go into our fire bullet, we can see our logic that's actually detecting the enemy and then applying the directional impulse. So, if we click into our directional impulse, we're just going to bypass all of the ragdolling and impulse logic, and all we're going to do is uh spawn our sparks and then play our impact sound. So, now if we hit play and we shoot our enemy, it's going to apply those sparks and the sound.
Also, something I set up since the last time, if I press E in the project now, the player will do a punch left and punch right montage, and they kind of just alternate that every time you press E.
And I'll show you really quick uh the way that I'm setting that up. If we go into the first-person character, when I press E, I'm setting this punch right variable. Um it's just a boolean.
And so, when that's true, you're punching right. And I just check uh what it's currently set to and then set it to be the opposite value. Um so, every time you press it, it's going to switch between right and left. And then I use a select node to pick my punch montage.
And I'm actually using a struct here, but you don't have to. That I'm just using it because I wanted a different speed um for each montage, and then it also a level sequence to play the camera animation. And again, this is all optional. Um so, then I just play the montage. I split my struct, and I get the attack speed, and I get the montage to play.
And then I do the same thing here um to split off the play rate for the level sequence, and then play um a specific camera animation for the montage. And then this setup is pretty much exactly what we were doing in the um seamless gameplay to cinematics uh tutorial. So, if you want to see exactly how this works, uh definitely check out that video.
So, that's essentially all we need for our base setup because we're going to set up our hit reactions to work with our ranged weapon and with our melee.
And one thing you'll note too, right now we're not tracing uh to detect if we hit an enemy so we're going to have to set up first.
And one more thing [music] to note, for my first-person punches, I did take animations from the Hit React Pro pack, and I just modified them so that they work for first-person. So, I stretched out the arm so it's in front of the first-person camera.
>> [music] >> Um a super like quick and dirty way to do this.
And then I just turn them into montages, and then I'm playing the montages.
So, if you want to do something similar, you can. Um if not, this will work in third-person or whatever your setup is.
So, now to set up the trace for the punches, what we're going to do is we need a few assets. So, let's right-click and search for enum. And for the first one, we'll do E {underscore} punch side, I guess we'll call it. And this will be basically the punching direction. So, if you're punching uh with your right fist or your left fist, we want to know that.
Um so, we can in this enum create two enumerators, and we're going to call the first one left, and the second one right. And we're also going to add, since we probably have to feed this into our ranged weapon, um let's also add one for none. Okay, click save, and then let's make another enum. So, search for enum again.
Let's call it E hit direction. And then for the enumerators here, let's do front, back, left, and right. And then save that as well. Now, we also want a anim notify that's going to do a few things for us.
Um we'll just right-click, search for blueprint class, anim notify, and then call it AN_ trigger attack trace.
And if we double-click that open, we want this notify to have a variable. So, let's actually click plus on variable, and then we're going to find our new um punch direction or punch side variable. Um so, our enumerator. And we'll click that, and we'll rename it.
And then super important, we want to check the instance editable eyeball here, um cuz we want to actually set this in our notify once we add it to our montage. So, do compile. And then for functions overridable, do receive notify. And then what we're going to do in here, we're going to get the owner of the mesh component, and then we're going to cast to the first-person character, just like that. And then return value true, and then we need a function in our first-person character to trace for the hit when you do your punches. So, let's go into our first person, um go above our E input here, and just do custom event, and just call that trace for hit. And then this should take in an input, and for the input, it's also going to be our E punch side.
And then we'll just call that punch side as well.
So, what we can do using our punch side, let's actually get a select node, and then it has our left, right, and none.
And then what we can do is get our mesh component, and then drag off the mesh component and get socket location.
And we want this for both our hand L and our hand R. And then for L, just plug that into the left, and for right, plug that into the right, just like that. And then we're going to do a sphere trace, so let's just search for sphere trace by channel, and then uh this left and right location for the fist is going to be the start and end location cuz you just want to create a sphere at the end of the fist. Um and then for radius, we'll just do something like 100. And then you can keep ignore self, that's fine.
Um and then we want to drag off of our out hit break hit result, and then get our hit actor, and then we're going to cast to BP enemy.
Then if our cast is successful, we'll just print out the name of the enemy.
This is going to do nothing now cuz we're actually not calling this uh function yet. So, if we go back to our anim notify, we want to call our trace for hit. And then right now it's choosing uh just the default left. We want to set this in the actual montage itself, so we're going to just use our variable from the notify here to set the punch side. Do compile, and then we need to add this to our montages. So, in our punch left montage, somewhere around here we'll probably trigger the trace.
So, we do add notify, and let's search for trigger attack trace, and we'll just set it there. And then if we click on our notify, and you go to uh the default settings, you'll see we have punch side, and you can actually just manually set what the side is. So, from here we're punching with our left hand, so it it can stay as the default, but let's go into our right montage, and then similar spot will trigger the trace, so we'll go to add notify, look for our trace, and if we click it in here, then here we'll set it to right. Okay, so now if we go back to our Anim Notify, we're triggering our trace uh after we cast to our first-person character.
So, if we go through here, then what we're doing is we're checking the punch side that we set on the notify.
And then we're getting the socket location for the left or right, doing a sphere trace from there, and then we're just casting to that enemy and printing the display name.
Let's also set Oh, yeah, it's already set. So, um draw debug type for duration.
Um if you want to actually visualize the trace, and then let's click play and test this out. So, yeah, you can see it's a pretty big trace. Um we're being pretty forgiving with the size here.
Um but obviously we didn't hit an enemy.
So, if we go close to one, yep, BP enemy four, BP enemy two, and BP enemy three. So, our traces are working.
So, I'm going to undo for duration. Just going to set that back to none.
And I'm going to stop printing the displayed enemy. Cuz what we actually want to do off of here is trigger um our hit reaction on the enemy.
So, to do that, let's go into BP enemy.
And we're going to create a new custom event.
And we're going to call this trigger hit reaction.
And then this is going to have an input for punch side. So, let's add that variable. Just going to let you know that. We'll just call it punch side again.
And then drag off of punch side and do promote to variable.
Okay, so now we want to calculate our hit direction. So, let's also add a variable for that. So, let's do plus hit direction. And then we want to do function for this. So, let's create one and just call it calculate hit direction. All right, so to figure out which side of the enemy the player is standing on, we're going to use a math concept called dot product, which is just a quick way to measure how much two directions are pointing the same way. The way we can set that up is just get the player pawn, and then get actor location, and we'll subtract that from the enemy location. So, if we get actual location again.
This will be self and since we're in the BP enemy, um that'll be the enemy's location. So, we subtract that and then we can normalize that so that we're working with uh direction and not distance. And then we can use our dot product node. And then for the first check, we want to use the forward vector of the enemy cuz this is going to check whether we're in front or behind them.
So, let's get forward vector.
Um get actor forward vector.
And then self cuz we want the enemy's forward vector. Then what we can do is the same logic, but instead of doing dot product for forward vector, let's also do it for the right vector. So, get actor right. And then this one will tell us whether you're on the left or right side of the enemy. Okay, then the first check we're going to do is we're going to get the absolute values of both of these. So, we're going to ignore whether it's negative or positive.
And then we're just going to check which one is greater. [music] So, the first check is going to be just what axis we are. So, we're either front/back or left/right. And then if we're true, we know we're front and back. So, we want to check specifically whether we're on the front or the back.
So, instead of doing the absolute, we're going to do the normal dot product and then let's do a greater than and check if we're greater than zero.
And then let's do our branch again.
So, if you are greater than zero, you're on the front side. So, what we can do is get our hit direction, set it, and we'll just say front.
And then if [music] you aren't, then you are on the back side.
And then you could probably guess we're going to do the same for left and right.
So, if you're not front and back, then you are left or right, but we need to check specifically which one you are.
So, drag off of dot product here.
Do another greater than.
And then if you're greater than zero off of this dot product check, then you are on the right side. So, we will set this to right, and then if you're false, it's left. So, actually, let's test this one more time. I will actually hook this back up to our event tick. We'll do just like that, and then we'll actually just print the hit direction. So, let's get that to print string, and on [music] tick, we'll just kind of constantly print out which side we're on. So, right now, front.
Go to the back.
I'm on his left side, and then I'm on his right side. So, yeah, that's all working.
Okay, then again, let's remove our calculate direction. We'll get rid of our prints, and we have our working function now.
So, if we go back to our trigger hit reaction, let's just hook up our function here.
And then the next thing we're going to do, we want an evaluate chooser node, but we haven't actually created our chooser yet. Um so, there's a few from the Hit React Pro Pack here. Um he has one for flinching full body, and ours is going to be full body, so let's make a new chooser.
Um and one thing to note, you actually have to have this plugin enabled. So, if you go to plugins, and then search chooser, just make sure that's checked. You might have to click it and restart the engine if not.
Okay, so let's create our chooser. So, let's right click in the content drawer, search for chooser.
Um you can do animation chooser table, and then let's search for anim class, and just search for anim sequence.
[music] We create and call it CT_HitReactions, and then double click that open. Okay, so if you've never used choosers before, they're basically just data-driven decision tables. So, instead of writing a bunch of branches or switch statements in blueprint, we can give the chooser some information, and it'll automatically pick the correct animation for us. So, we want to change a few of these default settings. So, for object of type, um result class, let's actually make this um anim sequence base, and then for our parameters down here, uh class parameter, instead of anim sequence, we're going to do BP_enemy.
And then, for direction, we're going to do input. And then, we can actually just get rid of the second index. So, delete that. And then, let's go over to where it says add row or add column, and we'll first add a column, and then we'll do this as a enum. And then, for our first enum, you'll see now that we set the class to be BP enemy, it gives us all of the variables um we have in our BP enemy. And we want to get hit direction.
And then, let's add one more column, another enum, and then this one will be punch side, cuz those are the two things we want to look at when we're setting up our chooser table here. Basically, we want to know what side of the enemy the player is standing on, and then we want to know if they're punching with the left and right when we're doing our punch animations. And then, for our ranged, we'll probably be more concerned just with the side of the enemy the player is on.
Um but, we can use one chooser table, and we'll set it up to work with both.
So, Okay, so now let's add a row.
>> [music] >> And when you click this, you can see you get some different options. Um you can do assets, or you can do choosers themselves. So, this can get pretty complex. Um we're just going to do some assets to start. So, let's add five different options. So, you can see when you add these, you actually get the enum values to the side, so you can actually set which animation depending on when these enums are set to a certain value.
So, for the first one, we're going to check if you're in front of the enemy, and if you're punching with your right fist. Then, the second one we'll do also in the front of the enemy, and if you're punching with the left. And then, I'm not going to get as specific with the other ones. I'm just going to do kind of general knockbacks um from the other sides. So, we'll do left, and then instead of being concerned with left or right, I'm just going to say any. And then, if you're hitting them from the right side, I'm going to do the same, and just going to play one animation um regardless of which way you're punching. And then, for the last one, we'll do back and then again, I really don't care um which side they're punching from. They're just going to play one animation. And you could get very specific with this and have different punch sides, you know, depending on whether you're punching left and right on any of the sides of the enemy. I'm not going to do that for this tutorial, but feel free to do that.
There's a lot of animations in Hit React Pro, so you can really set it up um as detailed as you want. And in fact, [music] the default setup it comes with is pretty intensive. Um there's a lot of choosers and a lot of different um animations that could pick. So, feel free to go as detailed as you want. And then the last thing we're going to do in our simple chooser is we're going to add one more row and we're going to add a fallback result. So, what this is going to do, if none of these things are true and none of these values match, then it's going to use a default.
And I'm going to do just an asset for the default. And I'm going to use this because I'm using this chooser for ranged and melee. So, if you're not punching with any specific side and you're just kind of shooting them from the front, I want them to do a front kind of knockback that's different than our punch left and punch right side animations we're going to use here.
Okay, so for filling in our animations here for when you're punched from the front with the right fist, I'm going to use heavy head {underscore} L {underscore} 01. And if I play this animation, you'll see it's like a knockback um but they're kind of getting hit from the right side. And even though they're going to their left um because you're punching with your right fist, that's exactly what I want. So, we want that for that one and then we want the opposite one for when you're punching with the left hand, so we'll say heavy head R {underscore} 01. And then when you are hitting from the left side, I'm just going to stagger them. I might just actually use the opposite of this one.
So, actually we'll use the heavy L {underscore} 01 again for this. Heavy head L {underscore} 01. And then we'll also use the right one for the right. So, if you hit them from the right side, we want to play this. And then if you hit them from the back, we want to do heavy underscore head back 01 and we can play that just to see.
And then the very last one we're just going to default to kind of a stagger backwards. So in hit react pro that's heavy head forward 01 and that should be our chooser. So again our chooser is very simple, lot simpler than the hit react pro pack, but we're going to click save.
And then if we go back to our BP enemy we have our evaluate chooser and then let's just set that to be our new CT hit reactions.
And then you'll notice now it's expecting an enemy since that's we made that chooser table with the enemy class. So all we got to do is get a reference to ourself and then now this is going to look at the variables that are here and it's going to pick the right animation based on that. So choosers are really useful so I definitely recommend experimenting with them. There's a lot you can do with them.
So then lastly we're just going to play our montage. So if you drag off of result we can do play slot animation as dynamic montage and if you don't see it you can uncheck context sensitive.
And then the target is going to be our mesh and we just get anim instance.
And then for slot let's just use the default slot that's in the enemy so just name it default slot and I think everything else can stay the same. So >> [music] >> now we should be able to test and see this working for our punches at least.
So let's click play. Oh actually we do need to hook up this function. So we didn't actually call this when we're doing our trace for hit in the first person character so we do actually have to do our trigger hit reaction here and then it'll expect a punch side so let's just drag off of here and hook that up there.
Okay, so now if we click play go up to our enemy.
Yep, so I punched him from the front. I punched with my right fist so So went left.
And if I do it that way, they do the reverse.
Now let's punch them from the side.
Yep, they stagger to that way, which is what we set it to.
And if we punch them in the back, they go forward.
Yep, and from the other side, they go the other way. So yeah, that's all working.
Um if we shoot them, they're going to do nothing cuz we didn't set that up yet.
So let's also set that in our EP Shooter Weapon Base.
So after we set our sparks and our sound effect, let's do the same function. So trigger hit reaction.
And then since they're shooting them, this is why we kind of set that default um last value on our chooser, we're actually just going to set this to none cuz we don't really care. Um there's no not really a punch side when you shoot them.
And then everything else could stay the same. So now let's pick up our pistol.
Yep, and now if I shoot them, they get staggered backwards, which is what that default value is.
Shoot them from that side, they do that.
All right, so that's the basic setup for directional hit reactions using Unreal's chooser system. This was a pretty simple example, but you can take it much further by factoring in specific hit limbs in addition to the player position and swing direction. Hit React Pro already does a lot of that out of the box. So definitely check that out if you're looking for a more complete solution. Big thanks to More Studios for collaborating on this tutorial. Be sure to check out their YouTube channel to stay up to date for future releases including their upcoming rifle motion matching pack. If you found this tutorial helpful, consider leaving a like and subscribing for more Unreal Engine and game dev content. Join our Discord community using the link in the description and as always, thank you so much for watching and I'll see you in the next one.
Related Videos
6:13
Computer Science
TOP 15 Data compression Interview Questions and Answers 2019 Part-2 | Data compression | Wisdom jobs
wisdomjobs
281 views•2019-06-28

27:51
Computer Science
CTS 158: 802.11w Management Frame Protection
ClearToSend
4K views•2019-02-04
23:21
Computer Science
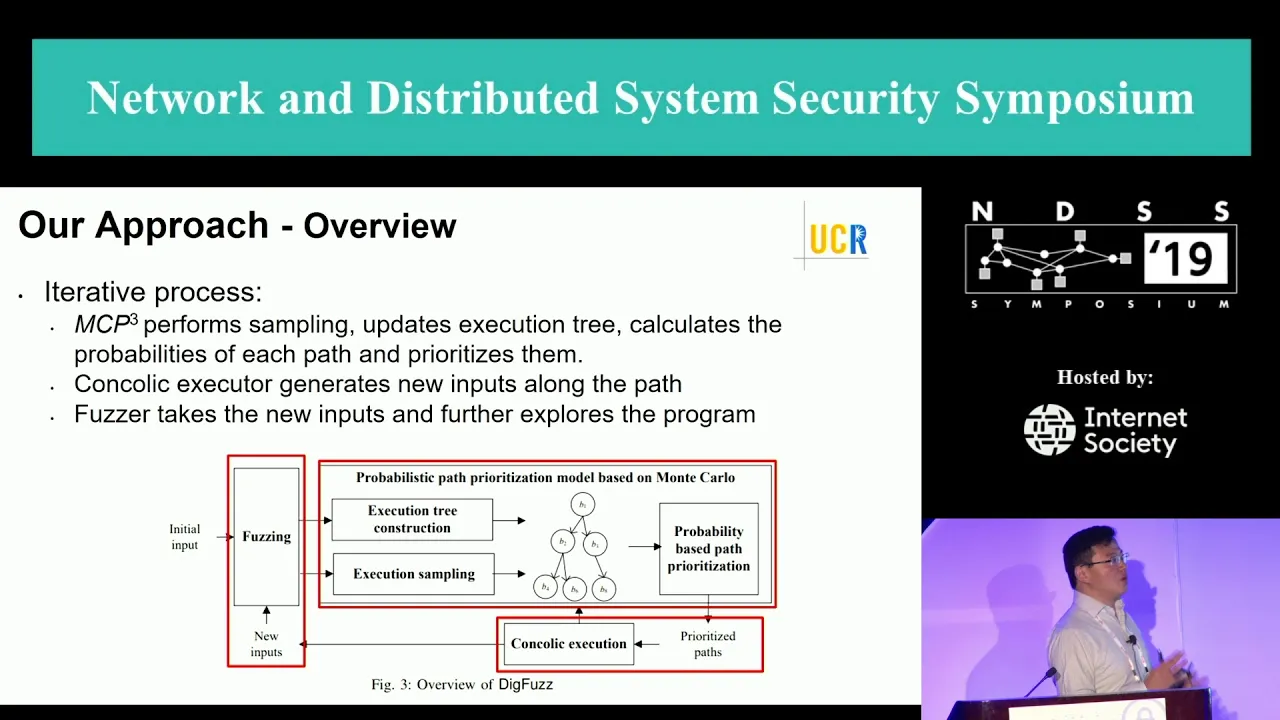
NDSS 2019 Send Hardest Problems My Way: Probabilistic Path Prioritization for Hybrid Fuzzing
NDSSSymposium
496 views•2019-04-02
12:48
Computer Science
How realistic is Cities: Skylines?
CityBeautiful
159K views•2019-02-14
46:39
Computer Science
GUIs & TUIs: Choosing a User Interface for Your Python Project | Real Python Podcast
realpython
2K views•2025-04-04

25:15
Computer Science
The OSI Model - Explained by Example
hnasr
225K views•2019-05-12
1:10:47
Computer Science
Cloud Computing - Introduction
elithecomputerguy
98K views•2019-10-07
2:24
Computer Science
From Traveler's Dilemma to Dynamic Routing | Demystifying Networking
IITBombayJuly
5K views•2019-08-04
Trending

13:25
Business
Playstation NO DISC/NO BUY Fight Is Over...
DavidJaffeGames
4K views•2026-07-23

16:52
Anthropology
Americans Confused in Australia for 17 Minutes Straight
IWrocker
17K views•2026-07-23

7:38
Blockchain & Crypto
Bitcoin Social Interest: Dozens of us Left
benjaminjcowen
12K views•2026-07-23
11:32
Business
Tesla Profits Plunge & SpaceX Stock Continues Fall
TheJohnJohnstonLounge
6K views•2026-07-23