This tutorial provides a surgical breakdown of network isolation, proving that FreeBSD’s clean interface logic remains the gold standard for transparent system administration. It is a refreshing masterclass that prioritizes precise manual control over the bloated abstractions of modern enterprise networking.
Install our extension to search inside any video instantly.
FreeBSD - Using and Configuring a VLAN
Added:Hello everyone and welcome to my channel. In this video, as per user request, I'm going to show you how to use and to how how to configure VLANs in FreeBSD. Okay? Let's do this.
I'm going to start by showing you a diagram that I've drawn. So, here you can see I will [clears throat] be showing three virtual machines, VM 1, 2, and 3.
Uh the first virtual machine is connected to the internet through the VTNET0 interface.
Then I'm going to show you that there is a private network that connects to VTNET1 in the first machine and VTNET0 in the second and third, respectively.
The I'm going to build a VLAN that I'm going to call number 10 between 1 and 2, and VLAN 20 between 1 and 3.
So, why are these VLANs What is the purpose of the VLAN?
Basically, it's a logical separation of the traffic, meaning it's like you have those pipes that you see here between the machines, and the traffic that goes in one VLAN cannot be seen by the other VLAN.
So, this means virtual machine number two should be able to talk with virtual machine number one, but virtual machine number two cannot talk with virtual machine number three because they are in different VLANs. So, this is the principle.
>> [snorts] >> Um I'm also going to show you that you can you can just very simply configure PF to do internet the network address translation and I get internet in VM2.
All right, so let's get this party started.
So all right, here we are.
You can see I have here three virtual machines VM1, VM2, VM3 and let's look at the configuration for VM1. This one has two network interfaces. So one which is the shared network which is going to allow the machine to connect to the internet.
The second network interface is the private network interface.
So virtual machine number two has only the private network and the same should be for virtual machine number three.
Okay, I closed the window. That should not have happened.
And yes, >> [clears throat] >> virtual machine number three. So as only has the private network.
So let's start for now virtual machine number one.
And let's see the configuration.
So we're going to do this step-by-step.
And the first thing as a first step we're going to configure things by hand and then we're going to configure this to make it persistent in /etc/rc.conf.
So [snorts] now [clears throat] it's just the first machine. So now let's just try the if to see if config and you see here VTnet0 has an IP address it's 64.22 and VTnet1 currently has configured an IPv4 and I think it should also get an IPv6.
Maybe it takes a little bit of time, but um >> [clears throat] >> I think it's going to get an IPv6 address also.
No problem. So, uh one thing because let me actually show you back the the diagram here.
Um we don't want those interfaces here to get by themselves an IP address because otherwise the machines would be able to talk between themselves. I mean, they would be they would avoid the VLAN communication.
And I want to show you that VM3 cannot talk with VM2.
And therefore, I'm not going to give an IP address to VTNet1 um here.
But I'm going to give an IP address to the VLAN10 and to the VLAN20.
All right. So, coming back here to the machine, let's see. Yes.
>> [clears throat] >> So, we have VTNet1.
Um uh let's start by taking out the IP address. So, ifconfig VTNet1 delete.
And we should be uh good.
VTNet um one now has uh no IPv4 address.
All right.
So, and now let's start to create the VLAN10. So, ifconfig um let's say VLAN10 >> [snorts] >> uh create.
Okay. So, if we look at the ifconfig, we now have a VLAN number 10.
And now let's configure this. So, ifconfig VLAN10, uh let me look at my notes. So, >> [clears throat] >> uh it's going to be on VLAN uh 10 on VLAN dev uh VTNet1 because this is where it's connected.
And again, ifconfig [clears throat] you see here the parent if interface is VTnet one. All right. So, ifconfig on VLAN 10, oh, let's give it an IPv4 address.
It's going to be 192.168.10.1.
Netmask 255 255.255.0 and let's just bring the interface up.
And now we can see here VLAN 10 has an inet 192.168.10.1.
Okay. VTnet one didn't get an IPv6 address. That's That's okay.
Now, let's start the other machine.
This VM number two.
And yeah, let's do the same thing, basically.
And we're going to check that they have they can communicate with uh uh between each other.
So, the machine is now starting and it's by default when you install FreeBSD, it's it's requesting a DHCP.
I'm just going to press control C.
Um I don't need that.
So, ifconfig we [clears throat] see VTnet zero.
It's on the 128.7. This is the private IP address. We don't need So, ifconfig VTnet zero, delete.
And um ifconfig um this one does have some IPv6 addresses and we're going to delete this.
So, um let's do uh ifconfig VTnet zero and let's extract with awk. Let's extract the uh inet 6.
And here, let's just uh print the second column.
And you see these are the the two IPv6 addresses that the machine has. And now we just need to delete each one of them.
And we do this by passing it into xargs.
-j percentage means use the percentage sign as a placeholder.
Uh L1 means run a command for every input, for each one that we have, so each line.
And it's the ifconfig that we want.
>> [snorts] >> vtnet0 inet6 Now, the this one here and delete. And this should get rid of both those addresses.
So, let's uh look at ifconfig and vtnet0 has no IPv6 addresses. Nice. Okay.
Now, let's do the same thing. ifconfig vlan10 create Okay. ifconfig and we have vlan10. So, vtnet has zero has no IP address, so it's the Although the VM1 and V the first virtual machine and the second one are in the same private um connected to the same private network.
They cannot talk to each other because they don't have the in [clears throat] the vtnet there's no IP address. But now, let's create a VLAN, so vlan10.
Uh the same thing we did for the other machine is uh let's uh do the vlan10. Let's uh say that this is in the vlan10.
And VLAN device, in this case vtnet0.
And ifconfig vlan 10 as we're going to put this uh hardcoded to 10.2 netmask 255.255.255.0 let's bring this interface up.
So now we see here it's uh the parent interface is VTN zero. So this is the VLAN 10 with the the proto the proto one uh 802.1Q etc. Let's let's just try to ping 192.168.10.1.
[snorts] Yes, we can ping that um the other machine.
>> [clears throat] >> And we are all good to go.
Now let's create the third machine.
So let's move the windows here a little bit and let's Oh, it's uh still shows that it's starting. That's uh not entirely correct, but um okay.
Uh let's um >> [clears throat and cough] >> Sorry.
Um let's start this machine and now we're going to do the same thing. So here control C, I don't want that IPv4 address.
Uh sorry, not ifconfig. We need to log in before. Um yes.
ifconfig And [snorts] we have here the same thing. So but this is another machine.
Uh we have VTN zero. This is the the third machine. Yeah, so ifconfig VTN zero, let's delete the IPv 4 address. Let's see, it still has the IPv6.
So let's do the same.
ifconfig VTN zero uh awk and uh inet six Let's print the second column. There we [clears throat] are.
And not awk, ix arcs. Ifconfig uh VLAN zero inet six this one here and delete. And of course, I forgot in the ix arcs, I forgot the J percentage and the L1. This is important.
Um Oh, it's not VLAN zero, it's vtnet.
Yes, of course.
So, >> [clears throat] >> now it got rid of both addresses and we can start building our VLAN. So, ifconfig VLAN In this case, we're going to put this in 20, create. So, uh so, that's the name we give.
Ifconfig VLAN 20 we're going to see this is in the VLAN 20 and VLAN dev is going to be vtnet zero.
And ifconfig VLAN 20 192.168.
20.2 netmask 255.255.255.0 Let's bring this up.
And here we are. Uh it's the 20.2 in VLAN 20. Can we ping the 10.1 or 10.
uh two? Let's try. 192.168.
Um 10.1 No route to host.
10.2 Also not.
You might have uh been noticed that I did not create or did not configure the VLAN still in the first machine. So, if we go here, 20.1, it doesn't work. Yeah, because we need to create this in the first machine. So, let's let's do that. Let's search for the first machine. Where is it?
Should be here.
Here is the Here is the first machine.
And ifconfig uh we have VLAN 10. Let's do the same thing. So, ifconfig VLAN 20 create.
ifconfig VLAN 20 Uh VLAN is going to be placed at 20 and VLAN dev it's going to be VTNET Z In this this machine is VTNET one because we have the 12 network interfaces, yeah?
Uh ifconfig VLAN 20 Oops, not clan.
VLAN 20 we give the static IP address on 20.1, netmask 255.255.255.0, and state up.
Let's again see.
This we have the 10.1 in VLAN 10 and 20.1 in VLAN 20. Now, ping 192 Oops, 192.168.20.1.
This is our local address. And now 20.2, that's the third machine.
Uh and if we try 10.2, it it's working.
Now, let's try to pick up the virtual machine three again. Here it is and let's try again 20.1. Now, it works because the VLAN is created and um what about 10.1?
This should still no not work and 10.2 should still not work.
The same thing is going to be for the other machine.
So, now just for curiosity, let's just do a TCP dump. ei The e stands for to dump the ethernet headers, which we need to see the VLAN.
Uh e i n v t net one. Okay.
And [snorts] now let's uh take this let's take this machine. Can I make maybe make it a little bit smaller? No, I cannot.
Uh but maybe I can move things a little bit around.
And you should be able to see actually in this direction.
Uh here uh yeah.
In this area here um you should be able to see the IP address uh the the things coming through. So, let's [clears throat] let's try to see. So, um um ping 192.168 Uh this we are in 10.1.
And here we are let's So, let's just stop. We see already some things going.
And you see here the magical the magical value. Where is it? Come on.
Uh you saw there up uh my mouse unfortunately disappears. But you see VLAN 10. You see length 102 VLAN 10.
Let's go for the other machine and try to do the same thing. Ping 10. uh 20.1 in this case. And let's um go to this machine and see here. Yes, it's on VLAN 20.
Uh so, the traffic is really being um transported across the different um across the different um uh machines. So, um actually not across it's going it's being tunneled through the different VLAN.
Before we make this persistent, um let's configure this uh between the the first and the second machine, let's configure this in such a way that it becomes kind of permanent.
And for that, we're going just to edit etc. rc.conf.
And here you can see vtnet1 is currently configured as DHCP. I'm going to comment this one out and I'm going to say ifconfig so cloned interfaces is going to be actually we're making it consistent persistent now. So VLAN 10 and VLAN 20 Let's Let's just do the both at the same time now.
ifconfig and VLAN 10 is going to be VLAN so Let me look at my notes. inet 192 168 10.1 netmask 255.255.255.0 >> [snorts] >> and VLAN 10. This is VLAN 10 yes and VLAN 12 we're going to see make it vtnet1 and ifconfig on Actually let me just copy the things here. This is going to be 20. This is going to be a 20 here and this is going to be VLAN 20.
So very similar and ifconfig vtnet0 one and let's bring the interface up without an IP address.
All right. Let's Let's reboot this machine and let's see what happens.
Hopefully the configurations we have done before are going to be kept meaning the machine boots and gets the VLANs working properly and the the VTNET one doesn't get an IP address.
All right. So, let's log in. Ifconfig, what we see? We see VTNET one has no IP V4 or IPV6 address and VLAN 10 it's configured. I think looks good, right?
So, ping 192.168.10.
uh two. There we go. And 20.2.
Hooray, it's working and it's persistent.
Now, let's try to make uh to bring uh internet um so that this machine here can communicate to the internet. So, if we go and we try uh pkg install actually pkg update.
It currently could not resolve host name and lots of things. So, it's it doesn't really work. Okay, so let's try and uh change this. For that, I might have uh had it here a pf. Oops, pf.conf. So, let's start etc pf.conf.
And the minimal set is match on VTNET zero from 192.168.
uh 10.0.
So, in this um address segment uh /24 to any net to uh VTNET zero.
I It should be enough and pass all.
And uh service pf enable.
So, we enable the PF.
Um and we also need another thing. We're going to I'm going to sysrc net.inet.ip.forwarding net.inet.ip.forwarding enable equals yes.
And let's just do this by hand before I So, before I I reboot the machine, it should be sysctl net.inet.ip.forwarding Oops, my fingers are The keyboard is a little bit difficult.
inet.ip.forwarding forwarding Uh it's currently set to zero. Oops.
Let's set this to one.
And service PF start.
Okay.
Um net to Uh did I do something wrong?
match out on Okay, I might have screwed that one up.
Out match out and service PF start.
Nice. Okay. So, this is matching out doing uh uh network address translation on the outgoing packets.
Here, this is the the second machine and of course it still doesn't have the um the things configured.
But, we need to do route out add default 10.192.168.10.1 10.1. So, that that is our default gateway. It's the first machine. And um I might have done this already.
resolve.conf Yes, it's already set. So, I I put here the name servers as 1.1.1.1 >> [snorts] >> and name server 8.8.8.8.
Let's try this again. pkg update.
Hooray, it's working. How cool is that?
And uh just to make sure that things are going fine, we go here to the this machine, pkg update.
And it doesn't work. It's the same thing.
Um just to finalize the video, I'm going again to this uh to the first virtual machine. Let's edit pf.conf and we can just add another one. So, if it is 20 uh on on 20.0 >> [snorts] >> /24 and we do the same thing for vtnet0.
So, service p um service pf restart.
Um cat etc. Let me just see the one thing. Yeah, because I did service pf enable, if you reboot the machine, this becomes permanent. So, I'm fine with that.
The third machine, which is still not working and you know already what's going to happen. So, here uh it doesn't work and um route add default Okay, default um 192 168. In this case, it's 20.1.
Okay. Cat uh etc. Um so, resolve.conf.
So, this is not there. Let's uh edit this uh etc. resolve.conf.
Uh oh, vim not found. Ay ay ay, that's not good.
Um so, let's uh just put here I I I can put it the other way around.
This is no big no big deal. 1111 and pkg update and lo and behold, it's again working. Can the two machines see each other. Ping 192.168.20.1.
This we can because we are in machine number three and 10.1. Oh, now it can.
>> [snorts] >> Uh this is This is an interesting thing and this might bring you to think, okay, the machines are now I can see them.
>> [laughter] >> The the machines can talk with each other, but the interesting thing is that those machines did Let's Let's just Let's just um do here uh TCP. Oops, this is machine number one.
TCP dump EI VT net the one, yes.
And now let's get this thing here running and you can see probably you see here the You're seeing that it goes from VLAN 20 and goes to VLAN number 10.
And uh um Uh we would need to adapt the IP the so the PF firewall in such a way that this doesn't happen, okay?
I'm going to try to do this very fast.
So I do have some additional notes here that I'm going to try to go very fast here in the video. I'm going to see probably me typing and let's just see if things get separated now.
So since this part here involves a little bit more typing, I just copied the configuration to the machine and now let's just have a quick look at it. ETC so pf.conf.
What we see here is that we have the external interface, the LAN 20 interface, LAN 10 interface, sorry. We have the networks, the respective LAN 10 net and 20 net.
>> [clears throat] >> Then we have here some policies to drop the packets and to skip on localhost. So if I'm not mistaken, this is to normalize the inbound package, meaning that is going to refragment and to enforce some TCP flags, etc. This is needed to properly process the different segments.
Then we're just going to do net on external interface.
So here from the different network segments and going to block the respective other package, but we're going to here, yes, we are specifically these are the important rules. We're going to block traffic from 10 to 20 and from 20 to 10. So the machine should not be able to talk with each other and we're going to allow the 10 to pass to any network and yeah, 10 to pass everything on external interface. So that this is a relatively small rule set.
Service PF restart. So we restart the service and now let's go to machine number Just looking here very quickly.
This is a machine number two. So ifconfig we are here at 10.2. So let's try to ping 192.168.10.1.
Yes, we can ping. Can we ping 20.1?
No, we cannot. It's denied by the firewall as intended.
Can we pkg update?
Yes, we can. So, >> [clears throat] >> uh again, going back to the picture, you see um here there was a small a small thing that we needed to add in the rules. So, because we are netting traffic and we are allowing traffic to go from here from this VLAN to go to the internet, uh we need specifically to also to tell the PF firewall not to allow the traffic to re-enter. So, coming from VLAN 10 and entering VLAN 20 and vice versa.
Okay, and uh that's it. Um per user request, we I did a small tutorial on how to use VLANs in FreeBSD. I hope you enjoyed it. And if you have some more additional comments or requests, you know what to do. Use the space down below. Otherwise, thanks for passing by and uh take care and see you next time.
Bye-bye.
Related Videos

6:13
Computer Science
TOP 15 Data compression Interview Questions and Answers 2019 Part-2 | Data compression | Wisdom jobs
wisdomjobs
281 views•2019-06-28

27:51
Computer Science
CTS 158: 802.11w Management Frame Protection
ClearToSend
4K views•2019-02-04
23:21
Computer Science
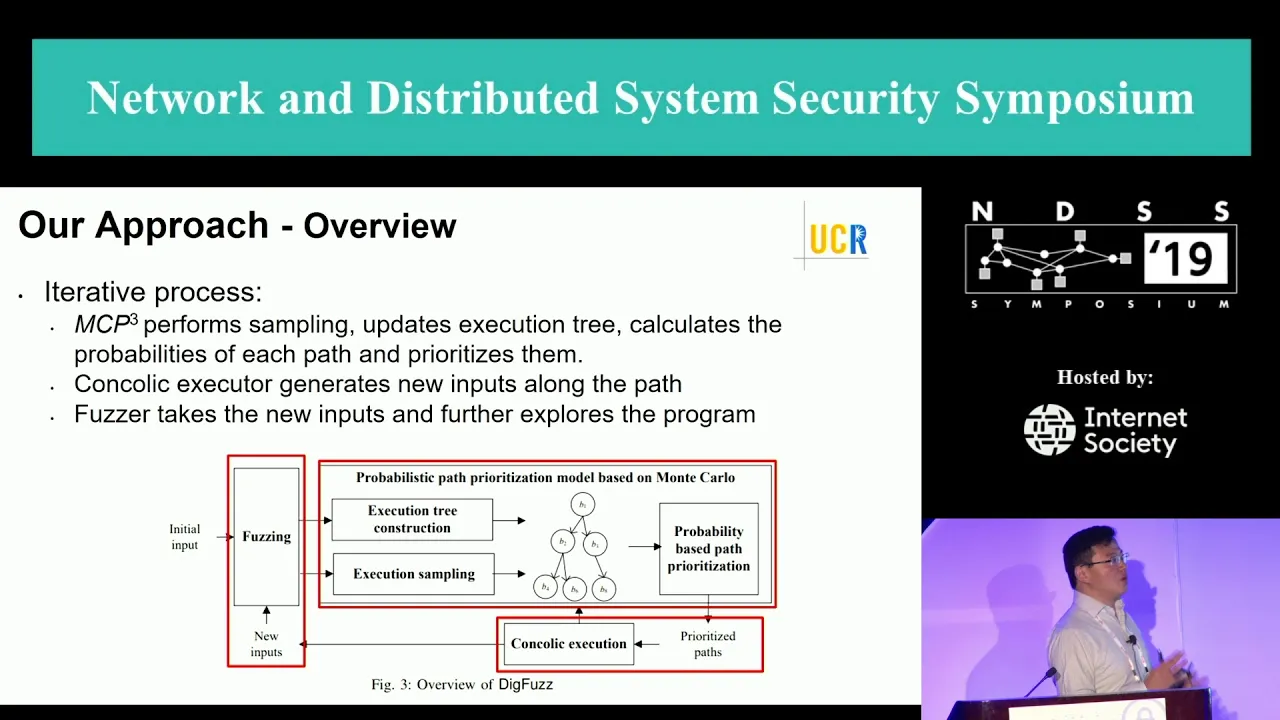
NDSS 2019 Send Hardest Problems My Way: Probabilistic Path Prioritization for Hybrid Fuzzing
NDSSSymposium
496 views•2019-04-02

12:48
Computer Science
How realistic is Cities: Skylines?
CityBeautiful
159K views•2019-02-14
46:39
Computer Science
GUIs & TUIs: Choosing a User Interface for Your Python Project | Real Python Podcast
realpython
2K views•2025-04-04

25:15
Computer Science
The OSI Model - Explained by Example
hnasr
225K views•2019-05-12
1:10:47
Computer Science
Cloud Computing - Introduction
elithecomputerguy
98K views•2019-10-07
2:24
Computer Science
From Traveler's Dilemma to Dynamic Routing | Demystifying Networking
IITBombayJuly
5K views•2019-08-04
Trending

13:38
Law
WOW! Judge TURNS THE TABLES on Trump in His OWN $10B LAWSUIT!!!
MeidasTouch
197K views•2026-07-23

13:25
Business
Playstation NO DISC/NO BUY Fight Is Over...
DavidJaffeGames
4K views•2026-07-23

22:40
Business
Steam and Xbox Just Dropped The Hammer On PlayStation
OhNoItsAlexx
9K views•2026-07-23

16:52
Anthropology
Americans Confused in Australia for 17 Minutes Straight
IWrocker
17K views•2026-07-23