This tutorial provides a masterclass in pedagogical precision, distilling complex fluid dynamics into a clear, actionable guide for academic success. It is an essential resource that seamlessly bridges the gap between theoretical formulas and practical laboratory mastery.
Install our extension to search inside any video instantly.
SPM Physics Amali: Manometer Experiment | Score Full Marks in Paper 3!
Added:Hello guys, I have a metter over here.
Now some of you have been interested on how to use a metometer or how to we do experiment or amali regarding this thing. Now over here right metameometer or maybe YouTube pretty much the same thing anyway because for millimeter right also u shape some school they don't have this. So what they do right they will use like a rubber tubing pretty much the same thing anyway. Now this experiment right it's for us to determine the liquid pressure relationship. Okay so normally what happen is that you will got color water over here. Okay this one right before you do anything to it you're supposed to get same level one balance level because the pressure here and the pressure here is the same. Now to generate pressure now we normally connect to another tube.
This one right can be a little bit different. Some school right they will use uh this one a syringe because why they don't have a funnel. So this one also do the same thing anyway. You connect inside and then you push you generate pressure just that it's not water pressure rather I mean instead it's basically air pressure. Now if not then we have this little thing here.
This one right I mean I basically home it myself. This one DIY one. Uh it's like a doesn't funnel also. Now you push this thing into the water slowly and then it exert pressure to this thing. It will push this side up. Okay let me show you this. Okay. So uh the first method will be using a turtle funer. Now if I want one is a bit of DIY one. Then after that right uh your school is supposed to have something called a measuring cylinder. Even better because marking so I got no choice. I use this one. So now your experiment basically it's the depth of the water versus the difference in height over here. Now you see when I press this little thing I don't even need to push in the water. When I push this inside look at the water level on this side. Let me show you. Okay. When I press this one here you can see the water level slowly rises because why?
Now same thing when you push it into the water because when you push it into the water the water pressure will exert pressure onto this thing and then they push from here and then the other side rises. So what you need to do very simple for this experiment right uh push it inside and one thing right normally they give you different different one.
So one simple idea always remember is to uh start measuring the depth. Now something to be careful is when you're taking readings start from the water surface and then you go down. Make sure you look from outside because you don't want to have all these parallax and whatever. Okay. So start from here.
Okay. You start from the water surface right? You go down all the way. Now start from here you go down all the way.
Now the start from 2 cm. Now I can see the other side water level rises right this one now 2 cm and then 4 cm and then 6 cm and then 8 cm and then all the way down. So meanwhile what you do is that you will take the reading okay the difference in height over here. Okay now let me show you let's say for example this part here. Now difference in height supposed to measure from let's say for example this one says 20.5 and then this one here is like 23.8 like for example so you're supposed to measure the difference in height as in over here. So you minus this one and this one that one will be the one that you're looking for.
Your responding variable is this one and then your manipulated variables will be the depth of the water. Okay. So that's is the first way of doing the most classical way of doing like by right you should be doing this one here the typical tunnel way. Now some school they might not have tal funnel then the another alternatives we have right will be over here the syringe. Let me show you. All right. So this is another way where they use a syringe. Strange will be relatively easy because why um you just put it inside and then you exert pressure. Now some marking already. So you don't even need to measure that of water whatsoever. Uh normally the experiment they will give the value for you. For example they give you like 100 ml 90 ml then you go from there. Now for example here you can start from 50 ml, 45 ml, 40 ml and go on. Now, but one thing to be careful is what you see whenever you're using this kind of stream situations, right? You cannot just shove it in like that. You see, if I just push it in, you notice the water level rises. Why? There's a little bit of air stuck inside. When you push it in like that, this is the problem. They will actually exert pressure one. So, what you need to do is that now usually some people they have like a like a little tiny metal wire they put inside together and then they pull it out later. You can do that also. If not, another way is that you push inside.
Now, start from slight way. Make sure you're having a bit of air hole to let the pressure escape. Go in slowly, slowly, slowly. Now, almost until full already. Right? Then you stop. You don't have to push all the way inside one.
Just make sure it's tight enough. Then your pressure can push then ready. Now next thing what you do very simple just push inside. Now you can see I exert the pressure in now water level start rising. Take reading again difference in depth. You can answer. Then you from here press some more. Okay. 5 ml 10 ml all the way. Now this one about to b. So that's why we stop here. All good. Okay.
So this is two different way that I show you. Either we using a tunnel way if not then we use the strange way. Um let me show you some of the questions. How do you answer and what kind of question you can ask in your arm? Okay. Now this one right is the questions for the manometer experiment. So this one is the official one. So you can see right over here uh pretty much as what we have just now right YouTube after that connect to uh the funner and then you push it inside and remember I said many time every time when you try to measure dep of the water right make sure what happen start from the water surface and then you go all the way to the bottom okay the part the bottom part there now how do we do this experiment basically the setup here procedure all settle might be different a bit regarding the dep can change a bit 2 cm 4 cm sometimes you do 1 cm 3 cm also kind of doesn't matter you follow that day whatever experiment you have now here based on experiment conducted you required to state the hypothesis Now do you remember how to write hypothesis?
One thing very important is what hypothesis is a smart guess. So don't write all the conclusions like what uh directly proportional but even you know please don't. Now normally for hypothesis very simple right the higher the lower typical right. So normally what we do is that we will say the higher the manipulator variables the the the the lower the responding whatever it is. Okay. How do you tell u what is the responding variables? What's the manipulated variables for experiment?
Right now uh simple trick for you. Every time when you read questions right you always get the starting here. You always say like to study to investigate to study same one. Now every time you see this to study to investigate basically right this is the aim of the experiment.
Now why do we look for aim? Because the format of writing aim is the relationship. Okay the relationship between MV and RV. So normally what comes after that it will be the responding variables and also the uh manipulated variable. So over here right they want the relationship between pressure and the depth of the water.
Right? So that will be your responding and manipulated. Well is it a must they put MV first and RV? Not necessarily.
Sometimes they can put RB then MV MV then RV also can depends on questions but uh you think about it yourself but of course in this case what are you manipulating quite obvious right well look at your procedure the thing that changes every time you see repeat procedure that means right this one that changes will be your manipulated variable so over here right this one you can see the dep of the water the one that remember push inside that's manipulated variables and meanwhile right you get the responding what do you measure measure means responding the difference in height of water column D right remember we say right when you push it inside the water column here will go mean the water level rises then you measure the difference in the height there. That one is basically your RV and then this one is MV. Okay. So uh hypothesis very simple the greater the depth of the H the greater the difference in height of water column D.
Now one thing is if the question do mention about symbol now over here they did give you right depth of the water comma H and then difference in height comma D. This one I must write okay because a lot of time right uh people forgot they just write dep of the water difference in height. Now if you don't write the symbol they minus mark one.
Don't create your own symbol. If the question give you copy don't have never mind. Okay. U manipulated variables we mentioned already right the dep of the water h and also this one very important pay attentions over here remember if the questions gave you symbol you must write if they don't give don't create yourself no need to write unit some people say do I need to slash cm don't bother okay now next one responding difference in height the one we measured just now right uh the capital D the different two water level now next one constant variables one is enough some people go and spam don't need one one okay the most relevant one and one thing remember constant variables are things that cannot change not things that doesn't change that's the difference there some people say hey I didn't change the uh liquid or can I say uh the color of it?
No, of course. Now, here's one thing. Of course, uh what is the thing that will affect your result? You think about it over here, you're trying to do experiment about that. Now, liquid pressure, what's the formula? Let's talk about theory to calculate liquid pressure. The formula is hro G. That means right, these are all the variables that changes. All right. Now, you are trying to do experiment regarding depth versus pressure. That means the rest must be constant. Gravity as usual is always constant. So, we don't try to write this always. Not to say wrong, but there's another one that's more obvious here. Right. Exactly. this one here the density because can you simply change the density or not let's say I was using water just now can I put like salt whatever cannot so that's why right the constant variables supposed to be density of liquid now here did you see me comma row or not I didn't right because if the question never give don't create your own symbol only put inside whenever they provided simple okay now next one of course tablet data this one I did experiment uh don't copy the number could be different one little bit different it's totally fine so over here 2 cm 4 cm 6 cm everything now a simple checklist for you how to make sure you got full marks for table right number one make sure you write simple as like this one here symbol and then next thing unit now normally people put bracket if not you want to put slash also can I would suggest people put slash I prefer slash means instead of do this right put slash cm even better okay but it's a must to have unit it's a must to have unit now next decimal point now this one very important okay when we say decimal point is like a consistency right uh here you notice right here put 0 now even there's no decimal point why do we put 0 is it a must to put a one decimal point no a simple way to follow this thing very easy one you follow the instruments now You are using ruler meter ruler. What's the smallest decimal point you measure? 0.1 cm. Right? That's why one decimal point. Let's say you are using another instruments that can measure 0.01 cm. That one you put two decimal point. So for this decimal point very simple you follow the instruments the smallest decimal point. If it's two decimal then two decimal. If it's one decimal point right even you are getting whole number put 0 inside. Now same thing here since you are using ruler. So point one decimal point. One decimal point. One decimal point. Okay. So decimal point basically we call consistency. uh now even you get one cm sharp sharp one cm also put 1.0 zero.
Okay, consistency means make sure you have the same number of decimal point.
Okay, now and of course next thing the value for D uh your experiment. That's why I say don't memorize because why?
You have to do it on the day and then get a results. Okay, now after that once you done your table right you will use your table to plot graph. Now follow whatever question they give you over here the graph uh you need to plot is d against h. So put your d on the y- axis every time is y against x1. So y axis d and then x ais h use this value to plot your graph. Now over here little checklist for you. Okay. Axis, make sure label unit must write, scale must write, size of the graph, right? I tell you what, as long as you can make about 75% of your graph paper, you should be very safe. Now, for example, this one in my graph paper, let's say graph paper, uh you make sure your graph, right? Uh looks a bit like this. Now 75% will be pretty much something like this. A bit of sketching. Of course, I'm not drawing graph here. Uh you try to try yourself.
Okay? Try using this number to try drawing also can. Okay? And then plot your point. Of course, use your eyeball.
This one typical checklist. Make sure you follow. You should be fine. Now you're supposed to get a graph that looks a bit like uh this. Okay, this one my sample of graph are different. Okay, so again know remember label label. One thing I always recommend student to do as well is what put the title of the graph. Now you don't need fancy title anyway. Just mention graph of D against H. That will do. Okay, you follow. Okay, Y against X. So D against H. That's it.
It's a good habit to label title. Some teacher they minus mark one. So make sure you write title. Okay. So again label your axis. Label axis and then make sure plot your point correctly. You should be fine. Okay. Uh next after that when we draw graph of course the next thing they ask is what relationship as always now since the graph I get is something like this what kind of relationship we have they start from zero and all the way up right start from zero straight up then what relationship do we have directly proportional okay you follow whatever graph you're drawing so answer should be directly proportional okay next one calculate gradient this one also based on your graph one so my answer might be a bit different than you but now what I did was I do a bit cheating gradient supposedingly is formula you see gradient right supposedingly y2 minus y1 X1 okay X2 - X1 okay typically this is the way now how we do it y2 my 1 x2 x1 very simple here these are all the numbers provided to you right you can use the graph okay now listen must I use my own answers must I use my own answers like you know all the point plotted no when you draw a straight line here you can use any point you want but one simple thing when you calculate the gradient okay let's say you wanted to pick for example uh random pick nice point of course those point that actually can uh get result for example say uh this one Okay, make sure you get those point you can find number very accurately one. Okay, pick one point and then right pick another point as close to zero as possible. Some people say can I use zero or not? Uh not to say cannot.
Usually I would recommend one thing is that you find a point close to zero but don't touch zero. Some people they don't like so you can put one point here. Now the two point you choose right try to pick it as far as possible. Now why?
Because when you pick two point further away the good thing about it is but they will give you a better and more accurate result. And one thing very important is whenever you pick the two point you're supposed to draw a triangle. Meaning what? from here dotted line all the way over okay until this point and then after that go up over here this one got marks one and make sure one thing what kind of triangle is this it's a right angle triangle so label the 90° this thing got marks and then after that use the point to calculate answer so gradient wise uh you can try yourself because every person graph different so uh might not be same same so over here uh based on my result if I calculate using this one right okay what I did was I take this one 5.5 and then 10 okay this one is my y value okay y2 and this one x1 uh X2. Now don't do this for you, right? Try to use the value from the graph. Get it? And then uh 0 0. So basically for this one, right, you get uh 5.5 minus 0. Okay? And then divide by 10 minus 0. Your answer can be different. You don't have to be exactly same as mine. Okay? Follow your graph.
You get what I mean or not? Okay? So over here 5.5 by 10, we get 0.55. Now gradient suppose right got unit one. But then this question don't have you know why? Cuz it's D against H. Now whenever we try to uh form unit for gradient, right? Very simple. It's y /x but the problem now is what the unit for d it's cm the unit for h is cm. So when you take cm divide by cm they cancel off that's why this thing got no unit but sometimes they have it you have to form yourself. So simple checklist for you every time gradient right make sure you get three things of course number one calculations right second thing make sure draw triangle label 90° and then one more thing it will be a unit. Now in this case no unit that's why right over here they you don't have to put anything because they can solve. Now next one predict what happened to the gradient K if the experiment is repeated by dissolving salt into the water. Now here's your keyword. What happen if we add salt inside? Simple right? When you put salt inside the density of the liquid increases. Now simple idea here you see pressure equals to h ro g. So if your density increase what happen? Of course provided everything concern gravity same and then we do the same experiment anyway 2 cm 4 cm 6 cm your height same also. Now by right this one increase your pressure is supposed to increase here. When you push into the same that they give you same pressure.
What's going to happen? Remember the experiment over here, right? What you do is that the pressure of the liquid here is basically pushing this over. That's why they create a difference in height here, right? So what happen if here got larger pressure? They're supposed to push push harder, right? That means what? The the liquid here is supposed to rise up higher. Also in simple word means what? You should see a greater difference in uh liquid here. You're supposed to get a larger difference because the pressure is bigger. They push harder. When they push harder, liquid up higher. Then the difference in height will get bigger. So in simple word huh what happened to the gradient okay you see whenever you have higher pressure this thing will go bigger meaning that the d value will increase my right so let's say originally this is my graph okay so with the same depth now what's going to happen for example just now we did uh 2 cm the pressure create a difference in height here so right now you're supposed to see another uh sorry you're supposed to see another graph right that should look something like this instead how come because same depth they give you more pressure more pressure gives you greater depth differences so you're supposed to see a graph that is higher up in simple what means what now your gradient of course greater okay so for these questions you're supposed to have okay larger gradient why because density of the liquid increases when you put salt inside and then the pressure increase pressure they push more liquid higher then the d value increases that's why I show you my right where your graph going to go up like that okay now there you go next one experiment is conducted using another unknown liquid the gradient of the graph is k equals to 0.85 If I calculate density of this unknown liquid, they give you one thing. Density of the colored water inside the manometer is 1,000 kg per meter cube.
Now this question a bit of Kbat. Okay, how we do it? See, first thing first, ask yourself uh why are we having this difference in in in uh water? Why are we having this difference in water for this uh colored water inside? It's because the pressure here pushing inside. Now in a more straightforward way questions, right? Why are you having liquid higher up? It's because right here you get pressure pressing. Okay, you get pressure pressing the liquid up. Now this side you got atmospheric pressure.
This side you got the pressure which is created by the liquid pressure. Now as you go deeper the pressure here go higher and then the pressure will pass on all the way and then exit same thing.
So in link it I mean if we link it up this way basically the difference in height here okay is basic caused by the pressure of the water here. So that's why right here first thing first how do we calculate the pressure? Okay, normally one of the way is we use the difference in height over here. Okay.
Now pressure equals to H ro row G. If you want to calculate the pressure difference is very simple this part and basically it will be the D. Okay.
Difference in time. Right. So I replace the H here become letter D because I want to pressure I want to calculate that little difference in pressure.
Okay. D means this one here. And meanwhile right as we push this inside how do we calculate the typical the normal way of calculating liquid pressure? The liquid pressure supposed to be pressure equals to H ro G standard formula. Right? But here's the thing again. What causes this liquid to go up?
The pressure exerted by the liquid here.
Okay. How much you have it here. How much will be transferred over here? So in simple momentum the pressure of the liquid equals to what? The pressure created this difference in height. Okay.
Ah. So over here what we have? Huh? Look first thing first the pressure created by the water. Okay. The typical now over here we are using unknown liquid. So I just called it liquid. Just now we are using water. Am right? But this one unknown liquid. How do we calculate?
Typical way. Horror G. Okay. Okay, the row means the density of the liquid, the one you're looking for. Now, meanwhile, the pressure liquid here, they are basically causing the liquid, sorry, the colored water here to rise up. The difference in that is the reason that they get push up. So, this part here is the pressure caused by here. Okay, that's why if you push it down, this one comes up. Straightforward relationship, right? Remember, remember this is now ah there we go. So, that's why right over here, you see the pressure of that colored water. I put W the colored water. Okay, I show here easier for you to see uh panometer. Okay. All the way this one. So this part is where you have the liquid pressure. Okay. This part is where you have the liquid pressure and then it pushes the colored water uh creating a difference in in in in height like that. So this part of the height pressure by the water is caused by the pressure of the liquid. That's why here I put pressure equals to dor g and the row I put water because this one is a colored water. Get it? Yeah. And then what can we do now is we can equip them together. Why? Again as I say why is your liquid rising here? because the liquid pressure is squeezing down here.
So that's why we can do a simple way here is we do H row liquid G equals to D row liquid water sorry and then G. Now look at both side. First thing we can cancel off is the gravity. Same gravity anyway. Am I right? Okay. Then next thing what you do here you need to bring this over basically we swap them a bit.
Now uh D / H equals to what? equals to uh density of the liquid divided by density of the water. Now how I do this you know your mathematics you got this cross multiply method right now you see if you cross multiply them d row water d row water and then after that hed row liquid h row liquid makes sense right so that's why what I did was I swap them so they become a ratio way why do we do this because you know what is this actually why do [clears throat] I need to purposely convert them this way d over h think about your graph what is the y-axis of the graph now remember the graph you draw right it was d against h right and then gradient practically is y /x. So if you look at this y axis uh basically it says d and then you look at the x axis right basically they look uh they say hed. So why must I convert them into a fraction way because d over h actually is what is the gradient of the graph and then they will equal to the density of the liquid the one you're looking for density of the water will be provided 1,000 gradient provided to you as well 0.85 equals to density of liquid divided by 1,000. So you bring the 1,000 over and divide the mysterious liquid. The unknown liquid density is 850 kg m minus 3. Okay. Uh little bit of hot questions.
So slightly difficult. So you want to think about it. Now next for the experiment above state of precaution during experiment. Now typical way every time I tell you a simple trick if whenever we say precautions right one of the standard one is what you see um whenever you involve instruments what do you do? You want to make sure no normally you want to pretend a bit you look at uh you make sure your eyeball look at it like level level. Right. Why do that? Cuz you want to avoid parallax error. Right. Now here's one thing a lot of time people write avoid parallax error and then they go and complain like hey I don't get max actually reason why is because whenever you're writing this um precautions right you have to be precise now how do you prevent this parallax error you take reading at eye level perpendicular to what now every experiment you are using different apparatus right so you need to put inside the apparatus you're using now for that case we're using ruler okay let's say for other time you're using like vol meter mter then you change accordingly of course you don't have like a universal answers right so if you want to write The take reading also can all right but don't just say avoid parallax error tell them how I take reading at eye level that is perpendicular to the scale of now this one most important you change according to your experiment now based on whatever instrument you are using if you use a ruler say ruler if you use a stopwatch say stopwatch if you use a volt meter says meter get it so this is why sometime you don't get marks you are not being detailed okay let's to be safe you say I don't want to write this my teacher say cannot never mind then we have another alternative right when you're doing this experiment what's the biggest concern you have right it's that you want to make everything right the air pressure don't leak the wetter pressure don't leak you want to make sure that whatever pressure exerted by the tussle funnel transfer over right so you want to make sure everything is airtight so you can also say make sure the tussle funnel or you can say the silicon tube is airtight means no air leak outside no pressure go wasted okay either one both accepted okay now next one what is the operational definition of liquid pressure now this one recently I noticed SPM like to ask a lot whatever operational definitions right now liquid pressure by right how do we calculate pressure f over a so the official definitions for pressure it's force per unit area okay if not liquid pressure will be the pressure produced by liquid right the weight pressing down but remember one thing whenever we do amali we do experiment right operational definition means what you need to refer to your experiment one now typical way is what tell them how did you get the answer okay how do you obtain now in this questions in this experiment liquid pressure measure how how do I how do I measure the liquid pressure I push the funnel inside and then the other side the level of the liquid rises up right and end up remember I said right how to calculate the pressure of the liquid here you calculate the difference in height here right ah that's why operational definition means what you tell them how to obtain the result in this experiment so that's why the answer you see liquid pressure is the difference in height of the water column V okay remember the difference in height okay when the talle funnel immersed into water at certain hed so whenever we say operational definition means what you must explain to them in this experiment how did you get that rather than tell them the official definitions okay there you go now next one tunnel with a wider mouth diameter use instead of the original one. What is the effect of the recorded height difference? Now, is there any difference if I use a bigger tunnel versus a smaller one? Actually no. Well, simple straightforward way to understand this. Number one, again, what causes this difference in height D? I say many time you press down the liquid pressure push over. How do you calculate pressure? H rorow g depth of the water density of the water gravity of surrounding. Any of this says diameter?
Any of this says like the shape of the tursor funnel at all? No. Right? Since whatever you mentioned here the diameter of the mouth whatsoever not in your equations do they affect your pressure exactly that's why simple answer will be no change in value okay something sometime people overthink they will feel like hey it's bigger what is it more pressure pushing it they don't work this way all right basically the pressure is ho simple idea no change in my formula no change in my result all good now finally next one we have this one here diameter of the U tube increases now the tube bigger smaller does it make any difference or not ultimately you see what causes The difference in depth again the pressure of the liquid. So a tube big or small does it affect my water pressure? It doesn't. You get it?
So that's why over here no change as well. Just remember my formula is hro g.
If nothing affecting hro or g my pressure will not change. Straight forward. 10. Now next one. Why is it important to lower talus slowly into the water? I show you just now. Right?
Remember when you're pushing in you have to push slowly. Now two reason. Number one if you push it too fast right they're going to suddenly push a lot of pressure. Then your liquid push it comes up. your when you're taking reading will be very difficult because your liquid will go up and down up and down up and down it won't be accurate. So normally when we're doing this experiment, right?
Push inside slowly. Okay. So your reason very simple. Prevent a sudden search in the air pressure. Okay. You don't want suddenly you push too much the water pressure push one shot and then the other side liquid comes up. You want a stable and steady reading of D value. So they can take readings slowly and more accurately. And another problem is what?
If you push a liquid up and then let them drop back, right? Some of the liquid might sticks on the wall. They might stay on the wall. Then whatever reading here won't be accurate. So you want to go slowly up and then up and up.
Get it? Now next one. Explain why is it mercury. I'm sorry. Why mercury is not suitable? Okay, if you study your textbook, you probably notice, right?
Normally manometer, normally YouTube, they like using mercury instead of normal water, right? Why are we using colored water, which is water anyway?
Now, think about this. What's the difference between mercury versus liquid? I'm sorry, uh water density being different, right? Mercury density is 13,600. Water is 1,000. So, if you use mercury, the liquid will be very heavy. So, if I just push like 2 cm into the water, do you think that pressure will be enough to actually push it or not? I mean it does but you're not going to see like a huge difference of whatever experiment you're doing just now right you will see a little bit rises so it will be very difficult to take readings now you see here I use water my result is like that 2 cm water depth give me 1.1 cm 4 cm 2.2 2 cm 3.3 cm I use water the the depth differences is only 1 cm you know so think about it if I use mercury what happen next the difference in depth will be very small so small that you can't even see differences you get I mean right that's a problem so that's why right uh why we like using water rather than mercury no a lot of people you know what they right not you you would normally you will tell me right oh isn't it mercury poisonous actually it's not the reason is because right water density is lower density they will create a larger difference in height okay and then they increase sensitivity also can you can take the reading easier also can all right most importantly is that when your density uh is smaller they create a larger difference in height you can see them clearer okay and that's it for this experiment all the questions that's supposed to come out for amali for whatever questions should be inside anyone okay all the best for amali I hope you all score good marks okay bye-bye
Related Videos
Monday evening forecast | June 15, 2026
WBNS
384 views•2026-06-15

Monday evening First Alert Weather with Darren Peck 6/15/2026
cbssf
662 views•2026-06-16

Clouds build up tonight as we track a storm threat for Thursday
NBC10Boston
2K views•2026-06-17

Just One magnetic field power, two light start with Armechar • Dc Armechar
DcArmechar7
14K views•2026-06-17

What a Massive Blue Iceberg Actually Looks Like?
QuickLearnGeography
100 views•2026-06-18

Chicago Morning News at 7 a.m. - Monday, Jun. 15, 2026
FOX32Chicago
942 views•2026-06-16

The Terrifying Physics of High Blood Pressure
fleshandwonder
1K views•2026-06-15
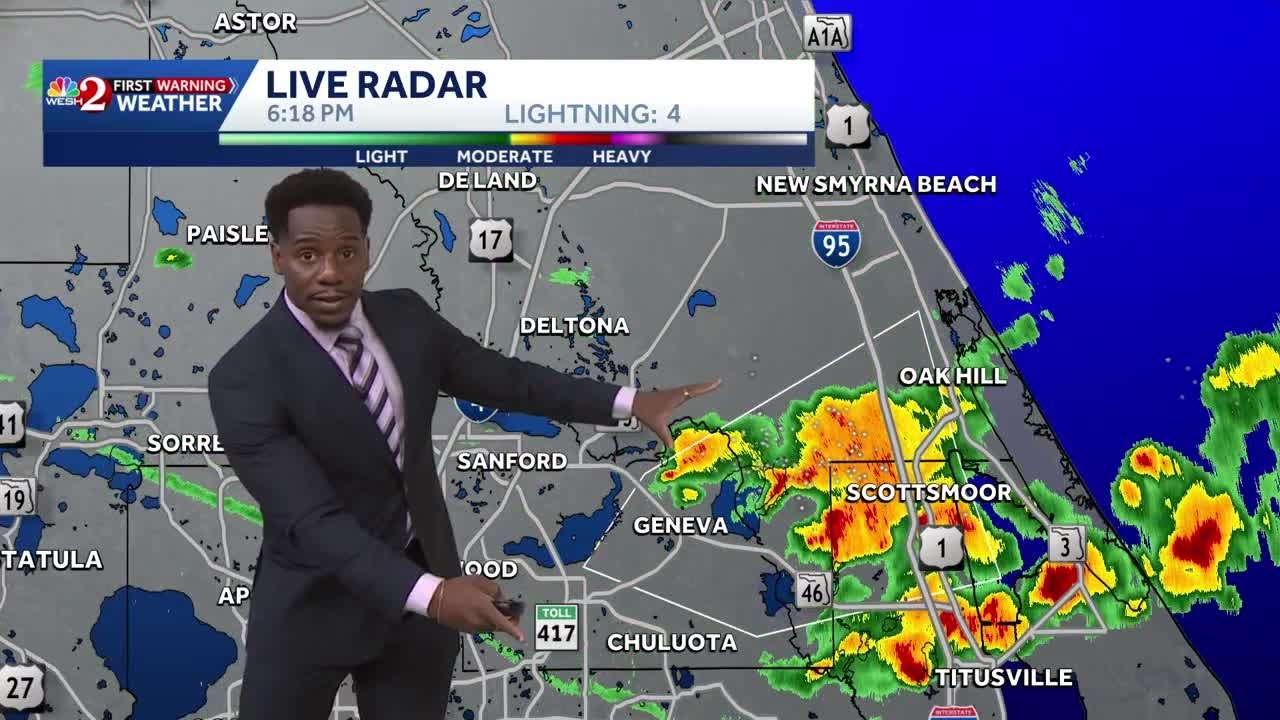
Strong And Severe Thunderstorms Surge Across Central Florida To Finish the Workweek | Stormy Week...
WESH
806 views•2026-06-19


