A head-to-toe nursing assessment is a systematic physical examination that evaluates multiple body systems in a structured sequence, beginning with patient identification and consent, followed by assessment of the head, face, and neck (including visual inspection, palpation of scalp and lymph nodes, and tracheal position), eyes (extraocular movements and pupillary response), ears (tragus and pinna manipulation), nose (symmetry and breathing), mouth and tongue (inspection and phonation), respiratory system (inspection and auscultation of thorax), cardiovascular system (heart sounds at valve locations), abdomen (inspection, auscultation, and palpation of quadrants), extremities (skin assessment, pulses, edema, range of motion, strength, reflexes), and gait, with proper documentation and patient safety measures throughout.
20260616 090823
Added:This is my headto toe assessment.
Claire here has given me her permission to use her as uh the patient so I can submit this uh for grading. Okay, first thing I'm going to do is I'm going to u I'm going to collect all my supplies.
It's going to include the tongue depressor. It's going to include the stethoscope, uh pen light. I'm going to uh come into the room and uh I'm going to um first I'm going to hand hygiene and then I'm going to pull the curtain uh for privacy.
After I've pulled the curtain for privacy, I'm going to introduce myself.
Hello, Claire. My name is Nate. I'm a student nurse today. here to perform a headto toe assessment.
>> Okay.
>> Do I have your permission to proceed?
>> Yes.
>> Great. Okay. Once I've gotten permission to proceed, um I'm going to have permission to proceed.
Okay, next I'm going to Sorry about that. Next, I'm going to ask your uh date of birth and your name.
>> Claire Hughes. XXX.
>> Okay. Thank God I remember that. Okay.
Yes. Um thank you for that. Of course.
Um at this point, I'm going to um make sure that the client is sitting at the edge of the bed. I'm going to look around the room, make sure that the room is free of hazards.
Um, next what I'm going to do is I'm going to ask the patient um if they know where they are. Do you know where you're at today?
>> I'm at NAU.
>> Great. And then I'm also going to ask them about what what day it is today.
>> It's Tuesday.
>> Perfect. Okay. So, the the patient is alert and oriented times three. that is name, place, and uh and time. So now that um now that we've done that um they I'm going to visualize I'm going to inspect that they are calm, that they are wellkept, um that they are alert and responsive to questions. From here, we're going to uh start off with the uh head, face, and neck assessment uh portion. Uh first thing I'm going to do is I'm going to uh visualize visualize the patient. I'm going to um I'm going to look at the look at their head. I'm going to vocalize that um the the head is normal syphalic in shape. Uh the face is symmetrical.
The neck is proportionate to uh the head and the face. Um at this point I'm going to ask the patient if um I can palpate the scalp to look at hair distribution and see if there's any lumps or bumps or tenderness. Is that okay?
>> Yes.
>> Great. come through here.
Make sure I'm not missing anything.
And uh the uh the hair is distributed normally. Um so from from this point um I'm going to I'm going to look at the patient, ask them to look up. I'm going to look at the trachea.
And the trachea is midline.
Um I'm going to um move into the the limp and uh or At this point, I'm going to bear with me a second. It's a lot of information.
Next, we're going to do the uh the temporal and the corateed assessment.
So, I'm going to um going to go ahead and check Temporal arteries.
Next, I'm going to assess the corateed artery one at a time.
It has left side.
Okay. Um temporal and corateed arteries um have been palpated or palpable bilaterally.
Uh next we're going to next we're going to check check the lymph lymph nodes. And so I'm gonna go ahead and check the jawline. We're checking for any lumps. We're also checking for any pain or tenderness. Do you have any of that?
>> No, sir.
>> Okay. We're going to go ahead and move back. We're going to go around the ears here again. Any pain or tenderness?
>> Great. Uh lymph nodes are non-palable and not tender bilateral or non tender bilaterally.
Okay. Uh next we're going to um we're going to start the the eyes section of the assessment. Um if you can for me uh can we do this with your glasses removed please? Great.
With the eyes um first thing I'm do I'm visualizing making sure they look symmetrical. We're going to check um the patient's field of vision. So I'm going to my pen light.
I'm going to ask the patient to look at the pen and go ahead and follow the pen with just your eyes.
>> Go up, down, cross, do left, right.
Okay, great. Um, I'm going to state that EOM is intact and no is noted. Next, we're going to um Next, we're going to check the pupils for dilation. So, I'm going to use my pen light here. Go ahead and just stare forward and put a little bit of light in your eye.
Right side, left side. We're going to do this again, but look at the other pupil.
Very good.
Very good. Okay. Next, we're going to um I'm gonna have you take a look at the take a look at the pen and then I want you to look past the pen. Back at the curtain and we're do that a couple times. Look at the pen. Look past the pen.
Great. Looks good. Um okay, so pupils are um so pupils are equal round and reactive to light and accommodation both direct and consensual I believe that's everything.
Oh, and then go ahead and take a look.
And it looks like um looks like pupils are 3 mm bilateral.
Awesome.
Okay. So, next we're going to um next we're going to move uh to the ears.
Okay. With the ears, we're going to check um first first thing we're going to do is we're going to We're going to push on the tragus for pain or discomfort. Is there any pain or discomfort?
>> No.
>> No. And then we're going to pull on the pin a little bit. Ask again. Pain or discomfort?
>> No. We're going to do the other side here. Pain or discomfort?
>> No.
>> No. And pain or discomfort?
>> No.
>> No. Ears. Ears look good. They are symmetrical.
color is consistent and expected color tra and mobile.
Great. Next going to uh we're going to assess your nose.
>> Okay.
>> So, what I'm going to have you do is go ahead and lift your head up just a little bit and I want you to cover one of your nose. Go ahead and give me a deep breath.
Good. Okay. The other one.
Okay. Looks good. Your nose is symmetrical.
It is symmetrical, but your your nose is midline. Yours are symmetrical.
And there's our and and breathing is noted bilaterally.
>> Okay. Um, so next we're going to go ahead and we're going to assess assess the mouth.
>> Okay.
>> So what I'd like you to do is go ahead and open your mouth and I'm going to shine my light. I'm going to look at the roof of the mouth. I'm going to look at sides of the mouth. Look at the tongue.
Go ahead and stick your tongue out for me. At this point, I would depress the tongue and I would have the patient say ah.
>> Ah.
>> Okay, great. Uh, uh, rise rises with phonation.
Both the tongue and both the tongue and the beautiful mucosa is uh is pink.
It is uh moist. It is free of lesions and uh okay. Um at this point um I I want to take a step back. I don't really want to redo the whole video, but what I am going to ask Claire to do is I'm going to ask you to take your glasses off for me because I did get a step here. So, I want to make sure to record that. Um, with the eye assessment, um, what I'd like you to do is you're going to pull down your lids a little bit. Go ahead and look up.
Okay. Thank you for that. Um, conjunctiva was pink and moist. Scara was white. Um, no signs of jaundice or drainage bilaterally. So, I know this is a little bit late in the video, but I wanted to make sure that I addressed it. Um, okay.
So, um, at this point, um, we're going to, um, at this point, I'm going to go ahead and have you sit into sit into the bed.
>> Okay. And we're going to um start with breaths and thorax. Okay.
>> Okay. Just go ahead and uh >> jumping backwards.
>> Yeah, just go ahead. Yeah, there we go.
Thank you.
Make sure that this is all the way down.
Um I have uh uh visualized uh breath respirations as uh normal and uh non labored. Uh at this point we're going to go ahead and uh we're going to um we're going to work in the uh posterior thorax and I'm going to going to put my hands on Claire's back and I'm going to ask her to take a couple deep breaths.
Do one more for me.
Okay. Posterior thorax um rises and falls symmetrically. Um also at this point uh you know because of this assessment where we have clothes on but usually um this would be um you know there would be open skin. So I I would also excuse me I would also um assess condition of skin. Um in this case I would say you know skin is is uh consistent in color normal and intact.
Um now what I'm going to do is I'm going to go ahead and uh I'm going to uh listen for I'm going to listen for breaths.
posterior thorax. Um, Claire, what I'm going to do is I'm going to put the diaphragm of my stethoscope on a few different spots on your back.
>> Okay?
>> And if you can take deep breaths for me when you feel the stethoscope touch your back, that would be helpful.
>> Okay?
>> Great.
>> Okay. We're start right side. Take a breath for me.
Great. Thank you for that. Um breath uh breaths sound uh breaths sound clear.
Um and they sound clear and are um and no adventicious uh breathing is noted. Uh at this point uh posterior uh thorax is finished. Um, we're going to go ahead and move to the anterior. Um, we're going to go ahead and move to the anterior thorax.
So, patient is going to be facing me.
I'm going to basically do the same thing on the anterior side here.
>> Take a breath for me.
Okay. Again, breaths are breath is clear and there's no note of appentitious breathing. Um, now that we've got Now that we've done the um posterior and antior thorax, now we're going to go ahead and move to heart sounds.
>> Okay.
>> So, just to explain a little bit, we're first going to assess the heart sounds with the diaphragm of the stethoscope.
Okay. And then we are also going to do the assessment with the stethoscope and I'll explain what those mean afterwards.
>> Okay, >> great.
First assessment is the aortic valve which is second intercostal space right side.
Next intercostal space left hand leftalonic valve.
Move down to the third intercostal space.
This is left sternal.
point.
Move down to the fourth intercostal space left.
This is the tricuspid valve.
And then ask to pull up her breast tissue. And I'm going to check the fifth intercostal space mid mid clavicular line for the mitro valve.
Normally you uh normally I could listen for one minute and that would give me your apical apical pulse rate. Okay, great. Um so I'm going to move a little bit quicker here, but again just walk you through it. We're going to go ahead and do everything that I just did, but now we're going to do it with the bell. This is going to help me assess your S3 and S4.
>> Okay.
>> Okay. So, again, we're going to do bone space right side.
Third space goes valve and then again your breast tissue up. We're going to come over with the bell interostal spacevicular line.
Great. Okay, at this point um I'm going to um relay that the um S1 and S2 was alsoated with the diaphragm of the stethoscope and the um the S3 S4 was alsoated with the bell of the stethoscope um with with no markers noted.
>> Okay.
>> Okay.
>> Thank you.
>> Yeah. Um, so from here, uh, we finished the heart and, um, we're going to go ahead and move, uh, to the abdomen. So, I'm going to go ahead and have the patient go ahead and lay down on the bed for me.
And, um, so from the abdomen, first thing we're going to do is going to use our pen light. And I'm going to shine pen light two different angles of the abdomen here.
And I'm going to note that the abdomen is um the abdomen is flat and that it is also um it's flat and there's uh no no pulsations and no no bulges. Um and after we after we note that uh we're going to um we're going to go ahead and start working with the the four quadrants of the abdomen. Uh first thing I want to do is I want to check the um first thing I'm going to do is I'm going to oscultate the uh right lower uh quadrant. I'm going to make my I'm going to make my way to the uh right lower quadrant. Then the right upper quadrant then I'm going to left upper quadrant and then the left lower quadrant. And I'm going to also take this with the diaphragm stethoscope.
Normally I would um I would listen to uh the sounds for a minute in each quadrant but for the sake of this video and the time I'm going to speed it up a bit but I will vocalize what I'm doing.
Okay, first thing I'm going to do now moving to the right upper left upper left.
Okay. Um, at this point, um, I I assessed or I have alsoated, um, the four quadrants. Um, I'm going to note that noises or gurgles and clicking sounds have been oscultated.
Next, I'm going to I'm going to going to the four quadrants. Um, but this time I'm going to palpate. Um, and I'm going to begin.
Great. Um, so I'm going to go ahead and check in three different places. Okay.
>> And I'm going to ask you about pain and tenderness as we go around the intestines.
>> Okay.
>> Okay. So, first here, any pain?
>> No.
>> Any pain? No pain.
>> Up here.
>> No.
>> Okay.
>> No. Left. Lower.
>> Perfect. Okay. Patient has noted that there is no pain or tenderness in any of the quadrants that um that I palpated.
So palpation um palpation was was free of pain and non tender bilaterally.
Yes. Okay. I think that that's good there. So, at this point, um I would I would bring the bed up. It's already in position, but Another point that I I need to backtrack on. Sorry about this. Um when when I did have uh Claire um lay down in the bed, I should have brought her I should have brought her head um uh down into a flat position. Um I I didn't do that, but I am I am noting that after the fact. And then um and then head was already up. You know, at this point, I would be bringing the head up. So, from here, um, we're going to go ahead and Oh, you know what? It's not that time yet. Claire, if you can go ahead and move back into the bed. I have a few more assessments that I need to do.
Sorry about that.
>> You're fine.
>> Okay, great. So at this point I am going to actually move her into more of a upward seating position. Let's see here.
>> Are you okay with that?
>> Yes.
>> Okay, great. So at this point um if the the patient has like a blanket or anything on them, I'm going to remove the blanket so I can have access to the patient. Um I am going to look at their skin. Um whether it's the whether it's the arms. Um again, there would be a lot of um this assessment that was um that was that was being done on the skin like diaphragm on skin checking for skin color. Obviously, we can't hear, but from what I can see on the arms and the legs, skin color is intact.
skin color is not intact. Skin color is consistent. Um the skin integrity is intact.
And I'm going to go ahead and palpate um Claire's arms here.
And then I'm also going to palpate her her legs. And I'm checking for edema in the upper and lower portions of her extremities. And No edema is no edema is noted in upper and lower extremities.
Uh from here at this point I'm going to check your radial pulse and your dorsalis pulse.
>> Okay.
>> Okay. So you can Give me your wrist here.
Start by checking first.
Check thumb side.
We're going to go ahead and do the same on the feet. Very good. So from here I'm going to go ahead and hand hygiene and I'm going to observe that both the um both the radial and pettis pulses were palpable and that strength is two plus. Okay. Um so what we're going to do now is Um, what we're going to do now is we're going to go ahead and do some wiggling of the uh of the extremities. So, Claire, if you can wiggle your fingers for me. Looks good. If you can wiggle your toes for me. Looks good. What we're going to do now is I'm going to ask the patient to close close her eyes and I'm going to touch a couple different spots on her left or her right side. And uh And then she'll just tell me left or right from whatever side that I'm touching. Okay. Start. What side is that?
>> Right.
>> Right.
>> Right.
>> Left.
>> Left. Okay. So, patient has uh has verbalized um has verbalized uh which which side is is palpable with eyes closed. From here, we're gonna go ahead and bear with me for just a second. I want to make sure I'm not foretting anything.
I think I think that's everything.
Okay.
I can't remember. Okay, at this point I'm going to go ahead and have you sit up for me and and thank you for um allowing me to um do that port. the ass from here. I'm gonna ask that you stand and I'm going to go ahead and do the next round of assessments. That's okay. Great. I'm gonna move this out of the way just so the camera can kind of see what's going on here.
Make sure that we're in view. Great. Uh, first thing we're going to do is I'm going to um, uh, I'm going to palpate joints. So, I'm gonna check shoulders for pain or tenderness?
>> No, I haven't.
>> No.
>> No.
>> No. That's on the elbow, on the wrist.
>> No. And then we're going to check tenderness on the lower extremities, hips.
>> None.
>> No.
>> None.
>> Okay. So, upper and lower extremities free of free of pain and non-ender bilaterally.
Next, we're going to do a range of motion. So, um I'm just going to have the patient here uh follow uh follow my lead. Okay.
>> Okay.
>> So, thank you. Uh first thing we're going to do is um we're gonna look up and we're going to look down. Look to the left and we're going to look to the right. Um, we're gonna grab our arms.
We're going to bring them up. Bring them all the way up. Bring those all the way down. Go ahead and turn your wrists for me and bring your arms to your side.
Um, what we're going to do here is we're going to do biceps up. We're going to turn into T-Rex arms and bring them back down.
Next thing we're going to do is uh we're going to um we're going to assess the lower extremities now. So go ahead and lift up choice of your leg. Thank you for holding on. Go ahead and bring your leg out.
Point your toe for me and dorsal flex.
Okay. Go ahead.
Do the other leg. Leg up. Forward. Point the toe. flex and back down. Good range of motion. Um, next what we're going to do is uh we're going to do all those range of motions that we just did, but now we're going to do it against resistance. So, first thing we're going to do um you did look up, so I'm gonna go ahead and put a little pressure. Go ahead and try to look up for me. Good.
Go ahead and press down. Good way. Good. The other way. Great.
We're going to bring our hands out to the side now. Good.
Go ahead and bring your arms forward.
Nice. Then go back. Very good.
Okay, go ahead and do bicep curls and then go ahead and push against me. Very good. Okay, so upper extremity range of motion um is strong. I'm going to go ahead and have the patient sit on the bed so we can um so we can check uh resistance for the lower extremities.
Okay. Uh from here um go ahead and move your legs one at a time for me. Okay. Very good. Go ahead and uh move that. Very good. Uh with your feet um go ahead and move your feet up one at a time. Very good. Go ahead and keep your foot up for me. Go ahead and push down. Very good. Okay. Um patient shows um strong strong reflexes and uh patient shows strong balance.
patient has uh good balance and strength.
That's what I got. Okay. Um next, what we're going to do is we're going to check your reflexes. Okay.
>> Okay.
>> So, I'm going to use my stethoscope here and I'm going to tap your knees and see if we can elicit a response.
>> Okay. Okay.
That's the bone. Sorry about that, Claire.
[clears throat] There we go. Yay. We're going to do the other one. Not hit the phone this time.
There we go. Okay. So, patient did elicit a response. Um, two plus. Okay.
So now now that we've done reflexes, um reflexes.
Oh, uh next we're going to go ahead and check gate. So I'm going to go ahead and have Claire stand up for me.
Um go ahead and take a couple steps this way for me. Okay. Turn around and go ahead and go back towards the bed.
Great. Okay. Um patient um uh ambulates uh independently and val balance is good. Okay. Um at this point um our headto toe assessment is is finished. That was a lot harder than I thought it was going to be. Um from from here I'm going to have the patient go ahead and sit back in the bed. Um go ahead and get back into to position that's comfortable for him. So, just so I can walk through it, Claire, if you go ahead and lay back for me.
Bed is still all the way down. Um, I'm going to bring up the side rails.
I'm going to tell the patient that I'm going to document document all the findings and that I will return um to check on shortly. I'm going to give the patient the call line and that's it. Thank you.
Related Videos

Why is IVF the treatment of choice?
aspirefertilityhouston
803 views•2026-06-14

The Lethal Cost of Disconnection: Loneliness, ADHD, and Life Expectancy | Dave Delaney TEDxFranklin
davedelaney
422 views•2026-06-15

ASMR Cranial Nerve Exam for Men Personal Attention Medical Roleplay for Sleep
gingerxasmr
999 views•2026-06-17
GLP 1s, Protein Shortages, and Apple’s Menopause Moment | Ep. 491
trimhealthymama
429 views•2026-06-18

Vaginal vs C-Section Recovery — What’s the Real Difference?
NutriAurabyAreej
935 views•2026-06-17

ECG interpretation made easy
Diseasedetective0
128 views•2026-06-14

21 Famous Actors Who Died From Alzheimer's Disease | Vintage Hollywood
BigstarV8
1K views•2026-06-19
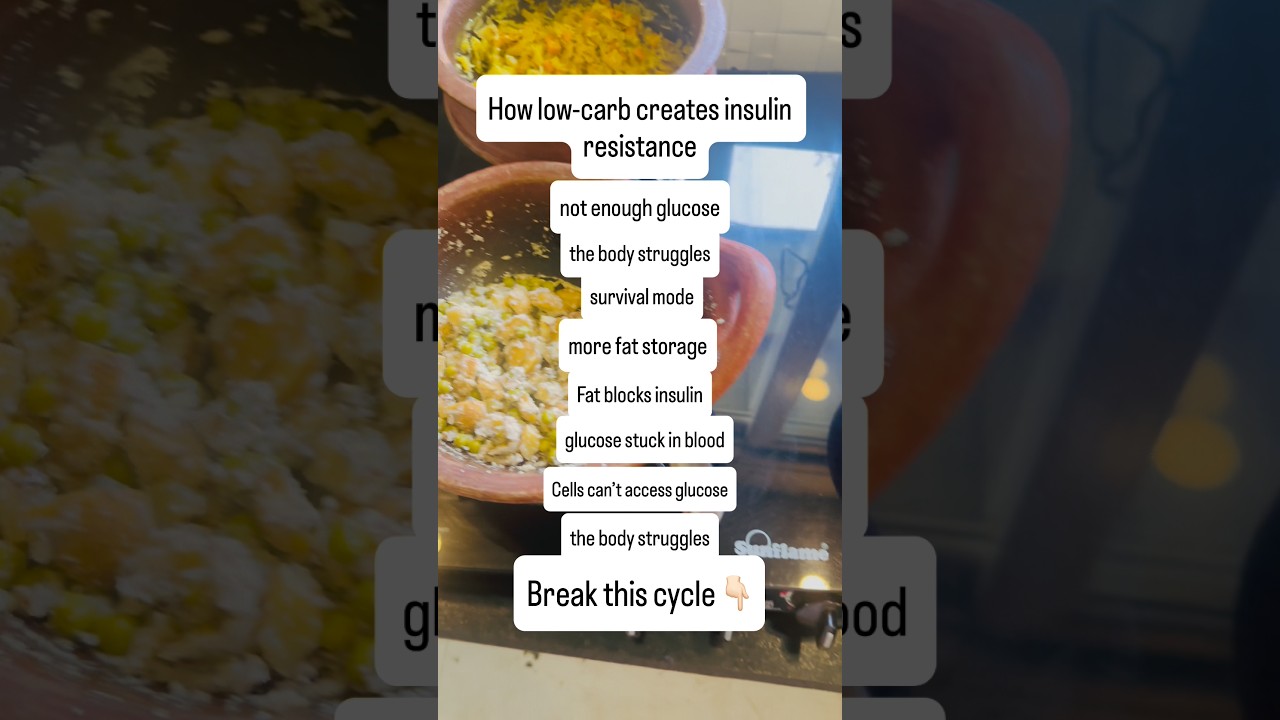
How low carb creates insulin resistance
Nidhikumari_healthcoach
1K views•2026-06-16


